|
|
What's in your sewing toolbox? |
It was originally titled "some of my favourite blog posts". I erroneously
assumed that it was a collection of my own posts that were deemed
favourites. It turned out to be a bunch of URLs to articles from other
blogs that I had long ago bookmarked for future reference. Most of them were
from Sew4Home.

A skill that every sewer will pick up along the way is how to box corners for a basic pouch or bag. There are essentially two ways to accomplish a boxed corner: cut squares of fabric away from the corners and then sew up the seams, or sew a straight bottomed seam and then (squish and sew and) cut away the triangular corners.
I will say one thing, however: the discussion on installing snaps involves
hardware that will incur additional cost to buy, i.e., specialized pliers
and such.
A handful came from other sources, but as this compilation was started years
ago, some of those old links are no longer valid. Rather than try to track
down the content, I decided to put this out with just a
Sew4Home focus.
Because Sew4Home is just that awesome.
As sewers, we all probably have sewing toolboxes filled with actual notions
and doodads that assist with our hobby. The lessons that I'm highlighting
today are invaluable additions for your virtual sewing toolbox,
particularly for those who are just starting out and learning the ropes, so
to speak.

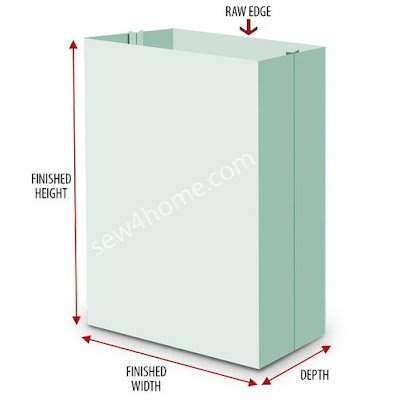
A skill that every sewer will pick up along the way is how to box corners for a basic pouch or bag. There are essentially two ways to accomplish a boxed corner: cut squares of fabric away from the corners and then sew up the seams, or sew a straight bottomed seam and then (squish and sew and) cut away the triangular corners.
We generally become familiar and comfortable with both techniques as we
build up our sewing expertise. They're not difficult to understand or
carry out and it's fairly easy to achieve good results.
BUT... have you ever been more adventurous with boxed corners to want to
apply them to a project of your own? Then, it's a matter of,
well, how big do I need to cut this piece of fabric to get a finished
item that's this high and that wide?
Sew4Home comes to your rescue with this post that includes all of the tricky
math – which is the topic of some future blog posts that you'll soon see – that you'll need (copy and paste this link into your browser; it's not a hot link):
https://sew4home.com/tips-resources/sewing-tips-tricks/how-box-corners-two-methods-formulas
Once we've mastered the basics of pouches and bags, we might want to finish
them off with extra detailing to have them stand out from the pack. In this
unusual post, you're introduced to how zippers can add a designer touch in
ways that you may never have expected.
Watch live classes for FREE at CreativeLive!

[affiliate link]
Staying somewhat on topic, our handmade pouches and bags usually need to be closed in some manner. This summary – which directs you to other more detailed posts on Sew4Home – covers the "how to"s from buttonholes to (three different styles of) zippers.
Once again, even if you never have a specific need to use some of these closures, just learning about their possibilities can do wonders to boost a budding sewer's confidence level.

|
| Everything you ever wanted to know about metal trims courtesy of Sew4Home... |
As a bonus, there is a discussion on how to shorten a metal chain strap
with fabric trim threaded through it. (You can purchase these online or
find them as
belts like I did.) Let me say that while you may never use any of the tips in this
article, it is likely to germinate creativity and inspire new ways of
looking at things that you can use to jazz up your bag projects.
Again, copy and paste the following link into your browser to check this
out:
http://www.sew4home.com/tips-resources/sewing-tips-tricks/tips-working-metal-trims

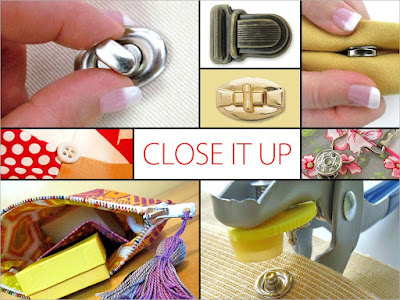
Staying somewhat on topic, our handmade pouches and bags usually need to be closed in some manner. This summary – which directs you to other more detailed posts on Sew4Home – covers the "how to"s from buttonholes to (three different styles of) zippers.
|
| Sew4Home covers you everything you ever wanted to know about applying "closures"... |
Once again, even if you never have a specific need to use some of these closures, just learning about their possibilities can do wonders to boost a budding sewer's confidence level.
|
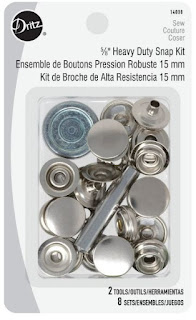
| Dritz snap kit... |
While there is a paragraph devoted to an "old school"
snapsetter tool, a simple solution that works for me is to buy
a basic snap fastener kit from a discount store that comes with snaps and a
couple of setting tools. (The Dritz set shown here is an
example, but there are other brands that cost less.) All that's needed is a
hammer and a firm surface to pound on. As long as you're not making
something that requires a whole bunch of snaps, a kit like this can meet
your requirements for about five bucks.
[By the way, instructions for these are printed on the back. If you choose
to dump these snaps into an actual sewing toolbox, be sure to keep the
cardboard backing from the packaging!]
To check out this post, copy and paste the following link into your
browser:
Check out crafty classes at Creativebug!

[affiliate link]
https://sew4home.com/top-10-closures-a-handy-list-of-tutorials/
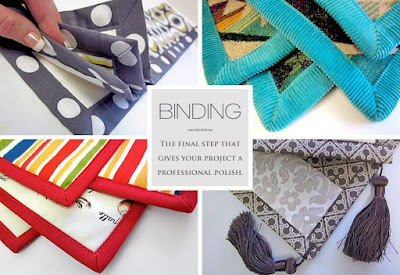
The final post I want to draw your attention to has to do with everything
you've ever wanted to know about binding, from making it (and determining how much fabric you need to do so) to
how to sew it onto your specific project... which doesn't have to be a
quilt.

While Sew4Home's instructions for making bias binding (AKA bias tape) is
different from my preferred method, it's probably the most commonly used method, involving cutting strips
of fabric and sewing them up one at a time.
There are several ways to attach binding to something (some of which I
covered
here), and over time, we all end up with our own personal preferences. If
you're new to the whole concept of binding and are looking for a
detailed description, the content here will not disappoint. Not to
mention that there's also some much appreciated instruction on how to
turn corners and join ends... something that I admittedly do in an ad
hoc fashion most of the time!
To check out this post, copy and paste the following link into your
browser:
https://sew4home.com/tips-resources/sewing-tips-tricks/complete-step-step-binding-quilts-throws
One final suggestion for all of the above: save the material as a PDF.
Sew4Home has a convenient button on a floating sidebar (left hand side
of the screen) to save individual posts as PDFs. That way you can keep
these toolbox must haves forever.
How's that for helping?


No comments:
Post a Comment
You have the power to brighten my day. Leave me a comment; I'd love to hear your thoughts... you can even remain ANONYMOUS! And rest assured that I acknowledge all comments, either here or via email. (That is, if you don't see a response from me here, I would have responded privately to the person.) Spam or generic comments with unrelated links, however, are promptly removed... and I may take appropriate action or report you to Google. Thanks for reading! (✿◠‿◠)