-->
DISCLOSURE: This blog contains Google Adsense ads and affiliate links via which potential commissions are earned when visitors click through.

Search This Blog > > >

Showing posts with label stuffies. Show all posts

Saturday, 24 January 2026

"Warren" Revisited (And Tips for Sewing With Minky)

Warren the Charity Bear crafted by eSheep Designs
I make a second "Warren"...
Almost five years to the day after my original post about Warren the Charity Bear appeared on this blog, I was finishing off another one for a new baby in the extended family.

For some reason, I had a fat quarter of my Luminescent Ocean Dreams fabric in minky in my stash. Since it worked so well the first time, it was an easy decision to go with it again. (It was an odd circumstance that I had this, as I've always purchased Spoonflower fabric with a purpose in mind. They run enough sales events for me to wait for a discounted price, whenever I've needed something for a specific project. I don't know what this fat quarter was originally bought for, but now it's a moot point.)



As a bit of background for those who are unaware, Warren the Charity Bear is a free pattern that has been around for over a decade, created by Wendi at Shiny Happy World. Crafters have likely made hundreds of thousands of different Warrens over that time, gifting them to many, many appreciative kids (and perhaps kids at heart).

Warren the Charity Bear free pattern
Full size Warren template, as well as some smaller versions...

Designed as a simple pattern for an "easy sew" (more about how easy it may actually be later), Warren appeals to gifters and recipients alike, since he will almost always be unique (unless you are the sort to make the exact same model – deliberately – each time) and because he's so eminently huggable and squishable. The pattern comes with basic elements in various shapes that allow you to differentiate your creations, so part of the fun is in deciding how you want your particular bear to turn out.

What makes this project so ultimately accessible to everyone is that you can use old clothing to make it. There's no need to go out and buy fabric if you have old sweats, t-shirts, or fleece blankets lying around that are no longer in their best shape. As for the sewing, I still have more to say later, but people have been known to hand sew their Warren bears, so a sewing machine or the skills to use one are not required. (If you choose to hand sew, perhaps you can attempt a bear family by also printing out the pattern in reduced sizes and making a couple of smaller ones.)

Warren the Charity Bear crafted by eSheep Designs
This Warren has white ear tips...

Even though I used the same fabric as my first Warren, there are some differences between the two. First, when cutting the pattern, I made effective use of Spoonflower's traditional white border to give this Warren some white ear tips.

Second, I could not find any red felt in my boxes of "sewing stuff" (even though I am convinced that I must still have at least enough to serve my intended purpose here), so this bear doesn't have a heart patch. 😞

Third, I refrained from adding a tail to his backside. 😏

Finally, instead of hand sewing, I machined stitched the eyes, nose and muzzle to the minky. (Use matching thread, a short stitch and go slowly.)


Check out crafty classes at Creativebug!

[affiliate link]


Which brings us to the second topic of this post: how to make sewing with minky less stressful. This furry fabric was not widely available when I started sewing way back when, even though I've heard its history goes back further than we'd guess. In the past couple of decades, however, it's become a favourite with crafters to make plushie toys and blankets. (Apart from Warren, I've actually used it to make a pair of mitts, a headband, and some fingerless gloves.)

But it's a slippery, stretchy, and fluffy – i.e., it will shed all over the place – material that can annoy you to no end when you cut and sew your first project with it. If, like me, your first projects are relatively small things (Warren is still relatively small), you may be able to make do just fine by going slowly and taking your time. But if your project plans involve even a small sized blanket, for instance, you may want to take note of these upcoming tips.

Warren the Charity Bear crafted by eSheep Designs
Gifting the bear with a note of "explanation"...

Minky Tip #1: Change to a Ballpoint Needle


I know that most of us don't chuck our needles after "each" project – because a project means different things in different circumstances – so you likely have a used ballpoint needle in your supplies. But if it's high time to break out a new one, so much the better when you're sewing with minky. (If you need to be convinced about this one, take a scrap of minky and try sewing on it with your regular needle. If you're lucky, the fabric won't end up being pushed into the sewing machine feed dogs!) A ballpoint needle will perform so much better and allow you to focus on all the other ways that your minky might end up challenging you.

Minky Tip #2: Stabilize it to Prevent Stretching


This tip is a game changer if you do it from the start; i.e., before you cut. Even if you have a great pair of scissors, cutting minky isn't fun due to its slipperiness and stretchiness. (And of course, the frustration is greater the smaller the piece is.) The secret ingredient for success in this case is something that you might have in your kitchen: Glad Press N Seal. Press this onto the fabric edges, pin the template on top, and say goodbye to the shifting and shedding when you cut!

Robyn's Love of Sewing - Minky & Fleece Hacks
image courtesy of YouTube (Robyn's Love of Sewing)...

The use of Press N Seal is especially helpful when sewing large pieces, due of the nature of the product (its firm but removable adherence to virtually anything). If you're making a blanket, a strip on both sides along the edges ensures that top and bottom pieces remain joined together – without pins – while you sew right on top of the Press N Seal.

Of course, if you have some lightweight fusible interfacing, you can use that to stabilize minky as well. That would, however, become a permanent part of the back of the fabric (unless you succeed at peeling it off), which will change how it feels, whereas the Press N Seal can be easily removed after sewing.

Minky Tip #3: Use a Walking Foot


I don't have a walking foot for my sewing machine and have not needed one enough times for me to change that, but if you have one, by all means use it for minky. A walking foot's main characteristic is that it has its own set of feed dogs that clamp onto whatever you're sewing – from the top, to mimic the same action that your sewing machine's feed dogs are performing from the bottom – so that it moves along precisely, without shifting or sticking or stretching.

That said, follow tips #1 and 2 and I guarantee you'll have an easier time with your minky project, even if you don't have a walking foot.

And now, back to the topic of actually sewing up a Warren Charity Bear. The curviness of the body, combined with the pronounced protrusions of the ears, arms and legs make this less of an "easy sew" when sewn by machine. I believe those who are beginner sewers will find it easier to sew this bear by hand, because the seam allowance can be better managed if you do it one careful stitch at a time... which, on a sewing machine, would require one to go very slowly.

My advice then, is to learn how to do a backstitch by hand and your Warren will turn out magnificently. If there is a next time, I may give it a try. (Yep, the me who hates hand sewing! 😜)

'Til next... 🇨🇦🍁
Saturday, 23 November 2024

Holiday Sewing Ideas You May Have Missed

Holiday Sewing Ideas You May Have Missed
Holiday sewing ideas you may have missed...
You must congratulate me for having found some inspiration – not to mention time – to slide another blog post into the rotation this late in the year. (Not only that, it's bumping my originally scheduled post out another couple of weeks.) 😉

As some of you may know, I pulled back from blogging on a weekly basis because there were increasingly fewer things to write about. A year later, nothing has changed in that sense. Even though I check YouTube less frequently than before, I don't find more content to inspire whenever I do visit. Even the newer channels that I follow are running out of fresh ideas. (Oh, and I don't know if some of you are encountering the same thing, but increasingly, crafters aren't showing their finished items until the very end of their videos. I find it irksome to have to fast forward to the end just to see if I want to see it. It seems incredibly presumptuous to assume that viewers will commit to watching something without knowing what "it" is.)

Anyway, it was with great excitement that a couple of weeks ago, I unexpectedly came across a source of freebie projects that were new to me.

Where was this? It was at Moda Fabrics, a company that actually celebrated their fiftieth anniversary a few months ago. If you go to their website (modafabrics.com), you can find these projects and more under Inspiration + Resources, Free Patterns.


Moda's business is first and foremost about selling fabrics, and the way to sell more fabrics is to provide a plethora of quilting projects to entice your customer base. (At least, that's my take on it.) Therefore, the free projects available here are heavily skewed towards quilts.

If you're a quilting person, that's wonderful. As for me, I'm forever looking for non-quilting projects. In that vein, I was also pleasantly surprised to find several that can be filed under the category of Christmas or holiday sewing, apropos for the time of year... hence the additional blog post.

First up is this collection called Christmas Faire by Cathe Holden. (For those of you whose French is a little rusty, the name is a take on the verb, to do. Clever.) The collection looks to be only about a year old.

Cathe Holden Christmas Faire patterns for Moda Fabrics
Christmas Faire by Cathe Holden for Moda Fabrics...

Visually, you can identify two of the projects immediately: a wine bottle holder and a mini Christmas tree. The third project that may not be as easily discernible is a bowl. On the surface of it, none are new or different, but I certainly like how the bottle bag – which is reversible – has a square base. The Christmas tree is yet another take on a stuffed tree – this time, simply cone shaped – but look at how it's decorated with fabric covered buttons... an opportunity to upcycle and use scraps.

Christmas Faire fabric bowl for Moda Fabrics
Fabric bowl...

As for the bowl, it's pieced together around an octagonal base, using a technique that's similar to how I've done my own 3D fabric pieced projects.

The 8 page PDF contains instructions for each project as well as the templates.

Another holiday themed project that I came across was this large wall hanging advent calendar, designed by Alexia Marcelle Abegg. Again, sewn advent calendars are hardly new, but if you've ever wanted to make one, this is as good an option to start with as any.

Advent Calendar by Alexia Marcelle Abegg for Moda Fabrics
Advent calendar and tree ornaments...

The bonus part is that this pattern comes with instructions for making different shaped ornaments that are perfect for scrap busting. All required templates (such as for the numbers and the various shaped ornaments) are included in the 7 page PDF.


Check out crafty classes at Creativebug!
[affiliate link]


This last pattern is totally fun and definitely different. If you have a crafty young lady on your list, this would be a wonderful handmade gift to pass along. You might even use it to introduce her to sewing.

Welcome to Flats world!

Flat House by Angela Yosten for Moda Fabrics
Angela Yosten's flat house...

The project is a fold-out house/room for flat dolls. (If you're thinking that it reminds you of paper dolls, that's exactly the whole point.) Folded up and carried as shown above, you see the front of the house, with door, windows and assorted planters appliqued on it. (The back side is just plain, but you could totally add your own elements.)

Flat House by Angela Yosten for Moda Fabrics
Inside the flat house...

Opened up, the whole thing converts into a four-sided room with a rug on the floor, couch along the back with pictures above it, and two side walls, one with a lamp on a table and the other with a set of stairs and a small door underneath. The PDF provides templates for all of the elements described.

What about the doll, you ask?

Angela Yosten Flats by Moda
What a lot of fun this would have been!

Well, the unfortunate part is that this project dates back to 2013. The corresponding dolls (and pets) were printed on fabric panels that were part of a line that Angela Yosten released for Moda at that time. The panels themselves are now virtually impossible to find.

Quiltsmart Fusible Flats by Angela Yosten
On the positive side, there appears to be an alternative that can be purchased from Quiltsmart. (To learn more, copy and paste this link into your browser: https://quiltsmart.com/fusible-flats/) 

If you go to their site, there's a video that demonstrates what they're selling (see image at right) and how to use it. You'll have to supply the fabric and additional materials in this case, since the package just contains the original drawn patterns on fusible interfacing. If you're not one to DIY the concept just by watching the video – i.e., draw your own dolls and clothes – the pricing is quite reasonable.

It's been said that we don't provide today's children with enough imaginative play opportunities that can be explored on their own. I think this would be a wonderful gift for that purpose... not to mention it looks like great fun to make. (Although I wouldn't make an assumption that it's easy, since it takes a certain amount of patience and control to sew around the edges of these things!)

Note that I've only highlighted the three projects from Moda's website that I thought were timely for the holidays. There were others that caught my eye and my interest; perhaps you'll find others to inspire you as well!

'Til next...

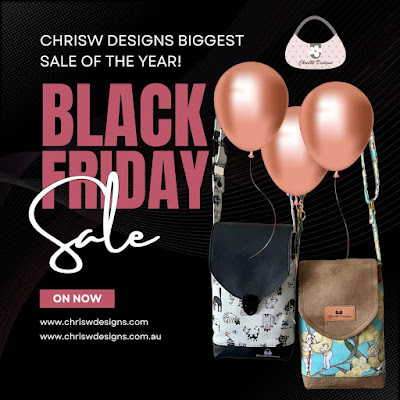
Chris W Designs Black Friday Sale

Saturday, 7 October 2023

Nifty Things I Thought I Might Make [Pt 3]

Nifty things I thought I might make
Lost opportunities or "never meant to be"s?
Welcome to part three of nifty things I thought I might make but never did.

I've said here that before I got back into sewing in 2012, I hadn't realized that people sewed things other than quilts and clothing.

I then began my renewed sewing adventure by making bags and pouches, but something else surprised me as I progressed on my journey: we can sew almost anything!

What I mean by that is, who would have thought that chickens would be such a popular thing to sew? (I certainly never could have guessed how popular chickens might be among my handful of regular readers.)

But how about a tea pot and tea cup set? I found one early on and thought — what a unique sewing project!


The Mad Hatter Tea Set is a mostly hand sewn project, put out in 2013 by Kris DeGraeve. (She describes it as entirely hand sewn, but there are various places where it would be possible – and obviously faster – to use a sewing machine.)
Mad Hatter Tea Set by Kris DeGraeve
The famous Mad Hatter Tea Set by Kris DeGraeve...

You can still find the original fourteen page PDF for this online (search for mad hatter tea set sewing pattern). It contains full templates, photos, and instructions on how to recreate this utterly charming fabric tea set.

As someone who loves to explore the back story on how things come to be, I'm a little bummed that there is nothing to be found about this project's origins.

It's undoubtedly as original as you're going to find when it comes to sewing patterns, but I've always wondered what made the creator go to such lengths to make a pattern for this and then not charge for it. (Not that I would question true altruism.)

I've also said before that I would never make this – due to all the hand sewing involved – but on occasion, I've considered the possibility of making one of the components, like maybe just the teapot. As you might guess, there are many, many darts involved in making the teacups and that gives me pause.

Who knows? Maybe in the coming years, the right inspiration will hit. But for now, I don't see the complete set ever being on my "to do" list.

Despite not having any specific affinity to cats, this Pointy Kitty stuffed cat caught my attention the very first time that I saw it. It's a creation by Hillary Lang at Wee Wonderfuls and first came out in 2005.

image courtesy of Wee Wonderfuls
Pointy Kitty by Hillary Lang...

The instructions only take up one page of the PDF, but it was this specific part of the instructions that stopped me from attempting this when I first read it:

Turn pieces right side out. I’m not going to lie to you, Pointy Kitty is a bear to turn out. Be careful not to split seams open while turning out those narrow apendages. [sic]

When a designer offers up a truthful assessment of how difficult something might be, I would say it's best to take it at her word.

I had the tea set, this cat and the Purl Bee Penguin in my sights at one point. Given that I eventually made a modified penguin with some success, I consider this "challenge of the small stuffies" met and don't need to prove myself further. ʘ‿ʘ


Watch live classes for FREE at CreativeLive! Sign Up at CreativeLive
[affiliate link]


What about large stuffies, then? And on that note, what's larger than a whale??

In 2014, someone named Marion at Camelot Fabrics came up with a tutorial and PDF template for making a whale... Wallace the Whale to be exact.

Wallace the Whale image courtesy of Camelot Fabrics
Wallace the Whale (for size reference)...

Even though this is a big project that I would normally shy away from simply for the fabric requirements, I was drawn to it because it's something that can easily be made out of old bedding (sheets, pillowcases, old pillows). It's very much a recycling friendly project if you look at it that way.

Oh, and I didn't come across this until a few years ago, but Riley Blake created an even bigger whale named Wesley.

Wesley Whale made by SewVeryEasy
Wesley with Laura at SewVeryEasy (image courtesy of YouTube)...

I suppose you can use old bedding to make this guy too, but you'll need a lot of old pillows to stuff him!

Last – but certainly not least – how about some faux taxidermy? Hanging stuffed heads of dead animals on a wall is not my kind of thing, but when it's a sewing project, it's totally cool.

During my first ever visit to Makerist, I picked up this pattern for $2 from B Trendy/Made by Oranges. (It's no longer for sale on Makerist, but can still be found online.)

image courtesy of B Trendy
"Wally" pattern from B Trendy...

As you can see, it's a pattern that shows you how to make three different "trophy" heads: an elephant, a lamb (sheep!) and a swan.

B Trendy pattern layout page
The appeal of the lamb is self-explanatory, but my cousin's son was into elephants, so I thought – at $2 – this wouldn't be a bad pattern to have and hold.

But when I opened up the PDF and saw this pattern layout page describing how to print and cut the pieces for each of the individual projects, I got an instant headache.

It's one of those overlapping template layouts commonly found in books. (I suppose it makes sense because B Trendy apparently has its origins in the magazine world.)

There's no getting away from the fact that I haven't attempted to make these trophy heads just because of these templates. (Cousin's son is now twenty-three years old. He might still appreciate a faux taxidermy elephant head, but I'm not likely to make one any time soon!)


Check out crafty classes at Creativebug!
[affiliate link]


By the way, the trophy heads projects are one of the few things I've featured in this series of posts (most recent one here) that is actually from a paid pattern. If you'd like to try out the idea without committing actual dollars, you can find freebies online (do a search for free faux taxidermy sewing patterns). I didn't find many, but there are at least two deer head projects and a flamingo.

'Til next...

Saturday, 25 December 2021

Nifty Things I'm Never Going to Make [Pt 4]

Nifty Things I'm Never Gonna Make
Never say never, but probably not...
After putting up part three of this series, I wondered who should get the spotlight for the fourth installment. Turns out I was quite remiss — given my history with this particular crafter — by having forgotten about her. This probably should have been the first post out of the chute.

The creator of today's nifty things that I'm (probably) never going to make is Choly Knight. I've had some of her plushie projects saved in my Other People's Projects folder for a long, looong time. And each time that I save one, I realize that I'm not likely to make it. (But — as I've intimated many times before — if something appeals to you, do yourself a favour and download/save it just in case it disappears forever.)

She churns out kawaii themed patterns quicker than it takes for most of us to think about what one should look like. And then she gives them away for nothing. (Well, at least some of them; she does have an Etsy shop where she sells other patterns and the occasional finished product.)

But the point is, she has been running a feature on her website (go to CholyKnight.com) called Free Pattern Friday for about six years now, delivered as regularly as once a month. My first — and to date, only — attempt at one of her offerings was when I made a modified version of her zippered sketch wallet to hold my Yahtzee paraphernalia.


If you're like me and don't have a lot of experience sewing up small "plushies", Choly offers up a wealth of knowledge in a downloadable ebook covering tips and tricks for beginner makers.

Choly Knight's Plush Sewing Basics
image courtesy of CholyKnight.com...

It's 42 pages of helpful stuff running the gamut from a summary of what sewing tools you'll need to how to sew two stuffed pieces of a plushie together successfully (by hand, of course; as Choly says, there is no machine equivalent for this task). Very professionally put together (in infographic format) and yes, it's also free.

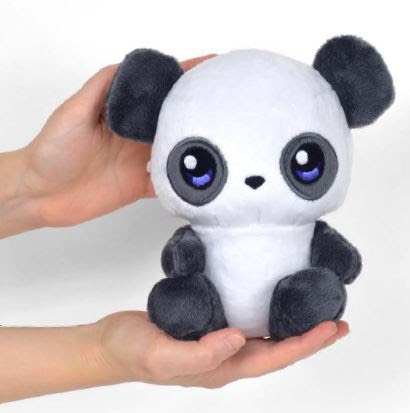
So what is my very favourite free pattern to date? This Panda Memory Bear that came out last year.

Choly Knight's Panda Memory Bear PDF
image courtesy of CholyKnight.com...

A memory bear is meant to be stuffed with remnants of clothing from a loved one who is no longer with us. So not only is it a meaningful item in itself, it's also a reclamation or upcycling/recycling project.

Choly Knight's Panda Memory Bear PDF
image courtesy of CholyKnight.com...

It finishes out at a nice size, as you can see here in this picture. (Although if you want something larger, she provides a thorough explanation of how to scale patterns in the afore-mentioned free eBook.) The best thing about this project is that it can be made with a variety of different fabrics. The front cover of the PDF (27 pages, very clear instructions) illustrates various models of the bear made in minky, quilting cotton, flannel and stretch knit.


Watch live classes for FREE at CreativeLive! Sign Up at CreativeLive
[affiliate link]


Since one of my first stuffie projects was a frog, I was of course drawn to Choly's version. This one, with the exception of some potentially challenging areas around the legs, is rated a 3/10 in terms of difficulty, so if you're game to give it a go, it's probably one of the easier patterns to tackle.

Choly Knight's Frog Plushie PDF
image courtesy of CholyKnight.com...

Another pattern that is close to my heart — because one of my other stuffie projects is a penguin — is this cute little guy who's sliding on his belly.

Choly Knight's Penguin Plushie PDF
image courtesy of CholyKnight.com...

This pattern is also rated at a difficulty level of 3/10. Oh, and for those of you who might be big into embroidery and have all the extra bells and whistles at your disposal, these projects also include free embroidery files.

Of her creations this year, I absolutely adored the manta ray. I'm not going to show you a pic of that one, rather you should go to her site and check everything out for yourself. (The manta ray is also graded at just a 2/10 for difficulty, so might be an ideal "springboard" project.) 


Check out crafty classes at Creativebug!
[affiliate link]


Choly is also a fellow Spoonflower designer. Her shop (named sewdesune) carries a whole bunch of "cut and sew" projects that are printed onto a fat quarter of minky or fleece. Here is the aforementioned penguin project (which was also featured on Spoonflower's blog in January of 2019). 

sewdesune Spoonflower cut and sew penguin
image courtesy Spoonflower (sewdesune)...

These FQs are quite reasonably priced whenever Spoonflower puts them on sale at 50% off. In fact, Spoonflower holds a lot of sales these days that would make the price point more appealing. A full yard, for example, would yield four projects and on a 20% off sale would work out to $5.80 per plushie, shipping not included. (And let me remind you that Spoonflower allows you to fill a yard with up to 42 different fabric selections, enabling you to print four different projects on one yard.)

Hmmm... I may yet change my mind about these being nifty things I'm never gonna make! Maybe one of these needs to go on my bucket list instead.

And with that, let me wish you and yours a safe and peaceful Christmas. With a renewed pandemic affecting most of us, I certainly won't wish you any merriment. (But if you're short of things to do, you could re-visit my pandemic projects page and see what's occupied my time since I last updated that list. Scroll down past the "baking" section to see the new content.)

'Til next year...

Saturday, 19 December 2020

Warren the Charity Bear — Two Ways

Warren the Charity Bear crafted by eSheep Designs
Warren the Charity Bear...
These uber cute Warren bears first came to my attention via the Patchouli Moon Studio blog, when fellow blogger Daryl P. made a whole hoard of them.

It wasn't until I recently saw them again — when she made several more — that I realized I had to get in on the fun.

I had originally dismissed the project via the I have no need for it, therefore why make it school of thought. But with babies beginning to appear on the horizon for a new generation of extended family members, I suddenly had a need and an excuse.

Not only that, I had the perfect fabric: my Luminescent Ocean Dreams in minky. So bright and colourful — stimulating for babies — and soft to the touch. (The design is based on photographs and feature an underwater scene embellished with butterflies.)

Warren the Charity Bear crafted by eSheep Designs
Fabric is my own creation called Luminescent Ocean Dreams...

The free pattern is by Wendi Gratz, of ShinyHappyWorld.com. (Would that we had such a world, huh?) She's got all sorts of fun stuff there, so I definitely recommend that you take some time to browse. And maybe download the pattern and start making your own family of bears; the pattern can be reduced for smaller versions.


Warren (named after Warren Buffett apparently) was developed to be an easy to sew and easy to customize stuffie that can be made assembly line style for charitable giving.

It's a perfect pandemic project that you can do with your whole family to introduce them to the pleasures of sewing. Kids in particular will have loads of fun deciding what elements to add to their bear to make him one of a kind.

Warren the Charity Bear pattern by Shiny Happy World
A simple shape...

The pattern comes with a variety of noses and muzzles — to create actual expressions — as well as an option for an oval belly patch or a heart. (Fleece is recommended, but I used a double layer of felt instead.)

There are options for the eyes depending on the age of the recipient. Since this is going to an infant, I glued and sewed all of the additional elements. I also made the eyes bigger since they might otherwise get lost in the busy print of the fabric.

Warren the Charity Bear crafted by eSheep Designs
Face elements glued and sewn on to front...

I played around by placing the pattern pieces on my fabric after cutting out the body and ultimately decided on a medium nose, with a wide muzzle and a heart patch.

Warren the Charity Bear crafted by eSheep Designs
Warren ready to be sewn up...

It's not part of the pattern, but I also gave him a tail on his back side. :-)


Watch live classes for FREE at CreativeLive! Sign Up at CreativeLive
[affiliate link]


By the way, while it's faster to sew up one of these with a sewing machine, this can be completely sewn by hand. I might even venture that — amount of total time notwithstanding — it might even be easier to sew by hand, since taking those extreme curves around the ears, arms and legs could pose a bit of a challenge.

Warren the Charity Bear crafted by eSheep Designs
It's the day before a walloping winter storm when I take Warren outside for a photo shoot...

My original intent was to make a family of Warrens in different sizes, but then I had a thought to take this in another direction.

Warren the Charity Bear crafted by eSheep Designs
Warren inside...

Why not turn him into a baby mobile? All you need is some single sided fusible Peltex, felt, fabric, glue, and fishing line.

I really liked how the template by itself looked so cute with the pudgy arms and legs. (Once you cut and sew the project, the seam allowance reduces the size of the arms and legs.) So I thought that if I reduced the template and used it to create a flat item that could hang, it would be yet another version of a baby gift.

Trace template onto a piece of Peltex...

Planning to make a mobile with three bears, I went with two templates, one that was reduced from the original by 50% — which I thought was perfectly sized for a "baby" version — and a second one that was upsized from the first by 125%.

For the fabric, I selected a black and white print that I had created for a Spoonflower competition two years ago. (The high contrast combo of black and white is apparently good for the brain development of infants.) 


Check out crafty classes at Creativebug!
[affiliate link]


The process is simple. For each bear, trace the template onto a piece of Peltex and a folded piece of fabric (to get two pieces, for front and back) and cut.

Warren the Charity Bear Mobile Version by eSheep Designs
All three bears have different sized eyes, noses and hearts...

Next, cut pieces of felt to make whatever other elements to personalize each bear. I didn't bother with templates for those, I just snipped freehand with a pair of scissors, ensuring that each bear would end up unique.

Warren the Charity Bear Mobile Version by eSheep Designs
Felt features glued on; smile sewn in...

Hand sew the mouth, and then it's time to fuse the Peltex to the top panel. Finish by zig-zag stitching all layers together.

Warren the Charity Bear Mobile Version by eSheep Designs
Complete Warren Family ready to be hung up...

To hang, thread some fishing line through the top of the head. Ensure that each line is a different length and the bears can simply be hung from the ceiling over a baby's crib or changing table.

Warren the Charity Bear Mobile Version by eSheep Designs
Floating baby bear...

Here is a picture that provides an idea of the size difference between the stuffed bear and the largest one used for the mobile.

Warren Bears crafted by eSheep Designs
Warrens in two different styles...

Love how these turned out and I'm hoping that the recipients will appreciate them too! Highly recommended as a charity sewing project. Or for someone who loves to cuddle during this year's rule of "no hugging allowed".

Have a safe week before Christmas, everyone. 

UPDATE 2026: I made another one, with some tips on how to sew with minky.

'Til next...