-->
DISCLOSURE: This blog contains Google Adsense ads and affiliate links to Creativebug via which potential commissions are earned when visitors click through.

Search This Blog > > >

Showing posts with label how to create your own pattern. Show all posts

Saturday, 31 August 2024

Planning a Fabric "Gingerbread" House

gingerbread house
Before it fell apart...
Hubby and I put together a large gingerbread house last Christmas, and while it looked pretty decent when all was said and done, the activity was not a particularly relaxing experience.

I assembled the house and he did the decorating (yes!) but neither of us would describe our task as having been something that we wanted to do again any time soon.

In mid-July – due to whatever – the house fell apart and everything scattered all over the floor. A few years ago, we had put together a smaller version that had managed to stay intact for over eighteen months, so we were disappointed with the early demise of this one.

Given that I didn't want to tackle another kit for the foreseeable future, I decided to put my efforts towards designing a fabric version that would invariably last longer.

It was something that I had actually seen last year, so once again, I freely admit to pursuing an idea that is neither original nor mine. (A pattern called Leave the Light On by Aunties Two features a fabric house with windows that can be used as a nightlight, with the aid of flameless votives inside.) Per my fastidious nature, the disadvantage of an actual gingerbread house is that it really can't be put away easily for storage; with a fabric version, hopefully I can make it so that it can be taken apart and stored flat!


The Aunties Two pattern sews up a house that's 8" x 8" x 5". I pulled out my project drafting notebook and began to draw a design for something smaller.

I figured that 5.5" high x 4" wide x 6" long was a sufficiently large house to "construct." I would need two side walls measuring 4" x 6", and two peaked front and back walls that are 4" x 4" with a 5.5" peak. The roof would be made out of two joined panels measuring 3" x 7" each.
planning a fabric gingerbread house
Pen on paper is the only way to start...

I also started planning for the door and windows. For the front, I want a door (1" wide x 2" high) with a window ( 2" wide x 1" high) above it. The back wall will have a larger (2" x 2") window.

The side walls could end up identical or not. Perhaps one side could have two side by side windows (each 1.25" wide x 2" high) while the other has a single bigger (3" wide x 2" high) window.

planning a fabric gingerbread house
Snack food boxes put to good use...

With measurements decided on, it was time to make a cardboard prototype. I dug into my recycling bin and fished out some discarded boxes for this purpose. With the help of a little bit of tape, I soon had a rudimentary, 3D rendition of my project.

planning a fabric gingerbread house
3D proof of concept is the next step...

Before drawing out windows and door for size, I want to see what fabrics will work for me.

Putting fabrics to a project like this at an early stage often helps to visualize the outcome and lock in one's commitment. (At least that's how I feel!)

That said, I don't have an extensive stash and have even smaller amounts of fabric that can be deemed appropriate for holidays or Christmas. I'm lucky to "make do."

planning a fabric gingerbread house
Choose and allocate fabric to help visualize the end result...

The red selection – which I plan to use for all four (exterior) walls – was last seen on my Collapsible Quilted Tabletop Christmas Tree project; it's from my 2020 Lily and Loom purchase. The "spruce and goose" fabric on the roof is actually one from a set of napkins that I've never used as such. Finally, the "penguin on a sled" fabric is a fat quarter that I picked up a couple of months ago at a discount store for ninety-nine cents. It will be the interior "wallpaper" of the house.

Satisfied that I have fabric to make this work, my next step was to add the windows and door.

planning a fabric gingerbread house
Angle on back of house... 

At this point, I do have a plan in mind for how I will construct these panels. Peltex and Decor Bond will be the backing for the exterior and interior sides of each. I will use a combination of transparent and translucent material to mimic the window glass, which will be trapped between the exterior and interior layers. (The panels will be sewn directly to each other like in my other 3D pieced projects, not bound.)

planning a fabric gingerbread house
Angle on front of house...

I drew muntin bars on the windows, but right now I don't have a specific plan in mind for how to execute them. (Ultimately, it could be something as simple as skinny strips of fabric glued down onto the window panes... or even lines drawn by a broad tipped black marker.)


Check out crafty classes at Creativebug!

[affiliate link]


Bits that can be put to use for a fabric gingerbread house
While I won't be aiming to replicate the look of the original gingerbread house in terms of gumballs, candy and other sugar-based decorations, a fabric house does open up opportunities for other types of embellishments.

For example, bits of leftover trim like what you see here in the photo can be used around the eaves of a fabric house. (I actually don't know where this remnant came from, but should it prove useful for this project, I'll be happy I kept it.)

Even things like pieces of ric rac, bias binding and zipper remnants could be potentially useful.

Do you have any suggestions for how to finish this? I'm tackling this slowly and won't be back with an update for a few months, so lemme know if you have any brilliant ideas that I can put to use!

'Til next...

Saturday, 24 September 2022

Quasi-Tutorial: Mini Notebook Cover With Receipt Pocket

Notebook Cover with Receipt Pocket by eSheep Designs
My new notebook cover with receipt pocket...
I'm a big fan of little notebooks.

You may recall this one that I have in my sewing room.

I have slightly larger ones for travel, with one that was used as a cruise diary, detailing where we were, what we did and what we ate... totally fun to read. (We haven't cruised in over a decade.)


The blue one that you see here is almost out of usable pages. For the past fifteen years or so, it's gone on vacations and road trips with us, creating a permanent record of dates, places, restaurants, expenses, and even Yahtzee scores.

The little inside pocket is useful for keeping receipts, but can only hold so many. You may be able to see that it's being held in place with tape.

Travel notebooks
My vacation notebooks...

Just in time for our annual BC getaway, I figured making a multi-functional cover for the new notebook (that I'd purchased a few years ago) would be a timely project.

Notebook Cover with Receipt Pocket by eSheep Designs
Receipt pocket on back cover...

The cover incorporates a pocket to keep receipts, of course.


I'm going to share some basic instructions using the dimensions that I had to work with, but you can apply the process to any size notebook.

The first step, therefore, is to measure. This particular notebook is 4.5" wide by 5.5" high; the coil is about 3/4". A cover, however, would need to extend at least 1.25" at both ends to wrap back to the inside so it can hold the actual notebook's front and back cover in place.

Notebook Cover with Receipt Pocket by eSheep Designs
Wrap-around extension to keep cover in place...

For the receipt pocket, I decided that a horizontally placed bellows pocket measuring 3/5" x 5" would be a good fit on the back. (At this point, I also knew that a tab of some sort would be needed to keep the book closed and the pocket secure, but size can be determined later.)

Once the physical measurements are accounted for, it's time to add seam allowances; I added 1/4" to all edges*.

For fabric, I looked to my remaining fat quarters of Tim Holtz's Eclectic Elements. The one that I'm using for the exterior is a vacation themed selection called Travel Labels.

Notebook Cover with Receipt Pocket by eSheep Designs
Project fabric selection...

The interior is a piece that came with my Boundless DECOdent bundle, purchased from Bluprint in 2018.

Both pieces were cut to 12.75" x 6" and were interfaced with some SF101. The math to arrive at the dimensions: (4.5" wide x 2) + (.75" width of coil ) + (1.25" overlap ends x 2) + (.25" seam allowance x 2) = 12.75" and (5.5" height) + (.25 seam allowance* x 2) = 6".

The bellows pocket piece is folded in half and then interfaced with SF101 on one half. Then it's sewn up, corners trimmed, and turned right side out. Be sure to leave the turning gap along the bottom. (Throughout this project, I recommend pressing seams open before turning as described in this post.)

Notebook Cover with Receipt Pocket by eSheep Designs
Making a bellows pocket...

A small piece of hook and loop tape is the final add-on.

Make a couple of 1/4" accordion folds along both sides of the pocket piece and press well. (The folds will allow the pocket to expand.)

Notebook Cover with Receipt Pocket by eSheep Designs
Bellows pocket sewn onto exterior panel...

Position the pocket piece on top of the exterior piece at the desired location and pin. (Put the actual notebook underneath so that you can determine the correct placement.) Stitch along the edge of the first fold on both sides. Then, with the second folds flattened down, sew across the bottom, which will also close up the turning gap.


Watch live classes for FREE at CreativeLive! Sign Up at CreativeLive
[affiliate link]


At this point, I did some rough estimating and decided that an 8" long x 1.75" wide strip of fabric would work for the tab closure. (This is based on the notebook being about a half inch thick.)

Simply fold the strip in half with wrong side out, sew around and leave a turning gap along one of the long sides. Trim corners, turn right side out, and topstitch. Attach the other part of the hook and loop tape to one end.

Notebook Cover with Receipt Pocket by eSheep Designs
Make a tab, add velcro and secure to front cover...

Now determine the proper placement for the tab and stitch it in place at the other end of the exterior panel. You can see below what the stitching should look like from the back.

Notebook Cover with Receipt Pocket by eSheep Designs
Pin exterior panel to lining, wrong sides together...

Place the two panels wrong sides together and pin, ensuring that the tab piece is tucked inside and out of the way. Leave the turning gap along the bottom of the cover. (If the fabric is non-directional, this won't be an issue, but this Tim Holtz selection has a definite up and down orientation.)

Sew, trim the corners and turn right side out. Use the notebook itself to determine where the two end folds need to be made. Press well.

Notebook Cover with Receipt Pocket by eSheep Designs
Add some Peltex for structure...

I wanted the cover to have some additional firmness, so I cut two pieces of Peltex to about 3.5" x 5.25" and slid them into place before closing up the turning gap. They should just butt up against the folded edges. (Not that it should matter much, but I put the fusible side against the exterior fabric.)

Once the Peltex pieces are inside, it's time to sew along the top and bottom to finish the cover. Stitch as close to the edge as you can, since the actual front and back cover of the notebook needs to slide into the end openings.

* Which leads to this asterisk. I made this as a Quick Craft Mondays sort of thing, creating on the fly. When I first envisioned the project, I knew that having the ends folded back inside after the whole panel is sewn up would require extra room at the top and bottom of about 1/8" or so in order for the notebook to fit. Unfortunately, when I cut the fabric, I did not add this extra bit to the 6" height. Later when I sewed the panels together, I had a last chance to fix the problem by stitching with a smaller seam allowance and did not remember to do that! (And to answer your question as to why I just didn't rip the seam open and redo it, I had already trimmed the corners.)

Notebook Cover with Receipt Pocket by eSheep Designs
Doesn't fit? Make it fit!

So, I was left to slice away at the top and bottom of the notebook's front and back covers in order to make them fit. If you don't mind this hack, it's a good way to achieve a snug fit, which is important because otherwise the covers might slip out every time the book is opened.

On the other hand, if you think this is hacky and lacks finesse, be sure to add extra room at the top and bottom when you cut the main pieces of fabric.


Check out crafty classes at Creativebug!
[affiliate link]


As shown in one of the images at the top of this post, I usually keep a pen inside the coil of the notebook. The pen still fits.

If you're wondering why I decided to put the pocket on the back, it's because I prefer a less cluttered look on the front.

Notebook Cover with Receipt Pocket by eSheep Designs
Back view...

One of the advantages of making the covers fit by trimming them is that the pages are pretty much even with the cover; i.e., the end result is the same essential size as the original book. (I like it this way rather than having the cover extend beyond the pages.)

Notebook Cover with Receipt Pocket by eSheep Designs
Front view...

Isn't this just the neatest fabric? So much detail to catch your interest and it hides dirt, to boot! (See the "smudges" over parts of the print? Those are part of the design. The notebook was well handled during our recent holiday and shows no signs of wear.)

My original purchase of twenty-five of these Tim Holtz fat quarters from early 2018 is now down to eight (plus assorted scraps). It's somewhat of an achievement that I've actually used seventeen selections, given how I had no plans for the bundle. The Eclectic Elements line is still widely available online (I've seen the Fat Quarter Shop selling yardage at $12.48), even though I think it debuted in 2013.

That's definitely a testament to its lasting appeal. Even simple projects like this one are so much better when done up in Eclectic Elements fabric.

'Til next...
Saturday, 9 April 2022

Problem Solving: Replicating an eReader Case [Pt 1]

Kobo Mini
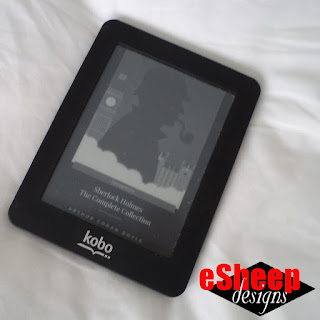
My eight year old Kobo Mini eReader...
When eReaders first came out, it seemed like everyone had to have one. At the time, I pooh pooh-ed the idea as trendy and lacking in authenticity.

After all, how can you replace the experience of reading an actual book?

I was also under the (mistaken) impression that they needed to be charged with the same frequency as our other electronic gadgets. Who wants to run out of juice right in the middle of an exciting chapter?

Once it was explained to me that a single charge can last a month — or longer, depending on how often it's used — I reconsidered my opinion. After all, for traveling, it certainly beats toting around actual books. (No argument that one's range of choice of reading material is greatly expanded with this small device.)

When I encountered a "you can't pass this up" price of only $40 for a Kobo Mini, I jumped on board the eReader bandwagon and haven't looked back since. I subsequently picked up a leatherette case for it on eBay for $5.30 (shipping included). That was 2014.


Eight years on and that case is definitely showing signs of wear and tear. It's also now been a decade since the Mini's original release and with Kobo officially abandoning it in 2019, no one is selling accessories for it anymore. At least, not at a price that I care to pay.

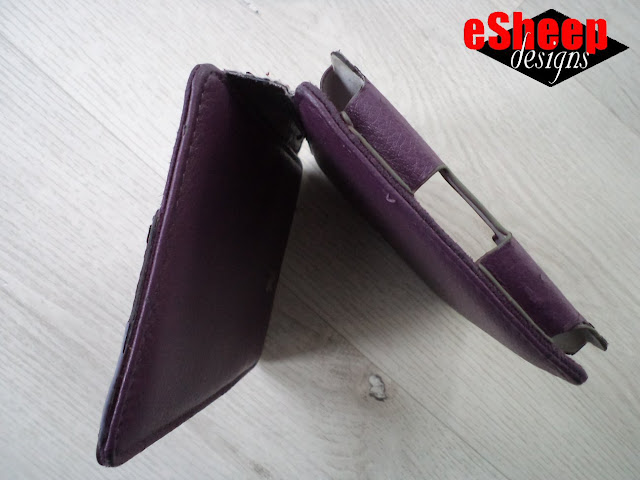
Kobo Mini Slip Case
Front and back of my current eReader case...

So, in an odd turn of events, I've decided to tackle a project that I briefly considered in 2014: to sew a case for my Kobo Mini. Didn't make sense back then when I could buy one for almost peanuts, but obsolescence has changed all that. 

Kobo Mini Slipcase
View of inside...

Since I like virtually everything about this case, it's once again a see it — like it — make it project. Easier this time because I have the original item and can make accurate — down to an eighth of an inch — measurements and peek around corners to see how things are constructed.

But it's still a problem solving exercise since this original case is made out of non-fraying materials and I'm going to be working with fabric.

Kobo Mini Slipcase
View of the bottom...

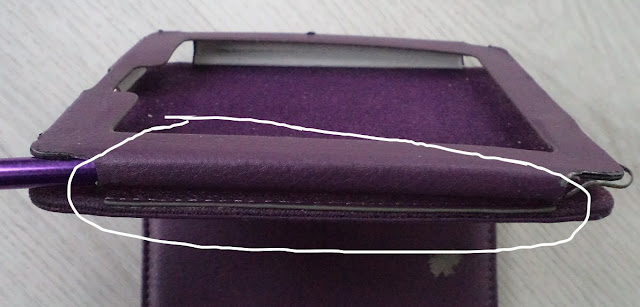
The biggest challenge is finding a way to replicate the slip-in feature. I know that many DIY solutions employ diagonal elastic in the corners to hold things in place — kind of like old time photo corners (remember those??) — but sorry, that would look too DIY for me. Lacks elegance.

Kobo Mini Slipcase
Side view...

Therefore, I've been ruminating on this project since late last year, trying to figure out how to recreate this "harness" (for lack of a better word); i.e., the stiff frame with soft sides sewn to the base that holds the device in place.

It also isn't particularly obvious how best to approximate the book-like structure of the case. As sewers, our usual "go to" method is to stitch two pieces together and then turn it right side out to make something with a front and a back, much like you would a wallet. I could envision early on, however, that that wouldn't be the right approach for this.


Watch live classes for FREE at CreativeLive! Sign Up at CreativeLive
[affiliate link]


As part of my routine whenever I start thinking about making something, I take out my project book and start measuring and scribbling notes, hoping that the process triggers some lightbulbs.

Except that this time, apart from my carefully considered measurements and general thought about how I wanted to change up the orientation — I wanted my case to open up like a notepad instead of a book — I didn't get very far in documenting any actual steps.

Making a new Kobo Mini slipcase
Make a template...

Towards the end of February, I decided just to start. By then, I had found a solution for the book cover part and wanted to begin, with the expectation that clouds might lift as I went along... you know, sort of like crafting on the fly.

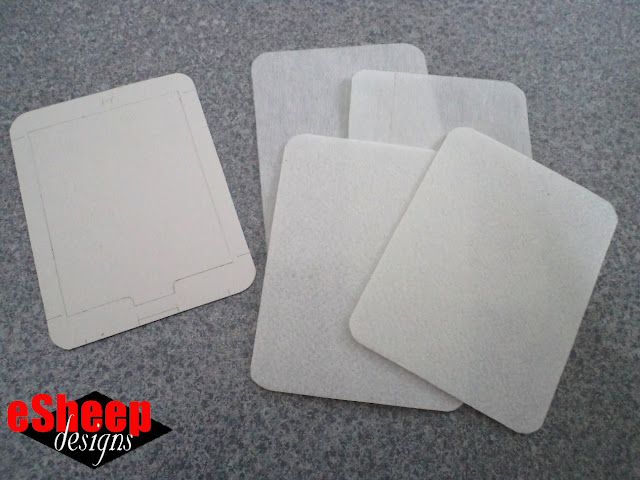
My first task was to make a detailed template out of card stock. Not only does it function as a template for the main panels of the case, it replicates the outline of the frame that surrounds the device.

Making a new Kobo Mini slipcase
Making the exterior panels...

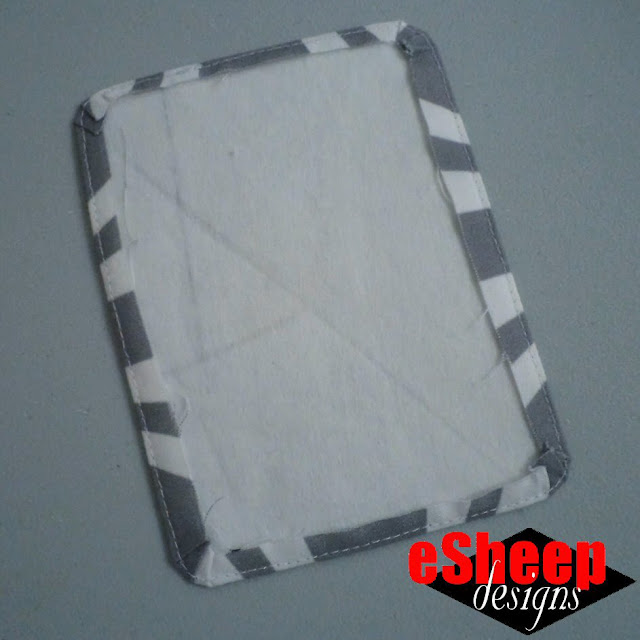
I used it to cut out two pieces each of Peltex and Decor Bond. My plan was to cover them with fabric and then sew them together back to back to create the interior and exterior of the cover. It seemed an ideal way to simulate the look and feel of the original case, and didn't require turning anything right side out.

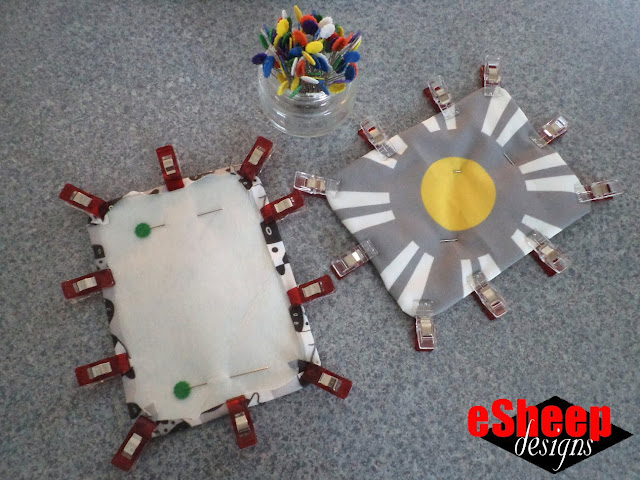
Armed with remnants of my 2021 Spoonflower competition entry fabrics (Year of the Ox and Yellow and Gray), I cut pieces about a half inch larger than the template, to allow just enough to wrap around the edge of the interfacing.

Making a new Kobo Mini slipcase
Inside of the exterior (back) panel...

The original case is padded on the outside. To give the new one some similar softness, I added a layer of fusible fleece to the exterior fabric before "sealing" it in with the Decor Bond. I then sewed around the edge.

The interior of the original case is firm and likely contains cardboard; I used Peltex to reproduce that stiffness. This time, I left the fusible side of the Peltex exposed on the back, so that when the two parts are sewn back to back later, they can also be somewhat fused together.

Making a new Kobo Mini slipcase
Fabric covered Peltex piece for the interior of the case...

This setup also lets me fuse the edge of the fabric underneath.
 
Making a new Kobo Mini slipcase
Preparing to join two halves of one "panel"...

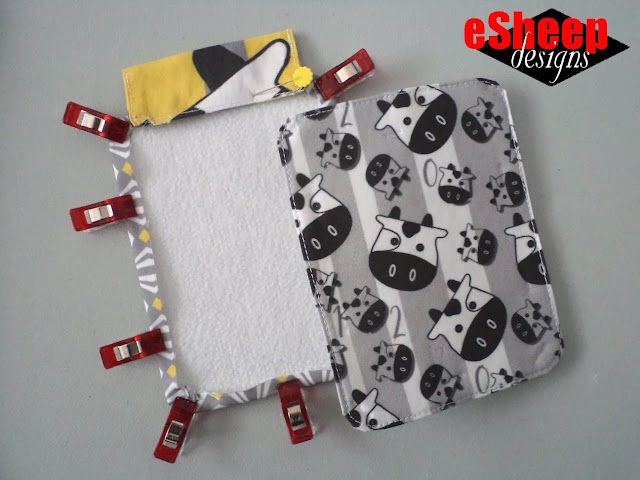
The soft "spine" of the case was established with the bit of fabric that you see above. It's meant to be sandwiched between the two layers, but was sewn onto the Peltex layer first to ensure that it would end up straight.

Making a new Kobo Mini slipcase
Finished front cover...

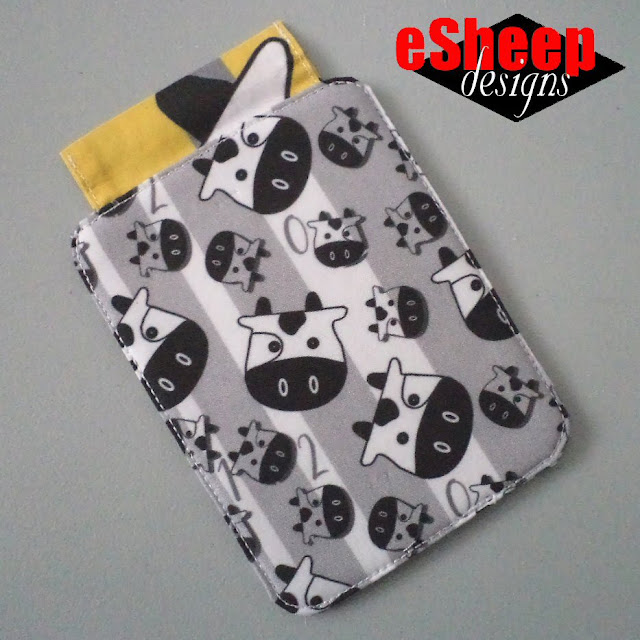
And here is the finished front cover of the case, after sewing the two halves together.  

By the way, I had measured beforehand to confirm that putting the spine at the top of the case would still allow the original stylus to be held in place there. It's essentially as long as the unit is wide.


Check out crafty classes at Creativebug!
[affiliate link]


Remember how I hoped that moving forward with the project would help develop further clarity?

Making a new Kobo Mini slipcase
How do I replicate this?

After I started, the obvious solution to use more Peltex to create that supporting harness occurred to me, but I was still stumped by the problem of how to cover it with fabric and yet still have more fabric coming down along the sides (i.e., the extension pieces that are sewn to the base).

Making a new Kobo Mini slipcase
This cutting requires a sharp knife, patience and precision...

I'm gonna hit pause here and let you ruminate on how to solve this problem. Let me know your thoughts on how you'd proceed. 

My answer came to me in the middle of the night. I almost got up to test it out. ʘ‿ʘ

'Til next...

Saturday, 6 November 2021

A Curvy Challenge for Your Consideration

making 3D objects out of curved pieces of fabric
What can this possibly be?
Are you familiar with a designer by the name of Josh Jakus?

His bag creations are all made out of a single curvy piece that zips up along itself and can be stored flat.

You've probably seen the bags before, but may not have known their origin. They appeared on the fashion scene about fifteen years ago. (Speaking of origin, I have no idea whether Mr. Jakus is the true originator of those curvy concepts; my guess would be that he's not.)

While I am intrigued by the simplistic shape of his UM bags, I'm not sure that in actual use they would be practical or user-friendly.

Josh Jakus UM Bag
Josh Jakus' UM Carry Bag...

Once you get over the coolness factor, you may discover that one zipper holding a whole purse together is not ideal.

Josh Jakus UM Bag
UM Carry Bag unzipped...

Perhaps it's more useful in one of the smaller pouch formats (for which I know some independent designers have come out with their own patterns).
Josh Jakus bags
Josh Jakus UM Bag collection...

I didn't realize until recently just how easy it is to draft a pattern for something like this (more on that later). Let me follow up that statement, however, with the fact that it may not be that easy to sew something like this.

By the way, the original website and social media accounts for Mr. Jakus are no longer accessible. I assume the photos reproduced here originally belonged to the designer; in any case, no copyright infringement is intended.


Mr. Jakus' creations are made out of industrial wool felt. At first I thought the zipper tape was applied directly against the wrong side of the material (that is, exposed zipper tape with no lining) but I've since seen photos of the interior and the zipper is definitely sandwiched between two layers of the felt.

interior view of zipper installation on a Jakus bag...

If you can find a similar type of wool felt (maybe check out your thrift stores for old woolen blankets), the sewing part would be infinitely easier to do than attempting to make one of these curvy creations out of regular fabric that frays and needs to have a finished edge. (That said, it's always nice to have the option of something a little less bland than plain woolen felt.)

A couple of months ago, I came upon an instructable by Jenna Fizel that demonstrated the process for designing one of these bags. (Her contribution — which includes various patterns available for downloading — won the 2007 Homemade for the Holidays competition at instructables.com.)

Apparently, all you really need to do is draw a lopsided open ellipse (about eighty percent of the way to being closed) and then join the start point and end point with a straight line. Here's my attempt (the blue is the hand drawn curve; the white is the joining of the end points):

draw a closed curve
Draw an open curve and close the two ends with a straight line...

Next, cut out the shape and trace a copy of it. Cut out the traced copy. This results in two pieces that can now be taped along the straight edges, forming a symmetrical curvy shape.

create a curvy template
Create a symmetrical template...

It's now a template to cut your material.


Watch live classes for FREE at CreativeLive! Sign Up at CreativeLive
[affiliate link]


I intentionally did this on a small scale to test the process. (The template shown above is about 5.5" tall.) After cutting out my scrap of fabric, I proceeded to hand baste it together, end to end onto itself, simulating what a zipper would do.

curvy challenge test
Testing the curvy challenge by sewing all the way around...

It totally worked. The bottom has a twisty parallelogram look to it. (I stuffed it with cotton before sewing it closed, so that I could see it in 3D format.)

So that proves that you can DIY your own pattern for these one of a kind curvaceous pouches. That part is easy.

curvy challenge test
Another view...

Figuring out the best way to sew a zipper along that winding, curvy edge is probably not as easy. I definitely think that these patterns call for zipper tape "by the yard". That way, you don't have to worry about getting the right length and you can also separate the tape and sew each side independently. (Alternatively, if having the whole thing unzip into a flat piece isn't that important, one could install a zipper along just a portion of the edge for a more traditional pouch.)


Check out crafty classes at Creativebug!
[affiliate link]


I may take another kick at this with a larger test piece, with fabric on both sides. We'll see how it goes, if it goes anywhere. ;-)

Meanwhile, if you're interested in seeing how Jenna Frizel approached the challenge, go to https://www.instructables.com/Flat-Zipper-Bag-and-Wallet/ and check out her patterns.

'Til next...