-->
DISCLOSURE: This blog contains Google Adsense ads and affiliate links to Creativebug via which potential commissions are earned when visitors click through.

Search This Blog > > >

Showing posts with label no sew projects. Show all posts

Saturday, 15 July 2023

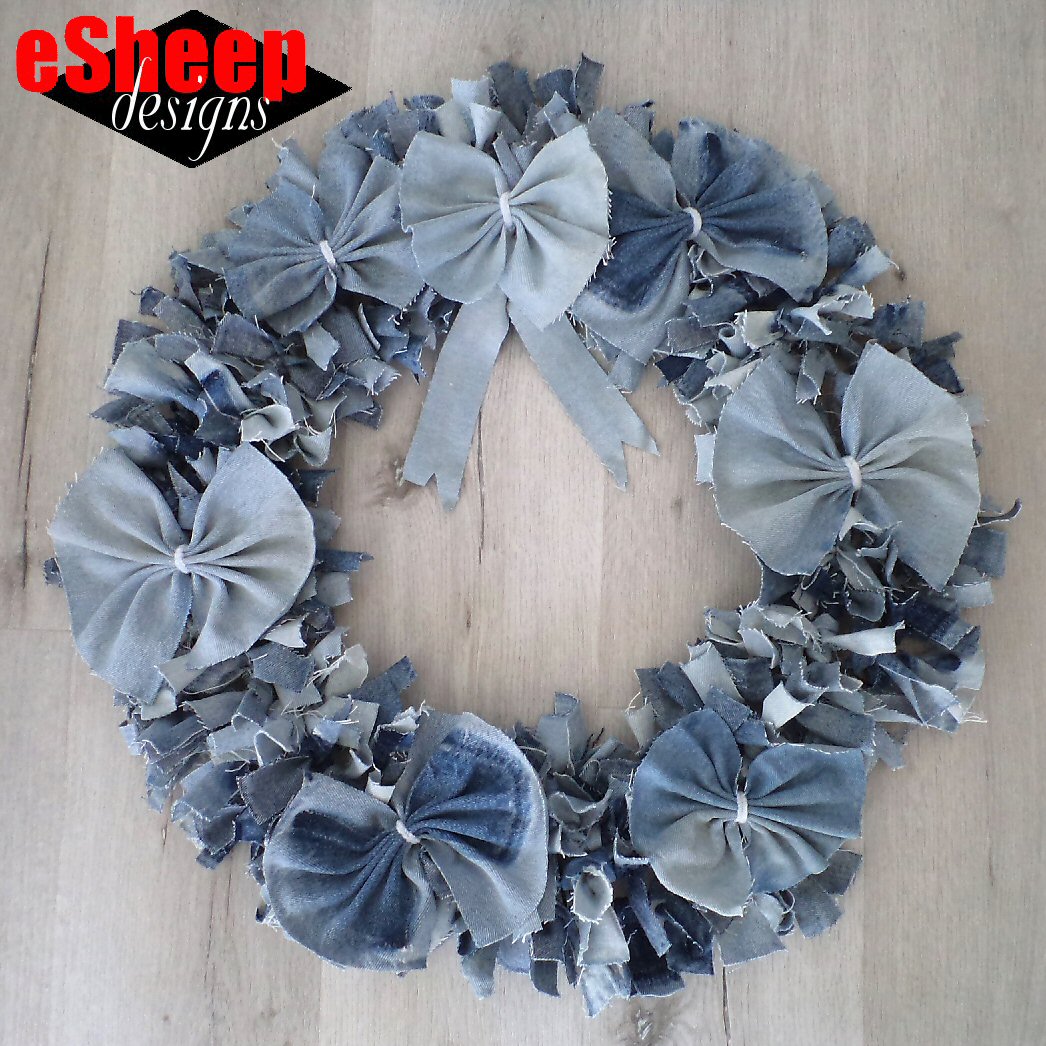
DIY "Designer" Denim Wreath

Recycled Denim Wreath by eSheep Designs
The ultimate denim recycling project...
Fun fact: the front door of our house is perpendicular to the structure itself; i.e., you cannot see the door until you're right in front of it.

This has made it not worth my while to decorate the outside of our door with — for example — a wreath.

Which is sort of too bad, because I like wreaths, particularly some of the more elaborate ones that crafty people DIY out of something called deco mesh. Moreover, our front porch area is covered from the elements, so that if I were to hang a wreath on the door, it wouldn't suffer much.

Sometime in March, I came across a YouTube tutorial for making a "designer" wreath. I was fascinated by the work of the crafter (and others like her) and the fact that some of them were making a decent income selling these wreaths for mega bucks.

image courtesy of Wayfair.ca
Turns out that people are willing to pay through the nose for these things. (Maybe not surprising considering my topic from last week.) Take a look at this one that I found on Wayfair. As you may guess, I was originally looking for ideas to use some of my burlap to try this out.

I find this particular price point beyond outrageous, considering that these are actually easy to make. (Not to mention that this is far from the nicest one that I've ever seen.) While some of the larger and higher quality selections of deco mesh will cost more, it's entirely doable to complete one of these wreaths for under $20 with supplies from Dollar Tree.

I'm about to show you how you can make a designer inspired wreath for even less.



0. BUY AND GATHER MATERIALS


While it was still debatable whether my front door needed a wreath, the idea of attempting one of these on a "designer" scale was just hard to resist. The challenge was fully on when I saw large 20" wire wreath frames at Dollarama selling for $3.50. I bought one, and left it to sit in my sewing room for many weeks before making a decision on how to proceed.

Recycled Denim Wreath by eSheep Designs
A lot of cutting involved, but no sewing...

For a while, my plan was to use the burlap and embellish with some mesh ribbon. However, the longer I considered, the less interested I was to spend more money. For something that I didn't need, the real challenge should be to see what I could do with what I already had.

And what I already had were several pairs of deconstructed denim jeans. The longer lengths of fabric had been pieced together for the big boat tote, but I was still left with six pairs of Daisy Duke shorts and several upper leg portions that were left over due to significant holes in the knee area.

Recycled Denim Wreath by eSheep Designs
Employing the "rag wreath" technique...

After searching through YouTube for more ideas, I decided on a rag wreath format, using strips of fabric secured with girth hitches.

1. CUT STRIPS


Some of the more organized crafters out there will cut their strips to the same size, all at once. I made my strips anywhere from 1" to 1.25" wide and anywhere from 8" to 10" long. (They weren't necessarily rectangular, either; some were wider at one end than the other.) I actually started with a 6" strip, but this is what happens when it's hitched up:

Recycled Denim Wreath by eSheep Designs
A 6" strip of denim is not quite long enough...

Regular quilting cotton strips may be fine at 6", but denim is quite thick (at least mine was) and after it's folded in half lengthwise, the hitch knot becomes difficult to pull through.

2. TIE STRIPS TO FRAME


If you're wondering why the strip is folded in half first, it helps the ends stand up. (That being said, I have a few in among the mix that are single layered.) Some people do a rag wreath by simply tying a knot on the frame with a single layer of fabric, but the strips can then be floppy on the finished wreath and I didn't care for that look.

So how many strips did I end up needing? There are six sections to this four-ringed wreath frame. In each section, I used thirty-five strips, so 35 x 6 = 210. The larger the frame — and the more rings there are — the more material you'll need, obviously. I believe this is the biggest that's widely available; my finished wreath is 24" in diameter.

Recycled Denim Wreath by eSheep Designs
The basic wreath needed embellishment, so bows it was...

While you can surely cut all of the strips at once, I alternately cut and tied, attaching one strip to each section so that they would all wind up with more or less the same distribution of shades of blue. (Tip: always start tying on the inner most ring.)


Watch live classes for FREE at CreativeLive! Sign Up at CreativeLive
[affiliate link]


If you were here a few weeks ago, you may recall that I said that "when someone in my household gives up on a pair of jeans, they are worn through and and through. They are noticeably faded in certain areas (i.e., knees and seat), and have distressed crease lines in various places." This normally undesirable aspect of old denim turned out to be almost beneficial in the creation of this wreath, giving it wonderful variations in colour.

3. PULL APART & "FLUFF" STRIPS


After hitching up about ninety percent of the strips, I arranged them to stand up straight along the rings. This made the whole wreath look very narrow, however, so I went back to each of the knots and yanked on the ends, pulling them apart (and making them tighter in the process). It created a fluffier appearance, so I was on the right track.

Recycled Denim Wreath by eSheep Designs
The area under the back pocket creates interesting colour variations...

4. MAKE & ATTACH BOWS


Still, it needed something more, so I revisited some YouTube videos and saw how crafters used squares of mesh or ribbon, folding them in some way and then tying them up to the wreath frames with wire or pipe cleaners. With mesh, this process is often used to fill in the wreath itself, but it occurred to me that I could use the same basic technique on the denim — by employing accordion folds — to make bows.

You can see in the photo above how the gradient that developed on the fabric underneath the back pocket creates an interesting look when used this way.

Recycled Denim Wreath by eSheep Designs
A standard pipe cleaner will hold the accordion folds in place...

As with the strips, I didn't bother to cut the denim pieces to any identical size, nor were any of the edges straight. (Generally speaking, they were approximately 7" x 8".) They were all wonky and I think that approach works in the spirit of making something like this. The imperfection of individual components is what makes the whole uniquely beautiful.

After securing the bows with the pipe cleaners, I tied the ends of the pipe cleaners around the two center rings of the wreath in the middle of each section. (Some strips were relocated during this process.)

denim wreath by eSheep Designs
More or less done...

I made seven bows, so the extra one got placed between two others to mark the top of the wreath. As a finishing touch, I cut pieces for tails to complete the illusion of a bow.

It's typical for the average wreath artiste to add decorations to their creations at this point. Dollar store embellishments in the way of signage (think "Home Sweet Home" or "Welcome" like in the Wayfair wreath), ornaments based on a particular theme (like Easter or Halloween), or simple floral arrangements are popular additions.

denim wreath by eSheep Designs
View of the back...

In my case, I was pleased with the result and don't have plans to add more "stuff".

5. ADD HANGING LOOP


All that was left was to tie something to the top of the frame for hanging. Another strip of denim will do just fine; I used some skinny ribbon rescued from a clothing designer tag.


Check out crafty classes at Creativebug!
[affiliate link]


Afterwards, I decided that since I don't want to end up with a spider-webbed, insect infested wreath, this will hang inside our house rather than outside.

denim wreath by eSheep Designs
Hanging on the front door, but inside...

At first, this location was the inside of our front door, but then hubby said that it covered up the little half moon window, which would make our foyer darker in the winter. So I moved it a few feet away to another door. It arguably looks better there, without light shining through the gaps.

denim wreath by eSheep Designs
Final home is another interior door...

My final tab for this project was $5.50. Aside from the frame, the only other thing I had to buy was a bag of pipe cleaners for two bucks. (Now left with ninety-three white pipe cleaners that I don't know what to do with... maybe I'll have to make more wreaths!)

Of course, I'm now feeling quite satisfied that I was tasked with making that big boat tote for hubby, because... the wreath!

'Til next...

Saturday, 13 May 2023

Super Simple (No Sew, Recycling Friendly) Burlap Projects

Recycling Burlap Projects by eSheep Designs
Guess what this is?
When last I touched upon the subject of making things (or not) out of burlap, the outcome was up in the air. As in, I hadn't made up my mind as to what I was going to do with the selections of burlap that my other half had gifted to me last Christmas.

As proof once again that we ultimately can surprise ourselves with our crafting choices, one of the projects that I'm featuring today was not something that I thought I'd make. (It's the one that's shown above in extreme closeup.)

My hubby's motorhome project was ultimately the inspiration for my choices.

There were two spaces between a couple of upper cabinet doors that had been decorated according to the previous owners' rather eclectic tastes. When those items were removed, visible outlines remained. Hubby said, why don't you make something out of burlap to hide that?


Why not indeed? 

I had already planned to make him the bulletin board with the monogram, but these spaces that we were trying to cover were relatively small; under one square foot each. So while I stayed with the idea of a pin board, I did not add any embellishments.

Recycling Burlap Projects by eSheep Designs
Burlap memo board...

For the underpinnings, I used some corrugated cardboard and plastic foam that were rescued out of the packaging of recent purchases that hubby made for the motorhome.

The first step of this super simple project was to cut both cardboard and foam to size and glue them together.

Recycling Burlap Projects by eSheep Designs
Crafting by recycling is the best!

Then it was a matter of cutting a piece of burlap big enough to overlap on all sides of the board.

Recycling Burlap Projects by eSheep Designs
Be generous with the amount of material...

Using a hot glue gun, secure the burlap, starting at a corner. Fold in and glue all the tips first, then go back and secure the sides on top of the corners.

Recycling Burlap Projects by eSheep Designs
Fold a mitred corner...

Burlap tends to be stiff and bulky, so I wasn't expecting perfection on these corners. But they turned out well, at least for my purposes.

Recycling Burlap Projects by eSheep Designs
Back view of finished memo board...

The advantage of this type of construction is that the resulting board is very light weight. Exactly what's needed inside a motorhome. We will secure it using some double-sided gel tape when the time comes.

Recycling Burlap Projects by eSheep Designs
No more rhinestone toucan stickers (that's what was here before)...

So that's super simple project number one.


Watch live classes for FREE at CreativeLive! Sign Up at CreativeLive
[affiliate link]


For super simple project number two, I started with the same materials: the plastic foam and corrugated cardboard.  (Note that in lieu of this plastic foam stuff, you could just use a couple more layers of cardboard.) The actual inspiration for this came out of a running joke between hubby and me about the motorhome. I created a piece of art that would reflect this joke, and wanted to contain it within a burlap frame.

Recycling Burlap Projects by eSheep Designs
Draw a frame...

This time, only the plastic foam would be wrapped in burlap. I cut away the center, leaving a 1.5" border that would be the frame itself. Then, as with the previous project, I needed some burlap large enough to overlap the entire piece.

Recycling Burlap Projects by eSheep Designs
Get the glue stick ready...

Next, I cut out the center of the burlap, again leaving enough material to overlap onto the inside edges of the frame; this was accomplished by snipping diagonally into each corner. My adhesive of choice here was a glue stick, and it worked fine, as most glues should. (Just be aware that a glue gun at high heat will melt plastic foam.)

Recycling Burlap Projects by eSheep Designs
Glue down the inside edges to the frame...

The insides of the corners are obviously raw edged. I would suggest that some dabs of Fray Check or some other liquid glue be applied if they are bothersome.

The outside edge of the frame is finished off by wrapping the burlap around in the same way as with the first project. Since there were parts here that are burlap on burlap, I did end up using hot glue to secure those areas.

Recycling Burlap Projects by eSheep Designs
If using a glue gun, don't wait for it to heat up to highest setting...

Every frame needs a protective surface for the item being framed, even if it's just a thin piece of plastic. (As this will be hanging in a moving vehicle, I'd prefer it to be plastic.) This used to be the cover of a presentation folder.

Recycling Burlap Projects by eSheep Designs
Add some plastic to the frame...

Cut to size and glue to the back of the frame. (Just along the top and bottom as indicated by the white bars in the photo; of course, if you want the frame to be oriented portrait style, secure the two shorter sides.) The last step is to attach the piece of cardboard on top; glue was applied to the sides and the bottom for that.

Recycling Burlap Projects by eSheep Designs
Leave the top edge open to receive whatever picture you want framed...

I then printed up my work of art to the size of the frame's opening and can now do the "big reveal" to show you what it is.


Check out crafty classes at Creativebug!
[affiliate link]


Throughout this whole motorhome renovation experience, I've made the same comment virtually every time he's showed me one of his improvements: it's just lipstick on a pig. (Which is not to disparage his efforts. It's just that quite often, when new elements are introduced on top of an old foundation, the disparity between them is obvious.)

Anyway, that's the story behind this LoaP sign. I figure it'll be an amusing conversation starter.

Recycling Burlap Projects by eSheep Designs
Lipstick on a pig...

One of the features of a program like Paint Shop Pro is the ability to fill spaces with patterns, textures, or even other images. Here, the letters "o" and "a" are filled with custom stripes identical to the motorhome's new (recycled) curtains while the overall background is filled with a brown pattern called "rope", which resembles the weave of the burlap.

LoaP by eSheep Designs
The original image as seen on Paint Shop Pro...

I'm not sure if I ran across a burlap frame in those one hundred plus projects that I paged through last Christmas Day. If I had seen one, I would likely have pegged it as being too pedestrian to consider making. For a small space, however, this turned out to be the perfect project. Also, while the idea of a frame may seem rather ordinary, this patterned burlap adds a definite wow factor to the finished item.

I'm just happy that none of this cost me anything extra beyond what I already had around the house, and I was able to make useful things out of potential trash. Hurray for recycling once again!

'Til next...

Saturday, 14 January 2023

$5 DIY Sewing Machine Extension Table

DIY sewing machine extension table by eSheep Designs
Guess what this is?
I am so stoked!

At the same time, I want to smack myself upside the head for not having pursued this sooner.

I don't think I've ever shown the little extension table that came with my Kenmore sewing machine, but it's just a small piece of plastic that doesn't seem to match the functionality of the machine itself. In its defense — and I've probably said this before — it's likely because it was meant to be sunk into a sewing table.

For me, however, I've always used it on top of a regular table while the machine sits in the bottom half of its carrying case. Which means that I have often been hampered by not having a level surface when sewing larger items, resulting in that dreaded "fabric drag" that seems to require three hands to control.

Original Kenmore extension table
My original Kenmore extension "table"...

I've hopefully curtailed any future difficulties with my latest DIY, which I am sharing with you today. It turned out to be almost entirely a recycling project for me, but as you can assume from the title of this post, it's a cheap project even if you have to buy supplies. Certainly cheaper than buying a ready-made extension table. (Not to mention that that's often only an option for those with popular, late model sewing machines or machines with a free arm; i.e., the tables are U-shaped.)

Here's what you'll need: foam core board (or two, depending on your preference for thickness), something out of your household recycling bin for the legs (pill bottles, cardboard tubes, cardboard box corners, styrofoam packing pieces, empty thread spools, or whatever you can think of that's the right height or can be made into the right height), hot glue gun, adhesive hook and loop "dots" (optional), and a roll of adhesive shelf liner paper or decorative tape.


Last spring, I came across some old foam core mounted photos from hubby's and my first business venture together. It occurred to me then that they could be used to create a lightweight extension table for my Kenmore, as long as I could find some "legs" for them. It turned out that a couple of pill bottles that I found in our blue box were more or less the right height.

DIY sewing machine extension table by eSheep Designs
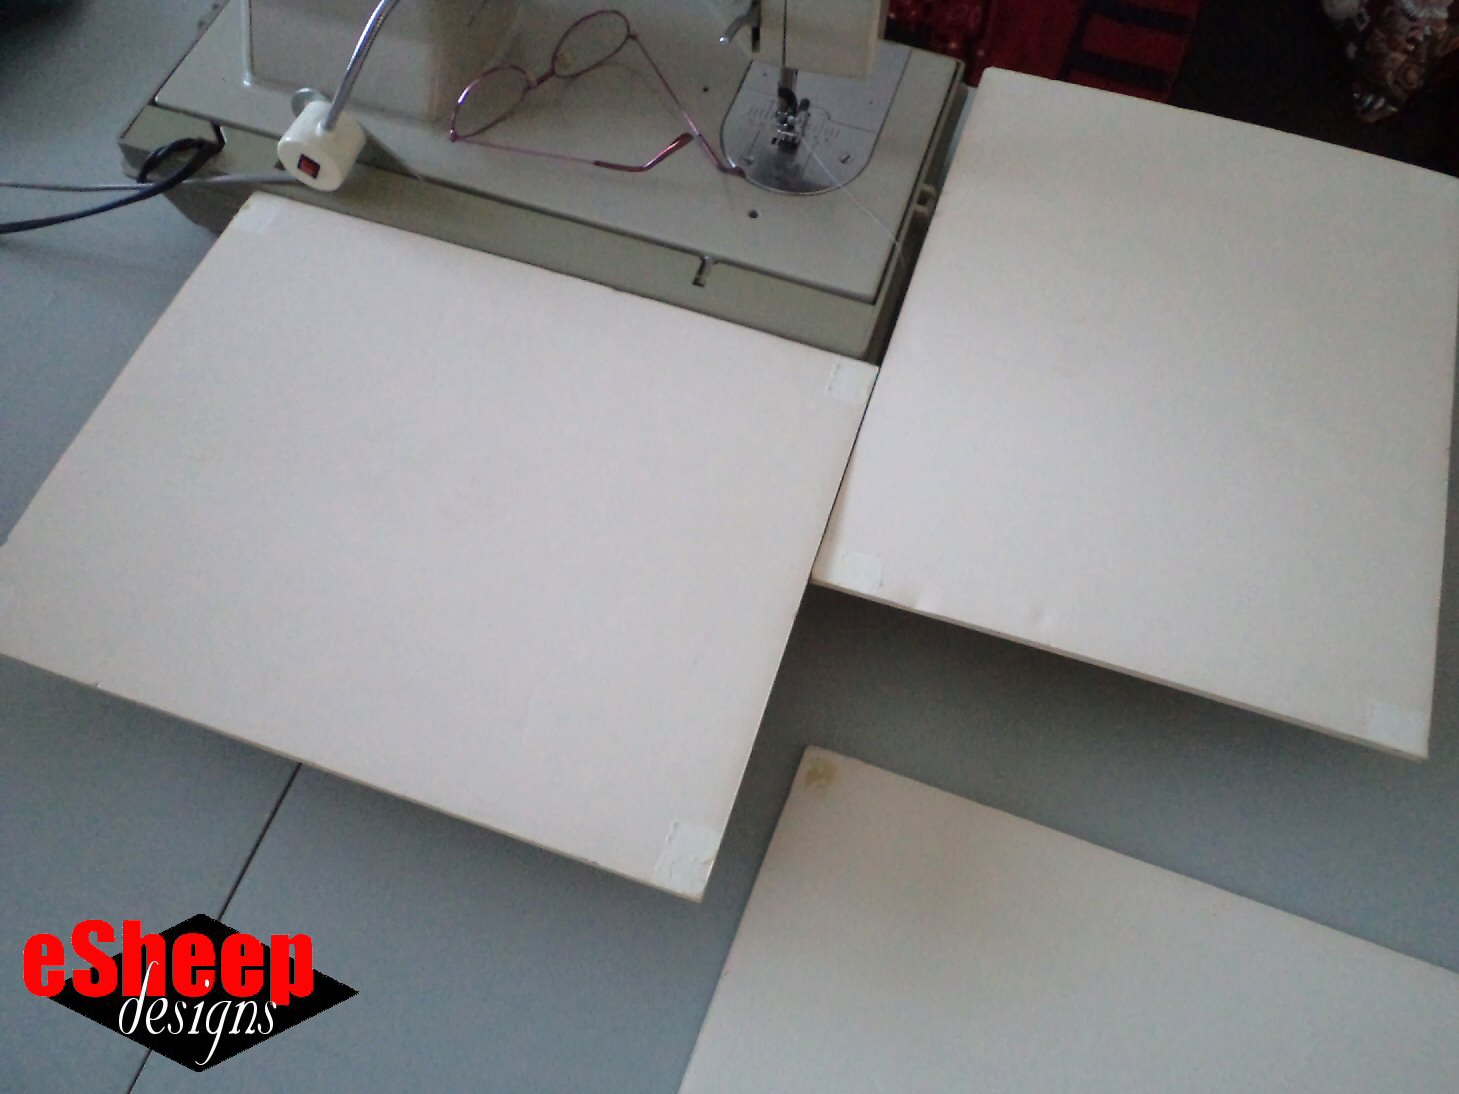
Three old photo panels being recycled...

I asked hubby if he had any more of the same bottles and that got us started on a conversation of what I was planning to do. At the time, we had just finished off a roll of tin foil and he volunteered to cut the rather stiff cardboard tube into additional legs for my table.

DIY sewing machine extension table by eSheep Designs
You may need these for your table: pill bottles, cardboard tubes, adhesive velcro dots...

Then at Christmas — after gifts had been opened — he presented me with an "extra" gift: a moving dolly with casters that he thought could be converted into what I need. I loved that he remembered my extension table project, but what he thought might work wasn't going to be practical at all. (The dolly was returned.)

A week later, he handed me the five cardboard tube pieces shown above. I headed upstairs to measure the required cuts and joins on my 11" x 14" photo panels. The project was officially underway!

DIY sewing machine extension table by eSheep Designs
Pieces cut and joined with hot glue...

Several minutes later, I had two panels and one smaller piece hot glued together. Of course, you would just start off with a (typical) 20" x 30" piece of foam core board and won't need to make any joins at all, just a couple of cuts.


Watch live classes for FREE at CreativeLive! Sign Up at CreativeLive
[affiliate link]


Once the foam board is cut into the desired shape, you'll want to beautify it. For me — since the thing didn't look good "as is" — I went to my nearest dollar store and picked up a roll of adhesive shelf paper with a gray, beige and white leafy print.

If you want to keep your extension table the same colour as your foam board, just wrap the edges with some decorative tape.

DIY sewing machine extension table by eSheep Designs
At the corners, fold the tip in first, then wrap the two sides in on top...

If you do use shelf paper, remember that it's paper and can rip. (Unless you use a more expensive vinyl version.) Also, the foam board is not a shelf so you'll have minimal luck repositioning the paper without causing damage to the board. Be careful and go slowly, but don't worry too much about inevitable small creases if you go this route.

I managed to pattern match the seams, but because I didn't want to be too wasteful in my fussy cutting, I ended up using a total of four pieces to cover the board. (One of them was a 2" x 1" piece that didn't match, but I would challenge anyone to find where it is!)

DIY sewing machine extension table by eSheep Designs
Can you tell where the seams are?

I decided that I was going to work with the pill bottles rather than the cardboard tube pieces, given another idea that popped into my head. Because I won't always want this table sitting out there in the open, the less space that it takes to store, the better.

DIY sewing machine extension table by eSheep Designs
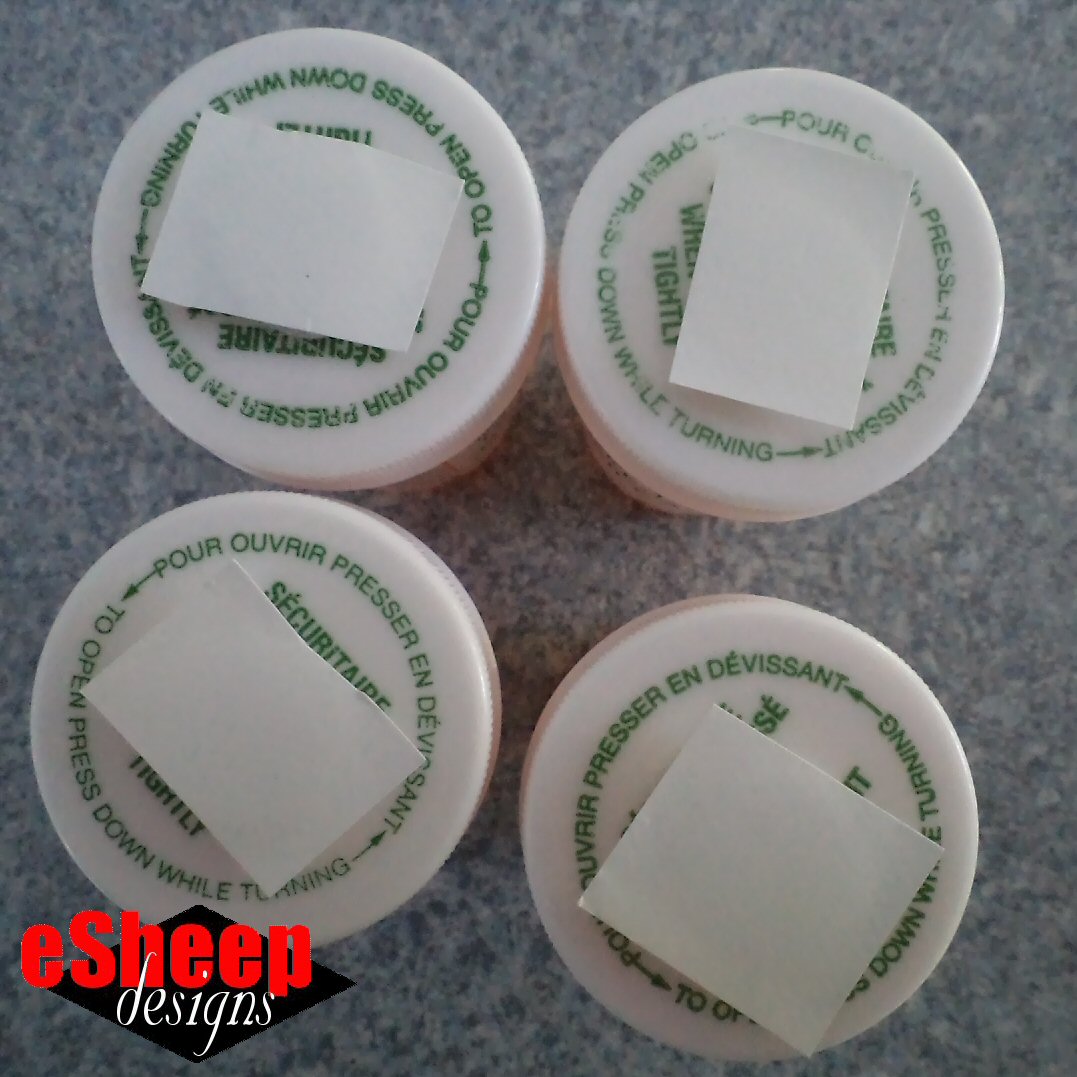
Velcro dots attached to the top of the pill bottles ensure legs are removeable...

So my thought was to put some adhesive velcro dots on the top of the pill bottles so that the legs can be removed. The top of the table is then just something flat that can slide out of sight behind virtually anything.

DIY sewing machine extension table by eSheep Designs
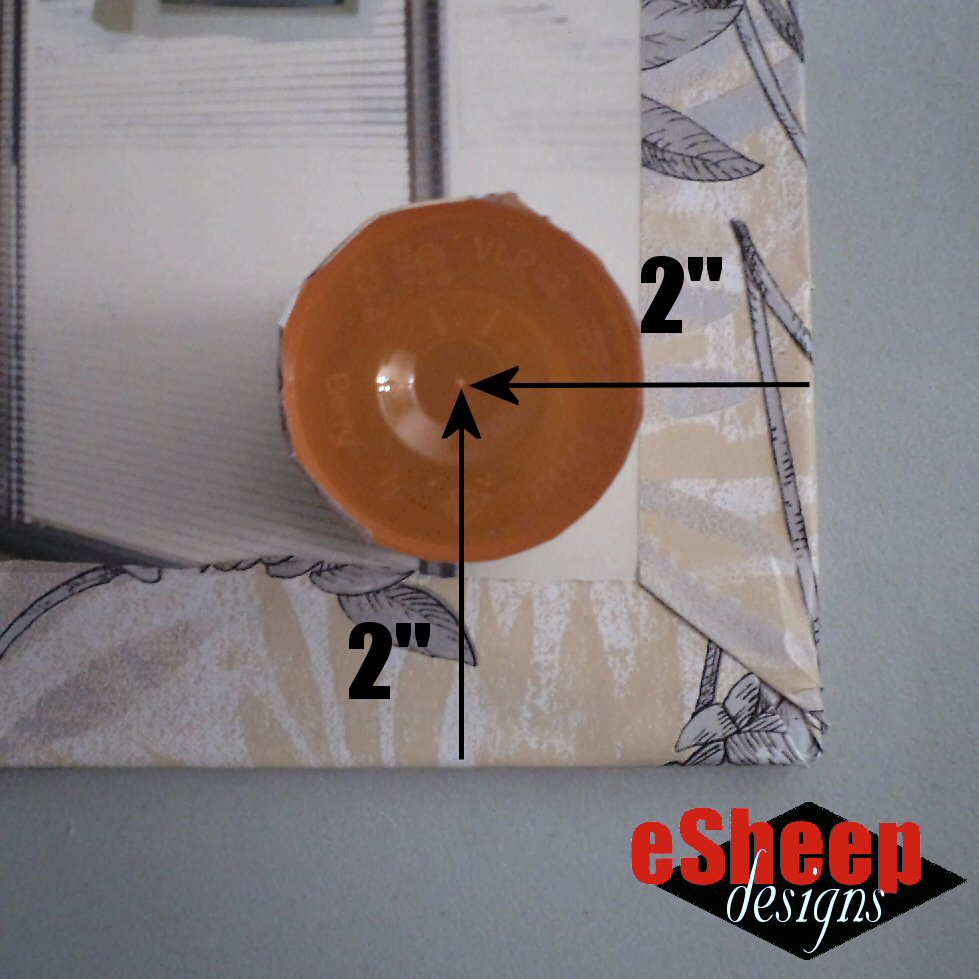
Positioning of the legs...

I put each of the legs about 2" in from the sides. If you opt not to make use of hook and loop adhesive dots, hot glue will secure your extension table legs permanently.


Check out crafty classes at Creativebug!
[affiliate link]


Before you do that, however, wrap the legs in some of the shelf liner paper or decorative tape. It makes for a polished look, don't you think?

DIY sewing machine extension table by eSheep Designs
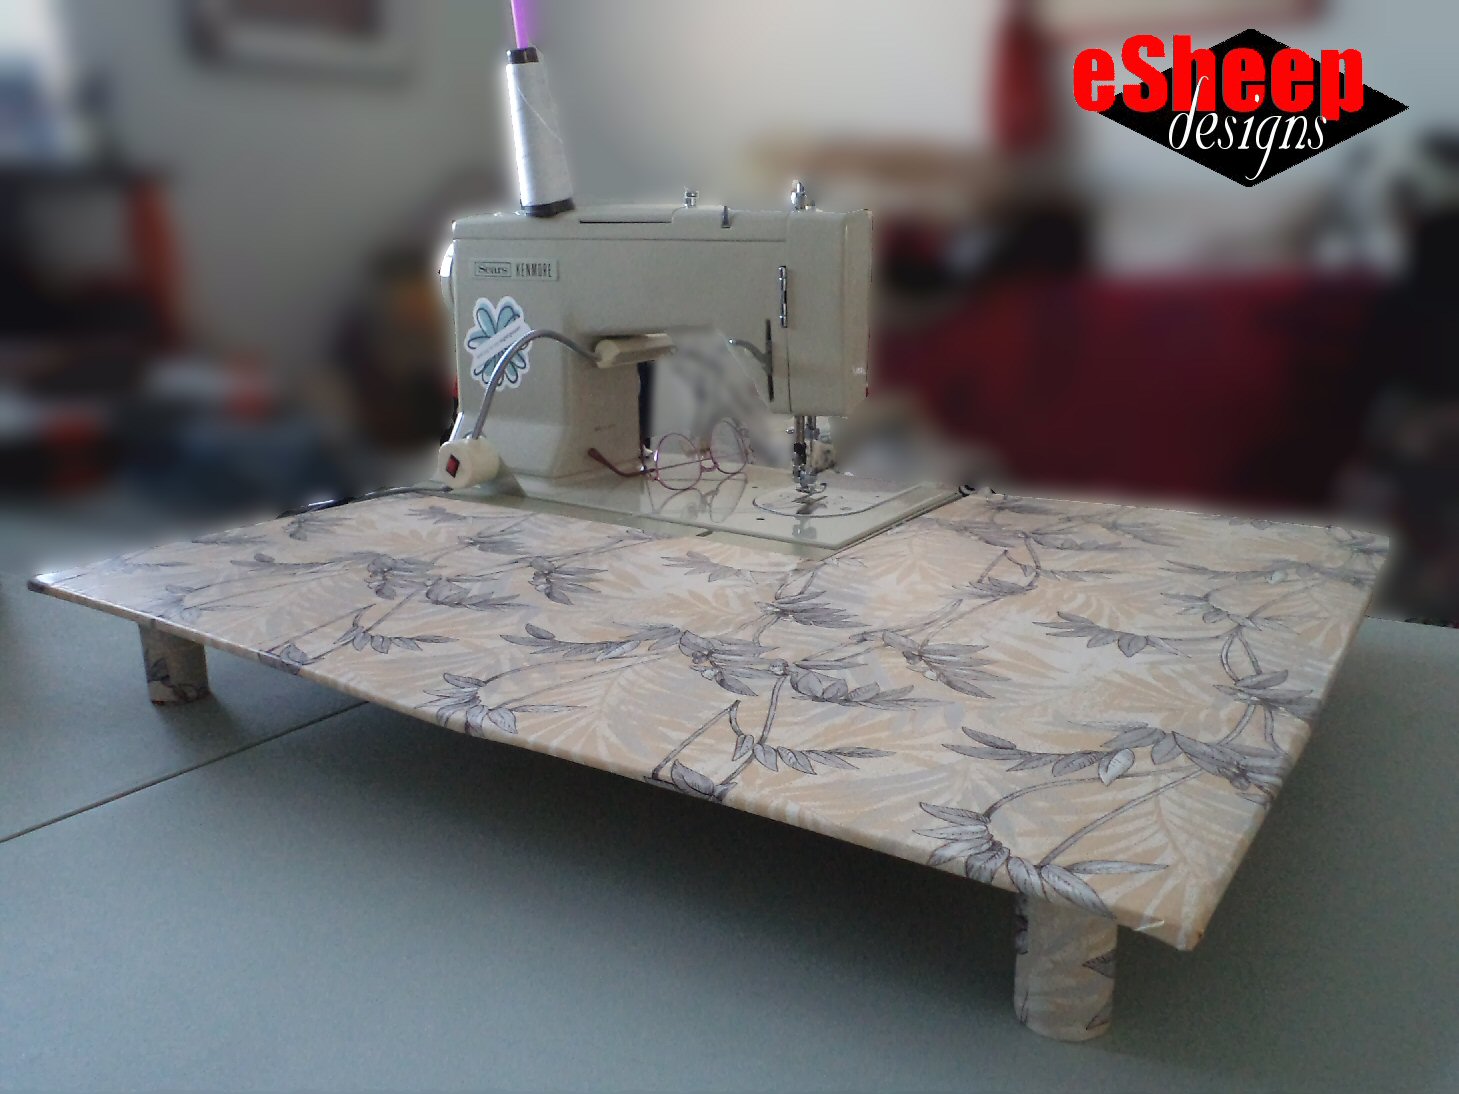
Ta da!

Finished size of my extension table is 27.75" wide and 20" deep. It ended up with five legs. (The table that my sewing machine sits on slopes towards the middle — it's a portable folding table — so the surface is not level. Putting more legs on the extension table won't help in this situation.)

I find it sturdy enough for sewing purposes, but you can definitely make this with two pieces of foam board for additional strength if desired.

DIY sewing machine extension table by eSheep Designs
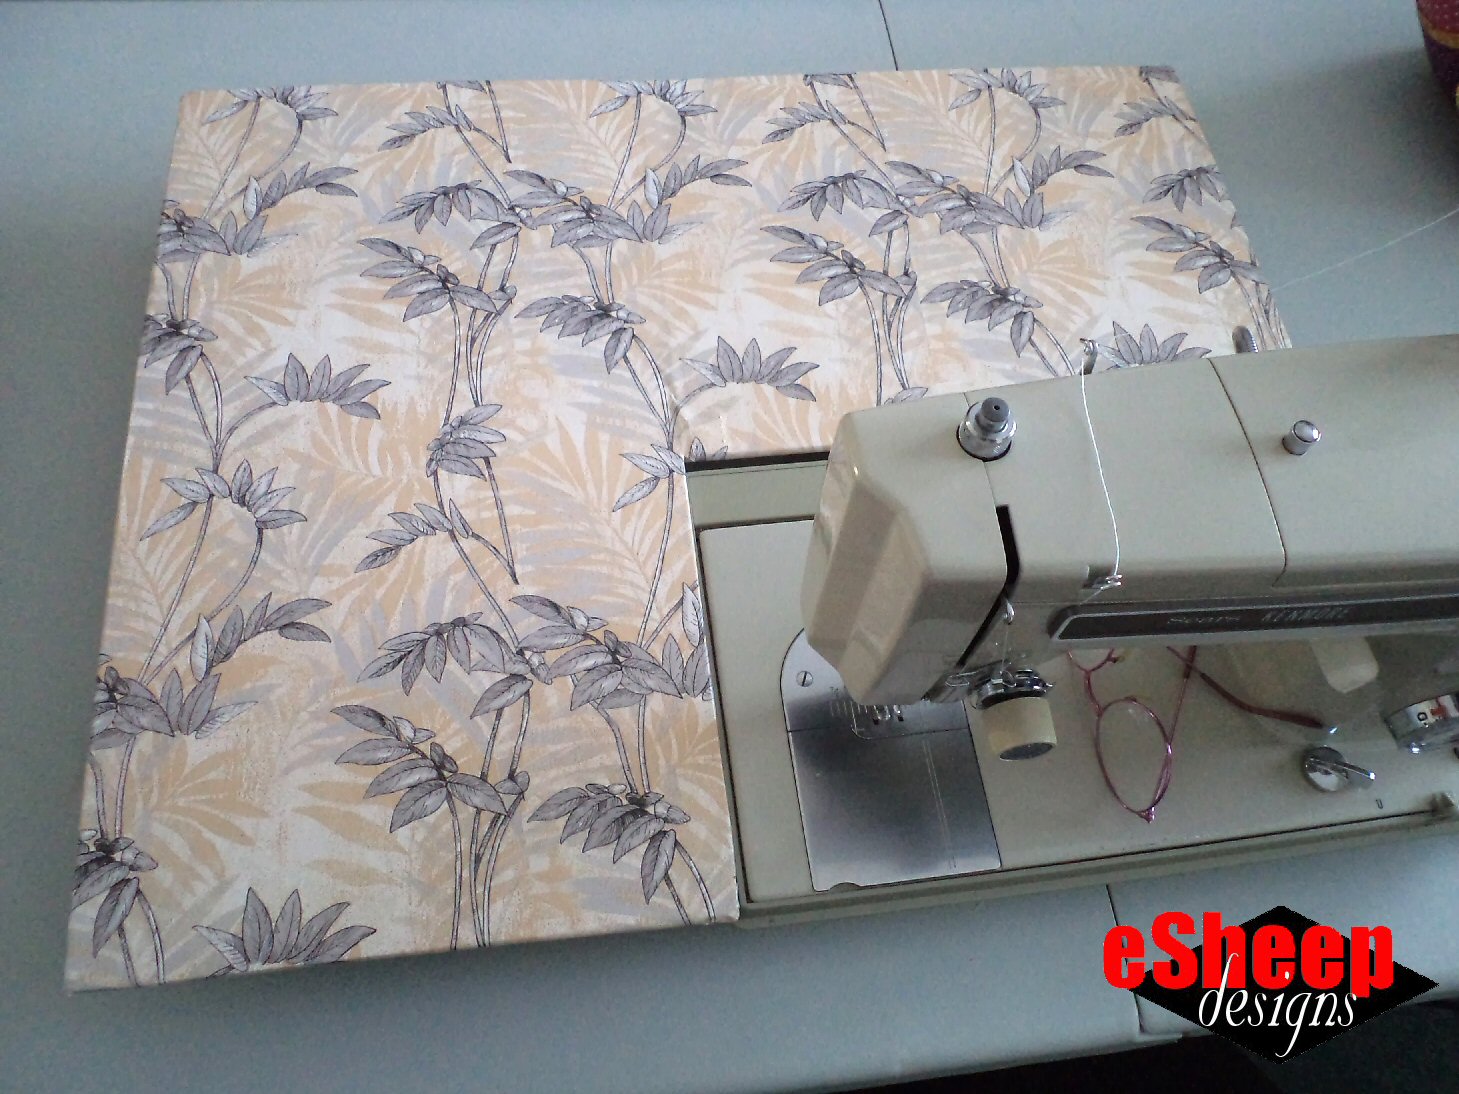
An extension table for a non-free arm sewing machine...

The title of this post states that you can make this for five dollars, but the cost will depend on what stores you have access to and what you can harvest from your own household. (You might already have adhesive hook and loop tape and/or shelf liner paper, for instance.) In my case, it was less than five dollars.

Ideally, you can find a piece of foam core board for $1.50 or less, spend $1.50 or less for a package of adhesive velcro (if you want removeable legs), and no more than $3.50 for a roll of shelf liner paper (vinyl will likely cost more). All in all, it's an incredibly inexpensive project. Since writing up this post, I've thought of other potential items that could be recycled for the legs: individual yogurt cups, spray can tops, tomato paste tin cans... all things that will cost you nothing.

Like I said, with it being so easy to do, I truly wonder why it has taken me so long to get around to solving this problem. (And if it weren't for my hubby, it probably still wouldn't be done, so hurray for him.)

'Til next...