|
|
Vase with hubby's boutonniere from our wedding... |
It being my own creation, I can't help but be biased, but honestly, part of
the appeal is that it represents a different sort of challenge for us sewers. And as I'm fond of saying around here, different is always
good.
That's why when I recently came across another different — yet familiar —
fabric vase, I knew I had to tackle it. (Even with no idea of what I would ultimately do with the finished item.)
First things first, as usual; I must begin by giving credit for the idea. I
found the project in a book by Linda Johansen, called Favorite Fabric Bowls, Boxes & Vases. (It came out in
2016, but I think it includes content from similar volumes that the author has
previously published.) She uses the same essential technique to make bowls,
boxes and vases in various shapes and forms.
I borrowed the (e)book from our
local library
and fortuitously, the hyperlinks in the book actually worked; I was able to
get to a page with the pattern pieces for all of the projects.

The process she uses is quite similar to the way I've tackled the various 3D fabric pieced projects that I've described here in the past. She takes interfacing and fuses fabric to both sides, then cuts them to the required shapes. She incorporates finishing touches by attaching cording along all of the raw edges and ultimately satin stitching the resulting "joins".
One review of the book states that there is a pricey learning curve associated
with the projects. Now, one could say that about a lot of sewing
projects (particularly bags and purses), but I've managed to find ways around
some of that expense. While I don't think it's possible to make these items
without Peltex (or equivalent), various other interfacing products that
the author uses to fuse the fabrics can be replaced with simple fabric glue.
And while the addition of satin stitched cording around everything is a nice
look, it's certainly not a necessity. (It might actually increase the level of
difficulty.)
In any case, here's the project that caught my eye. It's referred to in the
book as the Ellipse Vase (Fish Bowl).

|
| image courtesy of Favorite Fabric Bowls, Boxes & Vases by Linda Johansen... |
The vase is finished off with fabric both inside and out as designed, but in
my opinion, this particular style of vase is so flat and narrow that I don't
think leaving the interior partially unfinished is a big deal. The inside is
not likely to be the focus, even if the vase were left empty. Therefore — in
another way to reduce costs — I am going to make mine with only
some fabric on the interior, probably just enough so that you can still
see it when looking across the top.
And here is the reason for my attraction to it: it's the exact same style of
vase that currently holds my
fabulous fabric flowers, only mine is made out of glass.

|
| Fish bowl style glass vase... |
While it consists of only three pieces, in no way did I think that this would be easy to sew together. Virtually all of the various fabric pieced projects that I've done in the past have been made with rectangles, and all have had straight edges. Incorporating a small eye-shaped section into the bottom of this vase is only for sewers who are up to the challenge!
I was only partially up to the challenge. Therefore, I immediately
began to think up a way to avoid having to twist and turn a piece of
Peltex at that location.
My plan was to interface the base piece with Decor Bond. It would
provide sufficient stiffness to play with, without seriously hampering
efforts at fitting it along a tricky curve... hopefully. I would then make a
second base piece (slightly smaller) backed with Peltex that I would
later put inside the vase upon completion.
For once, the fabric selection process wasn't difficult. When I decided to
make the vase, I already knew what fabric would be perfect for it: a
Tim Holtz Eclectic Elements piece called Expedition. (And it's another project to add to this list of what I've made with these fat quarters.) I've liked this design ever since I first saw it, but no project has ever
seemed to be the right fit. Until now. Don't ask me why, but when I saw the
vase, I knew I had to make it with this map fabric.

|
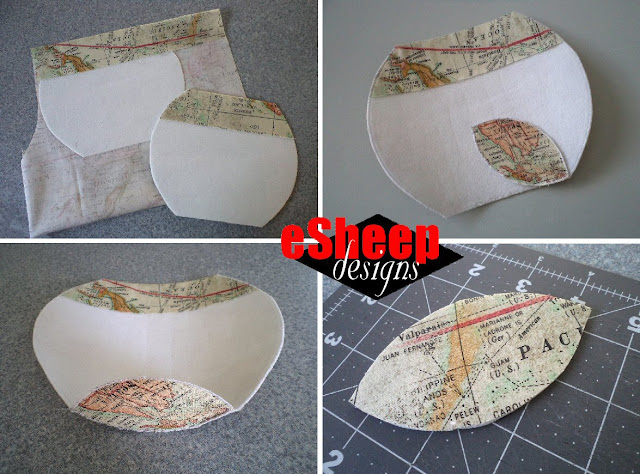
| Templates, fabric ready to go... |
Even though this fabric technically has a directional print (in terms of the text, anyway), I didn't care about having the two inch wrap-around on the
top edge be upside down on the interior. The opening of the vase is so
small, it really doesn't matter. Besides which, with the earth being
spherical, is there really an "upside down"?

My Peltex is a single-sided fusible, so for the fabric that overlaps to
the inside, I secured it with some Stitch Witchery. (As I stated above,
glue would also do the job.) Once fabric is fused — and before any pieces are
attached to one another — all exposed raw edges are zigzag stitched.
The tight zigzag that I used already seemed to take a toll on my sewing
machine, so I wasn't wanting to do a full satin stitch. If your fabric has
an interesting print, you can save on time and thread and just do the zigzag
thing. (And remember that it's actually done twice; once around the
individual pieces and then a second time when the pieces are joined
together.) Just make sure that your thread colour blends well.

|
| Steps in themselves are simple; execution is another story... |
In the photos above, the Decor Bond interfaced base piece was
hand basted to the side before I took it to the sewing machine to go
over it with a tight zigzag. (The fourth photo shows the base piece that was
interfaced with Peltex; that's the one that will be inserted into the
bottom inside of the vase.)

|
| Sewing the base piece to the second side... |
Let me say that it wasn't fun stitching the base piece onto the first side and
it was significantly less fun repeating the process for the second side. I
don't know how one would be able to manage it without basting first. The
inevitable pulling and yanking would just end up breaking needles if one were
to take the pieces straight to the machine.

|
| View of top opening and interior (and I don't care that the fabric doesn't go all the way down)... |
Never mind doing it with a piece of Peltex! (Don't get me wrong; it's
obviously doable since the author and others have done it.)
Sewing up the sides was a relative breeze by comparison.

|
| View of bottom of vase... |
I believe that my modification(s) resulted in an easier make, finicky
as it still was. That said, the first one of anything off the assembly
line is going to be a challenge. If I had it in me to make another and then
another and another, it would undoubtedly get easier. (I won't say never with
this project, however, since it's a giftable item and I'm thinking many people
would appreciate its uniqueness.)

|
| "Back" side... |
The author employs an off-beat tool to shape her vases: balloons. As in, insert
a balloon inside and inflate it to help the vase hold the desired form. She
then steams the item and lets it set.
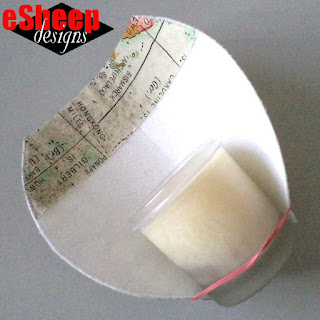
I have no balloons, so I used the other method that she demonstrated — using a
glass or similar cylindrical item. If you scroll back, there's a small photo
up above that shows one half of this vase wrapped around a candle. I let it
sit like that overnight before sewing on the base piece.

|
| "Front" side... |
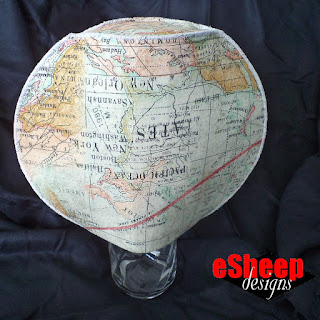
Once the whole thing was done, I placed it upside down on top of a glass and
then steamed it all around, leaving it overnight (per photo at end of this
post).

When I first received my Eclectic Elements bundle from Craftsy, I was surprised to see my city's name featured on this fabric. (Especially when Calgary and Toronto are not... heh, heh. ಠ‿ಠ) Obviously, when I cut this piece from the original fat quarter, I made sure that the name would be somewhat centered, while keeping my don't waste fabric unnecessarily caveat in mind.
By the way, on close examination, you can see that this fabric's print is not a real representation of an actual map of our world. It's composed of overlays, resulting in an (oversized) Australia almost touching the "Dominion of" Canada.
 |
| Don't yet have the perfect flowers for it, but minimalism seems to work for now... |
Finished vase is 7.5" tall by 9" wide. Two sets of templates are provided; this one was the larger one and is almost exactly the same size as my glass vase.
As I said, I borrowed the electronic version of this book from my local
library. If you are not able to do the same, as of this writing, there is
still a thing called the Internet Archive Library (from the same
organization that runs the Wayback Machine) that lets you create an account to borrow digital books. This system,
however, is currently being threatened by publishers with deep pockets. The
situation is fluid and ongoing; I don't know how much longer they may be able
to continue providing access, but I did find this volume there just yesterday (albeit on a "1 hour" loan basis; yes, you read that right).
Copy this link into your browser to check if it's available:
https://archive.org/details/favoritefabricbo0000joha/page/n1/mode/2up


This is very unique and beautifully made. I love the fabric that you have chosen. Thanks so much for the link I will try it out.
ReplyDeleteThank you so much for the appreciations, Patti, and best of luck if you pursue the project. I have to agree about that fabric; every time I see the vase, I feel so pleased with it. ;-)
DeleteAnother Great Blog! I am so intrigued by that fabric fish bowl - I have to make it! The link to the archive worked, I read the book in the hour allotted, haha, but nowhere did t see any links, except the publisher one. I have admired your vases like the book ones, but the fish bowl is so funny! I will find some perfect fish fabric! Thanks for all your inspirations! Marie
ReplyDeleteYou're very welcome, as usual, Marie. But I'm puzzled as to why there wasn't a link to the templates. In my copy of the book, the very last page of this "fish bowl" project shows the template with a line of text both above and below that provides a link to digital content. But I suppose you were able to print the template from the book itself since you say you're going to make it... once you find your perfect fabric!
DeleteYes,Rochelle, I did save a pic of the page to print the pattern. I went back to the book and checked again, but no links were seen, and no writing above and below the drawing. Thanks for my Sat morning sewing inspiration! Marie
DeleteGreat to hear. And I'd love to see it when you're done!
Delete