|
|
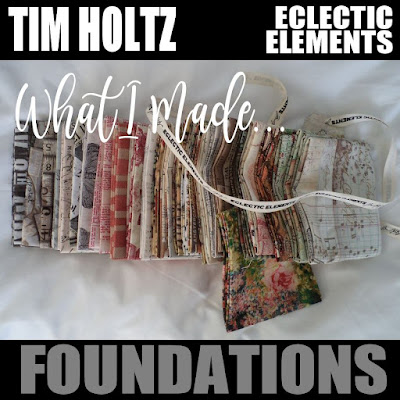
What have I made with these, four and a half years on...? |
Fabric shopping for me meant going online to Craftsy.
It was there, at the tail end of a fairly productive spending spree, that I
came across a bundle of twenty-five fat quarters from
Tim Holtz's Eclectic Elements (Foundations) fabric collection.
At the "can't say no" price of $55.13, I quickly added it to my shopping cart.
When I first showed off the collection in
this blog post, I wondered, "how the heck am I going to use this up?"
Well, it's been four and a half years, but with the original twenty-five fat quarters reduced to "eight and a half plus scraps", I figured it would be as good a time as any to go back and revisit just what I've made with those seventeen fat quarters.
Well, it's been four and a half years, but with the original twenty-five fat quarters reduced to "eight and a half plus scraps", I figured it would be as good a time as any to go back and revisit just what I've made with those seventeen fat quarters.
If you're a relatively newbie reader here, perhaps you'll see something that
catches your interest.

Almost immediately after I received the fabrics, I took one that seemed like an odd fit (the floral that's pulled out in the picture at the top of this post) and turned it into a frog. Fritz, to be exact.

|
| An extremely poseable stuffed frog... |
At the time, I couldn't imagine using this fabric (called Bouquet) for
any project that I would normally make, but as a coat for this charmer of a
frog, it was perfect. To this day, Fritz still sits on the lip of one of my
houseplant pots.
I used a few more of my "not so favourite" selections for my second project.
(While I'm a fan of red, the particular shades featured here did not really
appeal to me. That said, they seemed to work well against the beige of my
desk.) This is a modified version of a
wall organizer
that was a freebie tutorial offered via Spoonflower's blog.

|
| This two pocket organizer still hangs right on the side of my desk... |
It's been a welcome and well-used item over the past four-plus years. Not only
that, those originally problematic hooks have stayed in place too!
At the same time as this organizer was sewn, a fat quarter was sacrificed to
one of my first attempts at making
continuous double folded bias binding.

|
| Striped fabric is always a good choice for DIY bias binding... |
This binding was eventually used on three different projects, one of which I
didn't even bother to include here because it was only used as handles on a
basket.
Project number four was a
fabric match box. This was great fun to make and the fabrics — two different colourways of a
selection called Measurement — were perfect for the item.

|
| A versatile fabric match box... |
This box has become the keeper of my collection of bias binding and selvages. I didn't have any particular use in mind for it when I made it, so it's a happy outcome that it has found a job in my sewing room.
Project number five was a couple of
scalloped edge fat quarter baskets
from a free tutorial originally found at SewMamaSew by Sherri of
ThreadRidingHood fame. (Fabric selections are French Script and
Symphony.)
This was one of those rare occasions when I had a specific need in mind. These fat quarter baskets (I made two of them) have kept my Eclectic Elements fat quarters displayed at the end of my sewing table for the past several years.

|
| That's some fancy basket! |
This was one of those rare occasions when I had a specific need in mind. These fat quarter baskets (I made two of them) have kept my Eclectic Elements fat quarters displayed at the end of my sewing table for the past several years.
Project number six was a customized version of the
Seth bag
by IThinkSew. Dubbed the "Frankenpurse", it was the first bag I had
made in quite some time, so I took the opportunity to add all sorts of
features to it that were not part of the pattern.
Watch live classes for FREE at CreativeLive!

[affiliate link]
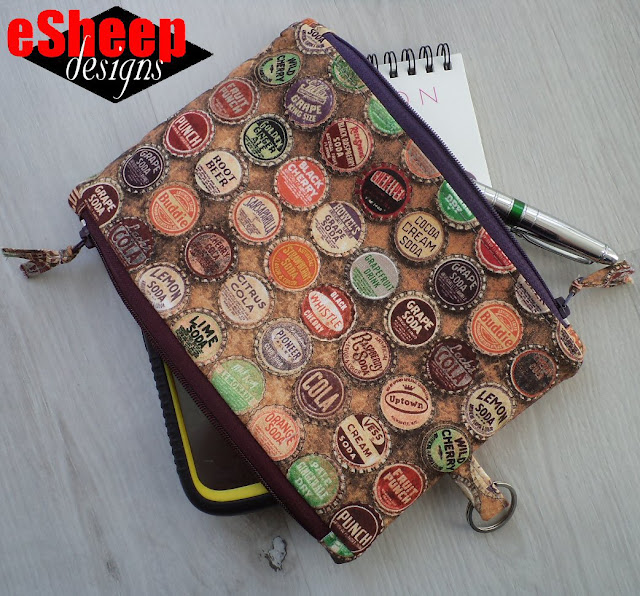
Project number eight is a clever take on your basic zippered pouch. This magic pouch was a free pattern found on Craftsy/Blueprint's old marketplace. (Since the marketplace is no longer a thing with what passes as Craftsy these days, if you want the pattern, do a search for its creator — Teresa Lucio Designs — and you should be able to find her PayHip shop.)
Get ONE YEAR of crafty classes at Creativebug for ZERO NET COST!

[affiliate link]
Maybe this is my "ode to Tim Holtz" pouch. I used seven different
selections for it: Dictionary, Travel Labels,
Game Pieces, French Script, Measurements, and
Top Shop, as well as Ticking again for the binding.
Most significantly, this project demonstrated how fat quarters can still
be used even when circumstances normally call for yardage. (One of my
commenters said that she didn't even realize that the bag was made out
of two different fabrics — called Timepieces — until she read the
post.)
[At the time that this was being written, it was a few days prior to
heading out to BC for our annual getaway. I decided to take this purse
with me.]
Project number seven is a small one. I used some of the selvages from
the fat quarters and some Timepiece scraps (for the reverse side)
to make this
designer purse charm.

|
| A selvage project! |
This charm still hangs off my
Frankenpurse.

Project number eight is a clever take on your basic zippered pouch. This magic pouch was a free pattern found on Craftsy/Blueprint's old marketplace. (Since the marketplace is no longer a thing with what passes as Craftsy these days, if you want the pattern, do a search for its creator — Teresa Lucio Designs — and you should be able to find her PayHip shop.)
The pouch features two zippered pockets on opposite sides; different
and unusual but not at all difficult to make. The fun fabric is called
Top Shop and features fascinating vintage bottle caps. I use
this pouch as intended when on vacation, usually attached to my
beach bag.
Project number nine is one of my own creations, the
quilted fabric plate. (It came out of a need for something to hold my
fabric fortune cookies.)

|
| First of two reversible quilted fabric plates... |
The fat quarter used here is called Game Pieces. The plate
itself sits at the top of a staircase in our home, still holding my
collection of fabric fortune cookies, along with a constantly
replenished supply of hard candy for hubby.
Project number ten is a YouTube project by
Owl Be Sewing called the
Ariel Clam Bag. Essentially a zippered pouch, I was drawn to it by its unique look.
As I recall, this was not as simple to sew as I expected, although if
you're looking for something different, the reward is definitely
there. (As you can see, the binding — a selection called
Ticking — makes a reappearance, as well as the
Top Shop fabric.)
This pouch has had a home on my sit/stand computer desk ever since it
was finished. Permanently open, it holds a bunch of note pads, pens,
sticky notes, as well as my
fingerless gloves
and a Lip Smacker.
Project number eleven is another small scrap-busting one:
DIY bobbins. Self-explanatory and simple, everyone can use some of these to help
corral thread ends or bias binding.
These are obviously scraps from my match box project, which
coincidentally enough, is where all of my DIY bobbins are stored.
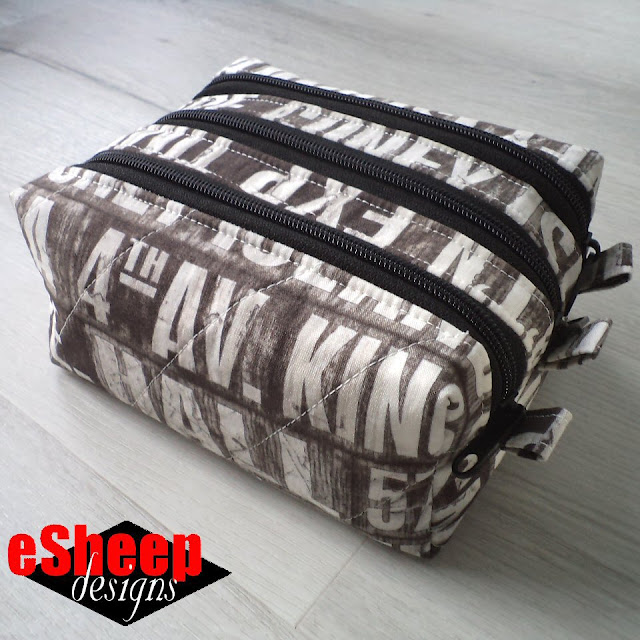
Project number twelve is another YouTube project courtesy of
Owl Be Sewing. It's called the
Triple Zip Box Pouch
and as you might guess, I felt compelled to make it because of its
boxy appearance.

|
| A toiletry bag for a guy? |
I had no plans for how it might be used going forward and in fact, it
currently sits empty on a shelf. In the past, it's held sewing
supplies whenever I've decided to take my hand sewing outside. It was
quite handy to keep pieces separate when I made my various
pandemic puzzle balls.
Fabrics used here (including selections for the lining) are
Subway Signs (the exterior), Game Pieces and
Travel Labels.
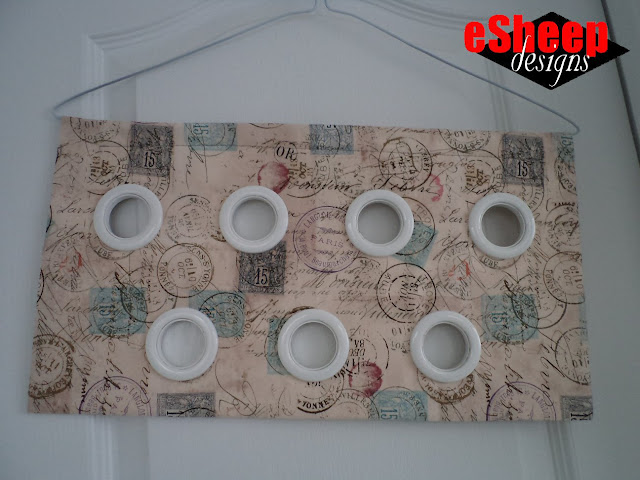
Project number thirteen was completed almost a whole year later. It's
a simple scarf hanger
that's made with only three seams.

|
| My fat quarter scarf hanger... |
This was made with a function in mind: to organize the myriad scarves
that I've made since I started sewing again. It's presently hanging on
the back of a door, stuffed with scarves. (The fabric selection is
called Correspondence.)
It was another year later before project number fourteen was realized:
a
tiny tote. From one of my favourite YouTube channels, this was made for
two reasons.

|
| Tiny tote holding my reusable makeup remover pads... |
I was fascinated by how making a small item like this can be quite
instructive for a beginner sewer. Without sacrificing a whole bunch of
(potentially expensive) supplies, this tiny tote allows someone to
practice all of the required skills of bag making. That made it a good
fit for a blog post topic.
But my second reason for making it is apparent from the picture above: I
needed a cute container for my
reusuable makeup remover pads. (Fabrics are Travel Labels and Measurements.)

Project number fifteen is a fairly recent one-off item: a
mini notebook cover. The exterior fabric is the
Travel Labels selection again, but in a different
colourway. (It has a naturally grungy, stained look to it.)

|
| What better fabric choice for a travel related notebook? |
This was purposefully made to fulfill a need, so I expect that it
will be with me on my travels for some time to come.
Finally, project number sixteen was unveiled here just a couple of weeks ago,
the patchwork pouch from YouTube that gave me some
unexpected challenges.
With at least eight FQs left, this adventure is not yet over, of course.
However, my blogging adventure may end before the fabric is used up, so
I hope you enjoyed this round-up of Eclectic Elements projects.


Love love love all these projects…you really made the fabrics shine in all of them. Well done!🏆🏆 Thank you for the links!🌷
ReplyDeleteAw, thank you so much for the love in return! Hope you find the inspiration to make some of those projects.
DeleteWhat a fascinating journey these fat quarters took you on! Thx for sharing.
ReplyDeleteThat's an apt way of describing it, for sure. Thanks for reading!
Delete