|
|
There's a certain satisfaction in doing this... |
The next step was to review my PDF and refer back to old blog posts to help me
figure out how to make this again. After cutting most of the fabric and still
not getting the right feel for the project — i.e., I wasn't
in the zone this time out — it dawned on me that what I probably needed
to do was dismantle the existing bag. (There's nothing like taking apart
something to figure out how it should go together.)
After all, in absolute honesty, there would be no reason for me to use that
bag ever again, given that I'd have a new one. Originally, I wanted to have
two to switch back and forth with, but the condition of the one that I've been
using for two and a half years does not merit keeping it in any rotation.
There was another reason to go this route, evidence of which you saw
a couple of weeks ago: some of the old elements (zippers, card slot/pocket assembly, the reverse
side of the flap pocket made out of ribbon, and of course, the entire strap)
were still in excellent shape to be recycled into the new bag.

The final reason for the dismantling was for any of you who might still be looking for a bit of assistance on this project.

The final reason for the dismantling was for any of you who might still be looking for a bit of assistance on this project.

|
| First item to harvest for reuse: the little zipper... |
I took photos as I ripped this apart, so today's post should be helpful for
anyone who has been struggling to make this without an actual tutorial.

|
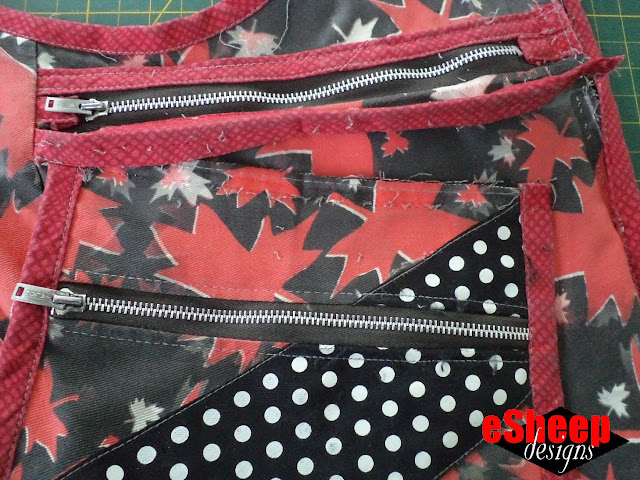
| This is what piece H (upper zippered pocket) looks like from the inside... |
I found during the remake process that it helps to have a clear understanding
of how the bag is formed. What I mean by that is that when we follow a
tutorial, we don't always have to know why we are doing something; we
can just do as we're told and have faith that in the end, we'll get the
desired outcome.

|
| This is the card slot assembly (pieces G & F sewn together) after being removed from piece D... |
When we make something without instructions, our ultimate success comes from
understanding how the pieces fit together, so that we know what to do and when
to do it.

|
|
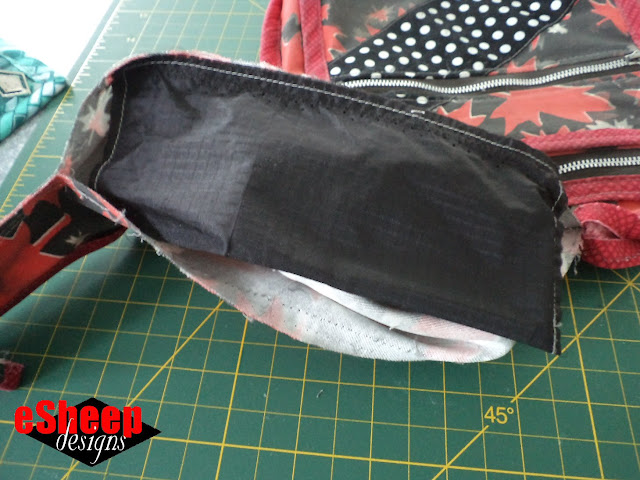
Removing the flap pocket assembly (essentially piece E), revealing that it was attached by some binding to the top of piece D... |
It's helpful in this case to know that the front and back of this bag are
identical (but mirrored, of course). All of the pockets (except the upper
zippered one) are added to the top of these panels. The back is simple
and flat while the front is three dimensional by virtue of the darted panel
(the D pieces) that forms the exterior of the main compartment.

|
|
Components of the flap pocket with actual pocket (top exterior and
lining) on the left; bottom exterior (sewn with ribbons in this case) on the right... |
Understanding how the use of bias binding changes a project is also important.
When things are bound, the pieces are assembled and sewn together with right
sides out; i.e., there's no "turning" required.

The back slip pocket and the receipt pocket/card slots are the only exceptions to the "mostly bound" construction of this bag.

|
| The velcro should be sewn onto the back exterior of the flap pocket before being bound... |
You should feel comfortable with installing zippers before you attempt this
bag, as there are three zippered pockets to put in.

|
| The most complex zipper installation of the three... |
The three are also done in three different ways. The upper one is a standard
"draw a zipper box and sew around the lines" type of pocket. The flap pocket
features a more sophisticated
zipper sandwich
type of installation.

|
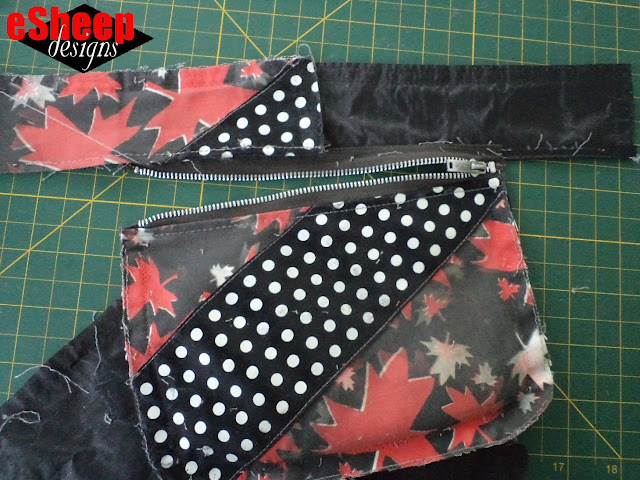
| Continuing to deconstruct the flap pocket... |
The third zipper that accesses the main compartment should be done with
a zipper sandwich on the bottom part of the zipper tape, but depending on your
choice of lining fabric, you could "cheat" like I did.
Since my ripstop nylon lining is so thin, I just sewed it onto the bottom half
of the zipper along with the exterior fabric. The top half of the zipper,
however, is wrapped in some binding and then sewn down on top of
pieces B & C.

|
|
Back slip pocket, made from
piece C (exterior & lining) and laid on top of the back joined pieces B (exterior) and C lining... |
The top part of the back slip pocket is sewn with two pieces of fabric, right
sides together, seamed across the top, flipped right side out and topstitched.
(One of those exceptions that I described earlier.)

|
|
The foundational halves of the bag, created out of
pieces A, B & C; front of bag (left) and back of bag (right)... |
Back to understanding the foundation of this bag: front and back halves are
the same; addition of the pockets is what differentiates them. In terms of how
each half is put together, pieces B and
C are sewn together first, pockets are then added to the mix,
and piece A is sewn last.
I recommend basting often to keep the various layers together.
The most time consuming part of making this bag was manipulating
piece D, the one that needs darts along the bottom to create the space required by
the main compartment. One side of that piece has to be sliced in order to fit
against the straight edge of piece A.

|
|
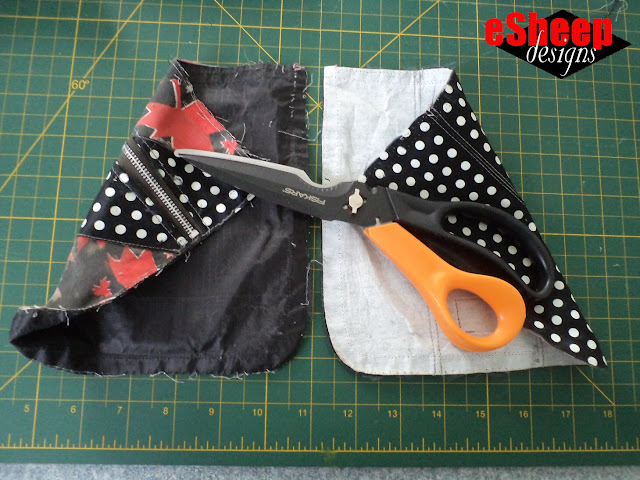
Exterior view of the disassembled bag back (left) and front (right)... |
If you want to see my updated photos of making the new bag, download
Before I sign off, I'd like to reaffirm my love for this bag's design. The
worst of the pandemic may be behind us, but my attachment to this sling bag
has only grown over the past couple of years. Its ease of use and body
conforming shape — I've made this observation before, but the vast majority
of crossbody bags end up being too bulky to sit comfortably across one's
body — has made me reluctant to give it up and go back to my "regular"
purses.


The first person I saw wearing a bum bag across his chest was a pretty savvy Indonesian friend, who travels extensively, and has been ripped off multiple times. Now someone would have to wrestle him for his valuables! Eeeek!
ReplyDeleteMy pandemic bag-of-choice has an open top that held a full size bottle of hand sanitizer spray. ;=) The tall bottle was easy to grab, and spray anything and everything in my path.
Love the deconstruction of your bag. My husband swears he understands how things work because he took everything he could apart as a child.
When we cruised through Europe over a decade ago, I routinely wore a money belt, as well as a "bra pocket", under my clothing. There are alternatives to the bum/chest bag... especially when one doesn't really want to be wrestled with to let go of a bag during a robbery!
DeleteAnyway... your husband is likely right. I hope, however (for the sake of his parents), that he had at least some interest in putting things back together again. ;-)
So glad I came across your Crossbody Sling Bag and the so helpful “Dismantling Crossbody Sling post”. I love it, and it turned out nice in denim.
ReplyDeleteI love it too, and am so grateful that you took the time to send me a photo of your creation. Love the pocket detail... I had a feeling it would look good in denim! Might have to try that out myself. ;-)
Delete