|
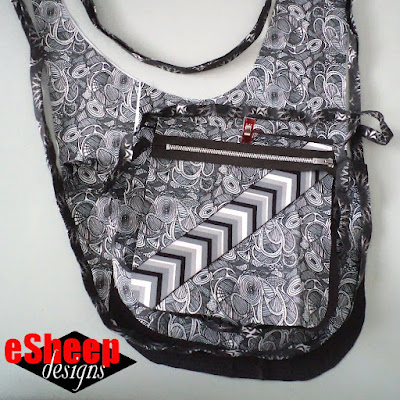
| No, it's not an April Fool's joke; I'm remaking it! |
In my
second "bucket list" post, I indicated that I wanted to make another one of my
crossbody sling bags
before retiring this blog.
Watch live classes for FREE at CreativeLive!

[affiliate link]
On a side note, I'm not sure what happened with my supply of binding.
Usually a regular (18" x 22") fat quarter will produce more than enough
continuous binding, but something happened between the fall of 2020 and the near spring of
2023 in terms of the type and amount of binding that was in my project
bag. (I actually made the binding some time ago.)
Check out crafty classes at Creativebug!

[affiliate link]
Anyhoo.
It became apparent to me when we flipped over into a new year that I'd have
to to make that bag sooner rather than later, plans for this blog
notwithstanding. The ribbon and fabric pieced front flap had begun to
separate along a seam, adding to the general signs of wear and tear that
have become more and more noticeable to me.
Given that I've been using it almost exclusively since July 2020, it's
actually held up well. (Avoiding future separating ribbon problems will be a
priority, however, on the new bag.) On an unrelated note, it's surprising
how well I've adapted to carrying so little with me.

Since offering up the pattern free to all comers in August 2020, it's a
mystery to me how many times it's been downloaded. (Because the file is just
stored on Google Drive, there's no default way to track access.)
However, an enhanced version of the pattern — enhanced with construction
photos; still no actual "tutorial style" instruction — was also being sold in my
Makerist
shop for a few dollars and I do know how many sales I've had there.
The number is not insignificant and yet I've never seen anyone's actual
finished bag. [Edit April 2025: With the closure of Makerist, the paid version of this pattern is now available at Sew Thankful.)

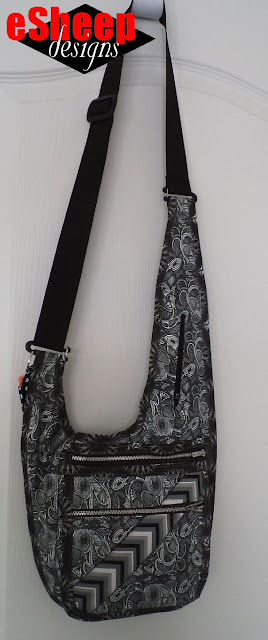
|
| Actual sewing doesn't take long... |
Perhaps it's more of a challenge than I anticipated? Could be. (I'll admit
that I had to get help from my past self for this redo.) But then there are
pattern hoarders out there just as there are fabric hoarders. The number of
people who have attempted the project is likely quite a bit smaller than the
number who have downloaded/purchased it.
By way of a yardstick, apart from testers' efforts, I've only ever seen
people's renditions of my
MyTie,
Hot Hues,
Crafty Cosmetics Caddy,
MIY
and
Wave Purse Organizer
projects; nothing else.
To that end, I thought that as long as I was making another one, why not
take photos along the way? Perhaps with that extra bit of help, my chances
of seeing someone else's crossbody sling bag will increase.
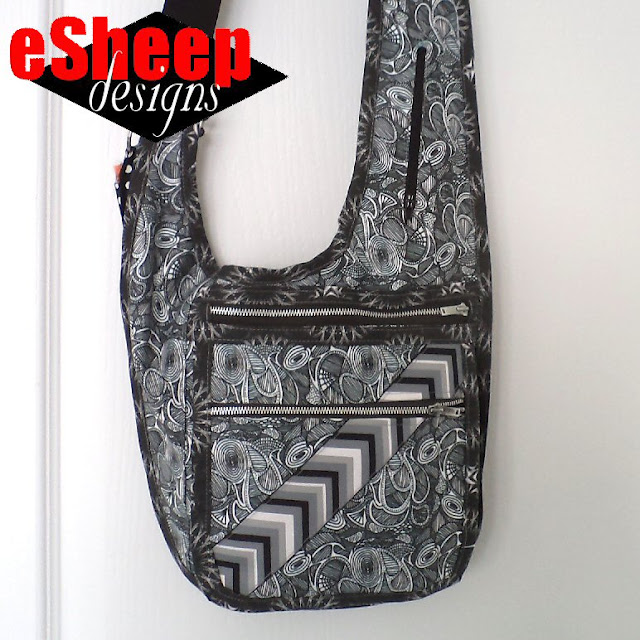
|
| A more subdued version than the first... |
The fabrics used for this new bag are my own creations from
Spoonflower. The main one is
Untangle My Zen (Micro)
in a lightweight cotton twill; the binding is
Spirogr*phing
in petal signature cotton. (Check out the origin story behind the
zen fabric
here; it was one of my favourite creative experiences.)
The lining is — just as with my original bag — a thin black ripstop nylon. I
complained about the crinkling noise after I made the first bag and can now
confirm that it does go away with use. But now I'm crinkling again!

|
| Back view... can you see the two lower pockets? |
Given the opportunity of new construction, I decided to add two pockets to
the back of the bag. The first one is just a piece of ribbon at the top,
underneath where the swivel hook is installed. The cart coin that hangs
there often falls off (the coin itself; the obvious problem being that the
holder is not tight enough), so this pocket should alleviate that issue
while I'm carrying the bag.

|
| Mini pocket to keep my cart coin in place! |
The section of ribbon is only sewn down along its bottom edge. During the
final binding of the bag, the sides are secured. (Kinda like adding a
pocket to a bag gusset.)
Ironic point to make about this pocket, having now used this bag for
over a month. I actually lost my cart coin recently! I think the token
itself was the problem; I've since replaced it with a loonie (Canadian
dollar coin) and it fits much more tightly in the holder.

I am still masking up when grocery shopping (among the five to ten percent
who do, but I've managed to avoid getting Covid and still don't want it)
so this back slip pocket is where I store my mask. My grocery list has
also occupied that same space up to now. With the opportunity for some
reimagining, a new patch pocket was created for the back.
It wasn't deliberately
fussy cut, but when it came time to place it, the pocket fit perfectly on top of
an identical section of fabric, in a position that was also more or less
centered. How serendipitous!

|
| A serendipitously matched up pocket! |
The fabric for this additional pocket was left over from the original fat
quarter, so with this remake, I can confirm that a single (wide width; the cotton twill FQ is 18" x 29") fat quarter with a
non-directional print — that's important, as this fabric has been
used both right side up and upside down here — should suffice for the
exterior of the bag.

|
| Erk... why do I have straight binding?? |
Always one to confirm whether or not there's enough of
whatever before going forward with a project, I did the basic "lay
the binding around the parts that are to be bound" and discovered that I
had just enough.
That was a bit weird, considering I thought I should have
more than enough. But that wasn't the most serious of my problems.
Just before finishing off the flap pocket, I realized that one of the two
sections of binding was straight; i.e., not cut on the bias.
In hindsight, I could have opted to bind the flap pocket in a different
fabric altogether, but in that moment, a decision was made to
make do. The corners would certainly wind up with a wrinkle or two,
but since the print on both fabrics is so "busy", it likely wouldn't be
obvious in the final finish.
As of this writing, I still don't know what happened to my supply of
binding. I have a vague memory of having gone into that project bag to
take some, but without doing an extensive search through my blog archives
or my sewing room, I can't think of what it might have been used for prior
to this... or why I ended up with some straight binding.

Anyhoo.
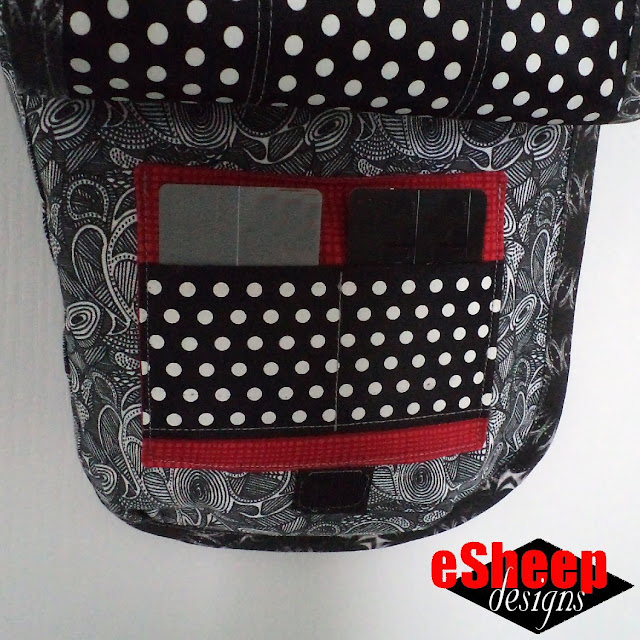
Here is the interior of the flap pocket. You can see my
almost origami card holder
inside. I still keep my "older than old" cellphone in there.
The first day that I used this new bag, I realized that I'd reversed the
direction of the two zippers. It felt slightly odd, but after a few days, I
got used to it.
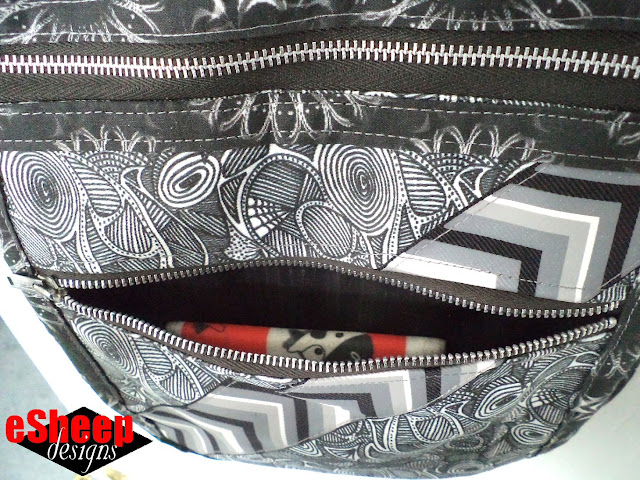
|
| View inside flap pocket... |
The next photo is of the main interior compartment. (You'll clearly notice
in this photo that I forgot to account for the fact that when you split up a
section of fabric to put a zipper in between, a diagonal pattern — in this
case, the piece of ribbon — no longer has the illusion of continuing
smoothly. D'oh!)
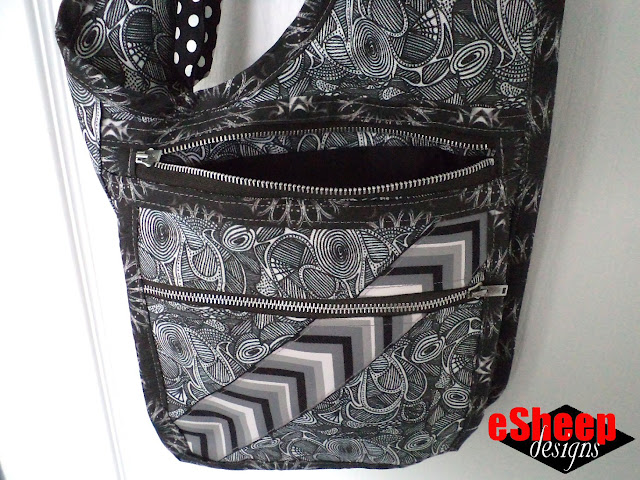
|
| Main compartment... |
To address the ribbon problem of the original bag, this one was directly
sewn on top of the fabric. I also glued it first. Of course, all of this
generally prevented me from easily fixing the off-centered-ness of the
diagonal trim. (For those of you wanting to create the illusion of a smooth
break, do not sew the ribbon all the way to the top corner of the underlying
fabric. Stop at the point where the piece is marked to be cut for the
zipper. After the bottom half of the zipper is attached, move the remaining
ribbon segment to the left — a 1/2" or so; depends on the width of your
zipper and how closely you sew it — before stitching it down onto the other
piece of fabric.)
I was somewhat surprised by how much I needed to refer back to my
"instructions" (such as they were) in the first couple of days. That was the
main reason I decided to take apart the old bag after I started cutting
fabric for this one.
Not only did it give me the chance to reuse certain components...
|
| Does this look familiar? |
... it also acted as a refresher course on how to make the bag!
If you've been stumped by this project and would like some additional help,
I suggest you come back in a couple of weeks for the
dismantling of my original bag.


I only now discovered your Sling Bag pattern and I'm so impressed with the time and dedication you spent creating this - not to mention the bag itself which is beautiful and very useful at the same time. I have many items cut out right now so this will go in my line-up of sewing, but I do hope to share photos of it when I am finished. Thank you so much for your generosity in sharing what you have worked on so hard.
ReplyDeleteGreetings, Linda, and thanks so much for the effusive praise! Beauty is in the eye of the beholder, but I don't think many can argue against the usefulness of this design.
DeleteI am thrilled that you will be taking on the project and am hoping — really hoping — that I will get the chance to see your bag someday. Best of luck with it!
While searching for a crossbag sewing pattern similar to a bag I bought a few years ago, I found your blog. Your pattern is exactly what I was looking for and your posts describe exactly my problems, inner fights, possible solutions, thoughts! I'm so glad I found your blog, so I don't have to reinvent the wheel 😂. I've just printed the pattern and will start my crossbag project soon. Thank you so much for sharing this bag 🥰.
ReplyDeleteYou're welcome, Claudia, and thanks for adding your thoughts. I have come to understand also that it's not always an effective use of one's time to reinvent the wheel. BTW, I would love to see your final creation. If you feel like sharing, please click through to my Blogger profile on the left sidebar and you'll find my email address there.
DeleteDear Rochelle, thanks for your prompt answer. I would love to share my thoughts and progress about my redo-project with you and will email you.
DeleteYay!
DeleteHi. I just discovered your pattern a few days ago. You mentioned that a downloadable tutorial of this pattern instructions can be purchased. I have been searching for where I could obtain this option but am unable to reach it. Is this still available? If so, can you send me a link to my email? Thank you for your time. God bless!!
ReplyDeleteUnfortunately, you're not coming through as a commenter with an attached email address, so I cannot reply directly to you. If you are asking about the version of the pattern that comes with construction photos (note: it's still not a tutorial with instructions), it's available in my Makerist shop at this link here: https://www.makerist.com/patterns/crossbody-sling-bag-pattern-only
DeleteI did it! I made your bag! It took me a little while to figure it out, but I examined the photos in your blogposts and tadaaa, I have a bag! Not sure how to post a pic here though.
ReplyDeleteCongrats! Unfortunately, there is no way to post it here, but I would love to see any pics if you can email me (esheepdesigns @ gmail.com - remove spaces).
Delete