|
|
My not so regular maintenance routine... |
About ten days ago, I flipped back the pages of
my little notebook
and discovered that it had been over a year since my last sewing machine
cleaning. I hate excuse-making, but here's my excuse: I actually sew so
infrequently that it's easy to lose track of how much time goes by.
Anyway, in the interim, I had done enough sewing involving both fleece and
fusible fleece to know that a lot fluff was accumulating under the throat
plate.

|
| A well used brush... |
As this is the only sewing machine I have known in my whole life (apart from
those I sewed with in Home Ec classes at school), I have no idea what sort of
maintenance one is expected to do with today's mostly plastic, computerized
machines. Is there even anything to open up and look at?

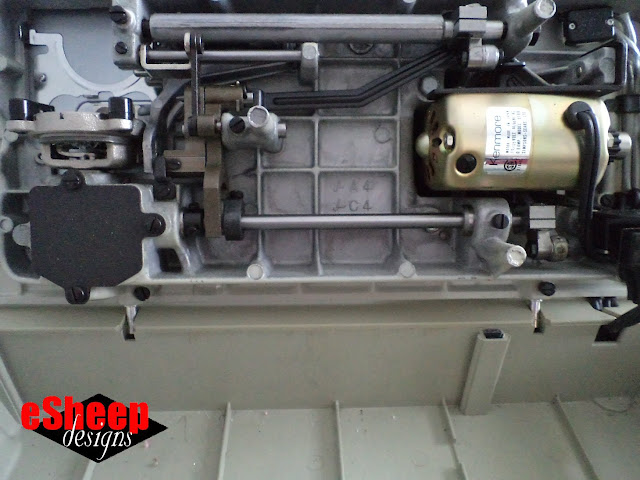
Here is what I see when I pull up the base of my Kenmore 15817200. Look how pristine that motor looks!
My Kenmore was made in Japan, although I'm not sure by what company
specifically (considering that Kenmore was just a
Sears brand name and not a manufacturer). My rudimentary
research seems to point to a company called Maruzen as the likely maker.
Having owned this machine now for forty-six years, it was only this past
December that I finally had to change the lightbulb. (Of course, I'd purchased
a spare one some time back in anticipation of that day.)

|
| A 45+ year old bulb! |

|
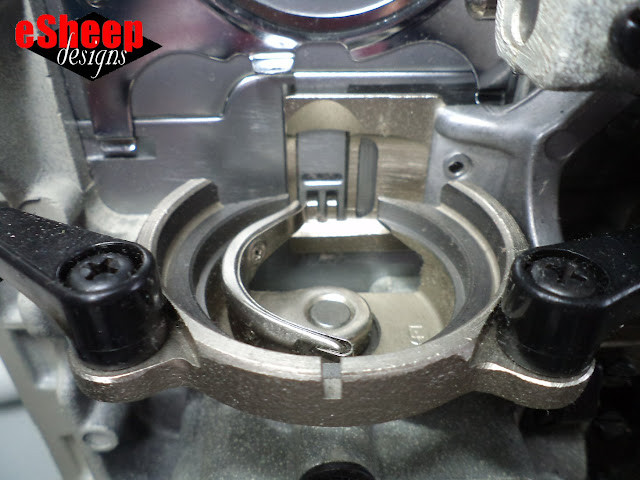
| Shuttle assembly removed to clean underneath... |
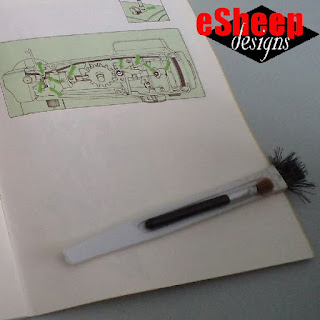
My original accessories kit came with a stiff bristled brush. Despite
looking very ragged, it's what I still use to clean out the nooks and
crannies around the feed dogs and shuttle.

Something that I would recommend to add to your sewing machine maintenance kit is a silicone brush cleaner like this one. I found this in the cosmetics aisle at a local discount shop for a couple of bucks. Not only is it handy for sweeping up a sewing table, but you can see how it grabs the dust bunnies from the cleaning brush.
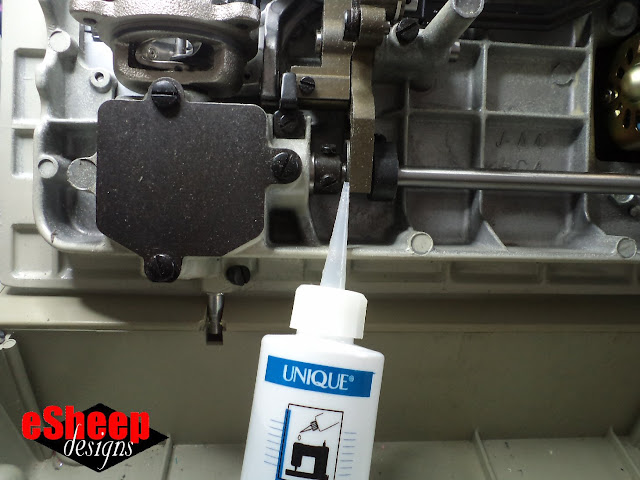
My Kenmore manual shows exactly where to apply oil during regular maintenance.
Essentially any joints that move should get a drop. After applying, I
typically hand crank a few times to let the oil work its way into wherever it
needs to go.

|
| Adding oil where oil is needed... |
Oiling a sewing machine is much like changing out the needle. You can
instantly tell the difference. I really must make it a point to do it more
often. Just because this old beastie can take the punishment doesn't mean
that it should!

|
| Underneath the top of my Kenmore... |
Now that you've seen the bottom the machine, take a gander at the top. There
are nine spots to oil here. Because the drawings in the manual are two
dimensional, I find it helpful to stand right over the area and look down
into it to establish where the points are located. (If it doesn't
immediately match the drawing, turning the wheel helps.)

By the way, it's important to use sewing machine oil to oil your sewing machine. That might be a pretty obvious statement, but it's worth making because some people think that a lubricant is a lubricant. That said, I don't think that any specific OEM version of sewing machine oil is needed. The one that I use is a brand called Unique, which also makes a variety of sewing notions and supplies (such as the replacement light bulb).
Anyway, back to my original query. For those of you who sew with modern
computerized machines, what sort of maintenance is required and are you
fastidious about doing it regularly? Is it necessary to "take them in" for
tune-ups?
Just a short note to let you know that Makerist (link on sidebar at left) is having
a $2 sale right now that runs through March 28. I'm not participating, so
this notice is not about my patterns. But I have found gems in the past
during similar promotions (like the Fritz Frog — yep, that and all of Angela Jardine's sweet patterns are on sale for just two bucks each), so it may be
worth a browse if you're looking for a new project at a great price point.
'Til next...


My first sewing machine I ever bought was a Sears Kenmore in the mid 70's. I never should have given it away! I bought a used Pfaff and gave the Kenmore away, darn it! So last year I bought a vintage Kenmore 158.19561, which was made by Maruzen in Japan in 1977. It was one of the last to be made in Japan. Your machine was made in 1975 and since Maruzen made the Kenmore machines in the 1070's, yours was most likely made by them too. Named it Kenny after my dad who was called Kenny by family & friends. I love that hum Kenny makes as it sews. While it more of a pain to have to remover the bottom of the machine to oil it, it's not that bad considering these old machines will last and last if you take care of them and the proof is this machine is already 46 years old. I don't know if there was one or more owners of this machine, but I am sure it will be working long after I am gone! As for computerized machines, I have or had several of those too. Most do not need anything but cleaning out the lint as most are self oiling. I still add a drop of oil in the bobbin area. I prefer a front loading bobbin like Kenny has. The computer machines have drop in plastic bobbins. While it is easy to see the bobbin, they tend to be too finicky and the drop in bobbins tend to bounce around sometimes for who knows what reason? I have had those drop in bobbins jam and the needle penetrate the plastic bobbin case making it impossible to reuse the bobbin case as it make a horrible sound due to the puncture from the needle. I have even sanded the case without success and had to purchase 2 new bobbin cases and they weren't cheap! I am so careful when sewing so I don't know why or what is causing the machine to jam, but it has happened too many times, although the bobbin case doesn't always get punctured. I got rid of one new machine because I wasn't going to deal with a finicky machine, only to find it happened with another new machine that was a different brand. This machine sews beautifully and I as careful as I am, it happens. I mainly use this machine for the blanket stitch when doing appliqué. I think those drop in plastic bobbins are part of the problem. I love the metal class 15 bobbins that fit several of my machines. Metal bobbins hold more thread and I never have an issue with them or the bobbin cases made of metal. My straight stitch only Brother Sewing Machine that I used all the time only lasted 13 years of nearly daily sewing! I paid more than 8 times more for that machine in 2008 than I did for the vintage Kenny in 2022. I will only buy vintage machines now. I only wish I knew how great they were overall decades ago! I found 2 more vintage machines last year too: A Necchi made in Italy and a Singer, also one of the last ones made in the factory Singer had in Italy. I love them all. Although the Necchi weighs a ton!!! At least the Kenmore is more manageable in lifting to clean it. I need help with the Necchi. The Necchi is older than I am, and has many more years of life left in her! All three of those vintage machines together cost less than one low-end computerized machine today and they will all be running when that computer machine conks out. I did have a back-up Juki that I got new in case my Brother was in the shop, but never dreamed the Brother would completely die on me! Well that Juki is about half the life of the Brother right now, so if it only lasts a few more years, I will have my vintage machines still to sew on.
ReplyDeleteInteresting observations about the supposed convenience of drop in bobbins. I was somewhat envious of that setup but can now be grateful (again) for what I have Never would have thought! Thanks too, for the info re: maintenance on a modern machine.
DeleteBy the way, I'm thinking you can turn this lengthy comment into a blog post of your own if you add some photos!