|
|
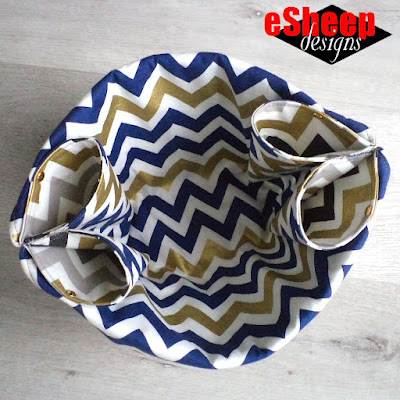
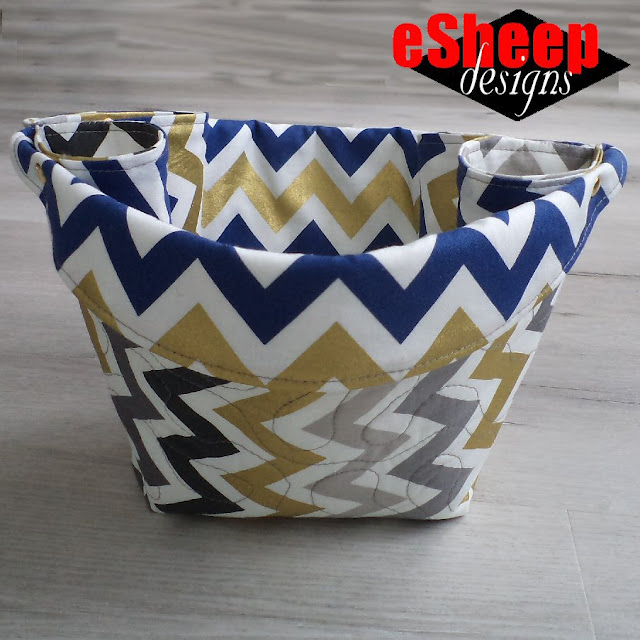
View of the interior of my new basket... |
Last week, I previewed today's project by running a "clip show" of past projects I've
done that started with a circle. The variety represented by that list
surprised me.
Generally speaking, I love sewing projects that start off simply and then get transformed in unexpected ways. Most projects that start with a circle grab my attention in that sense.
I also love origami, so to find a project that starts off with a circle and
is somewhat origami-ish, well, how could I resist? (And aren't you
happy that I couldn't resist, so that I could have a topic for a blog
post??)

All kidding aside, I was drawn to this project by the opportunity to do my
own thing with it. (Sort of like how I made the
magic box pouch
my own.) So while I give full credit to Ae PooiM on YouTube for her tutorial (search for
New idea!.. Make a Basket from a piece of circular cloth) from
August 3, 2021, I did make several changes to her version in arriving at
the basket shown here, which I think has its own charm.

|
| Quilted and riveted... |
For one thing, it's quilted. And for another, it's finished off with
rivets. I also wanted it to be bigger, so I cut my fabric circles to 20"
in diameter instead of the stated 45cm (which is under 18") in the video.
(In fact, I will provide my adjusted measurements in old fashioned
imperial for those of you still stuck in the dark ages. ಠ‿ಠ)
|
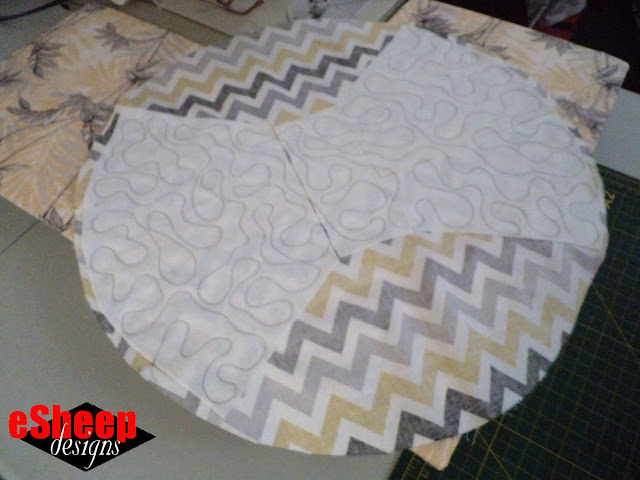
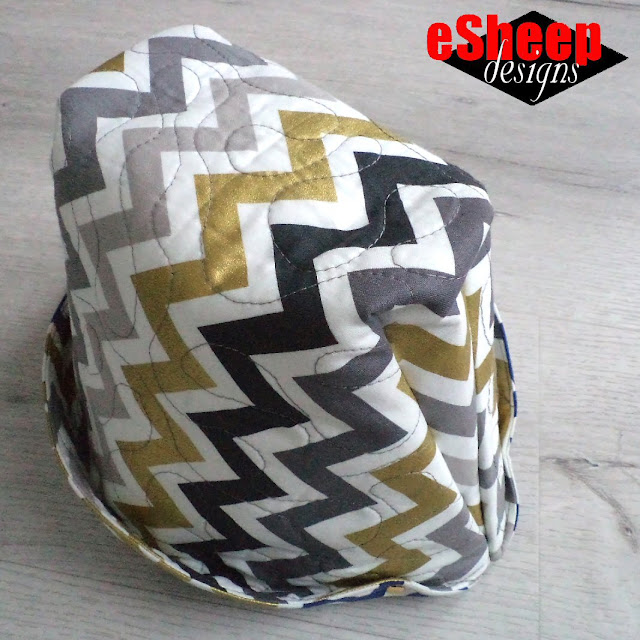
| Only a portion of the (exterior side) circle is quilted... |
While I encourage experimenting with patterns to make them your own, I
will always remind that it takes planning to be able to do so
successfully. After I'd watched this video a couple of times, it occurred
to me that quilting just the exterior front and back would be relatively
easy if I established what the divisions were for the cone shaped pockets
before sewing.
As in, the area not used for the pockets would end up being the front,
back and base of the basket. This part of the exterior side would then be
interfaced with some fusible fleece and quilted. (Why not quilt the whole
thing? Those little cone pockets would get too thick to handle.)
Don't know if you can see it clearly, but the fusible fleece in the
quilted area was pieced together from large scraps left over from
my Christmas table topper project. (I don't know about you, but I hate to waste interfacing!)
|
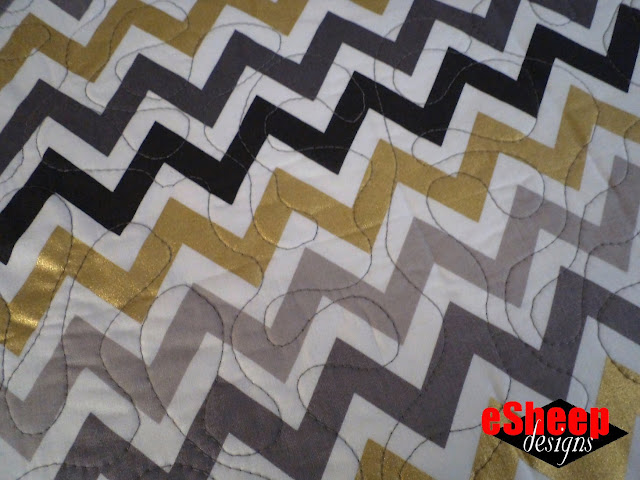
| This was one continuous free motion squiggle... |
I hadn't done any free motion quilting in quite some time — and therefore
will likely never get good at it — so I gladly welcomed this opportunity to
practice. I will admit, however, that I did not use my
free motion quilting foot; it had seriously been a while since I used it and I didn't trust that I'd
be able to do it well enough over such a large area. By using a regular
presser foot, however, I wasn't able to make small movements, so my quilting
is just a series of big squiggles.
But at least it was done in one continuous stretch of stitching, with only
one small hiccup (which I can't even find anymore on the finished item).
Watch live classes for FREE at CreativeLive!

[affiliate link]
|
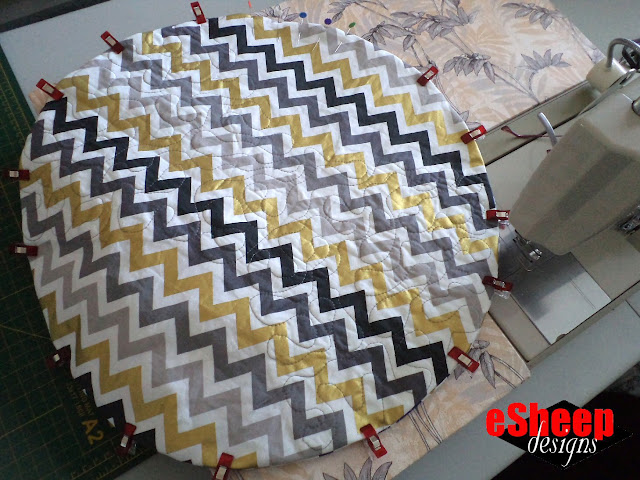
| First project using my new extension table! |
The DIY extension table performed wonderfully in its first real use. I felt in
total control of the large piece that I was quilting, able to swing it
back and forth with no dragging issues at all.

This project is actually a very "simple sew", except when you get near
the end and are required to sew the inside edge of the cones to the
outside edge of the basket (where the four clips are in the photo
below). Just from watching the video, I knew it would be a challenge to
get "in there" with my sewing machine.

|
| Preparing to finish off the pockets in a different way... |
When I got to this point, I decided to do a combination of hand sewing
and rivets to secure those pockets. (The clips holding the two pairs of
cones together is where I hand sewed; the tutorial leaves them
separated.)
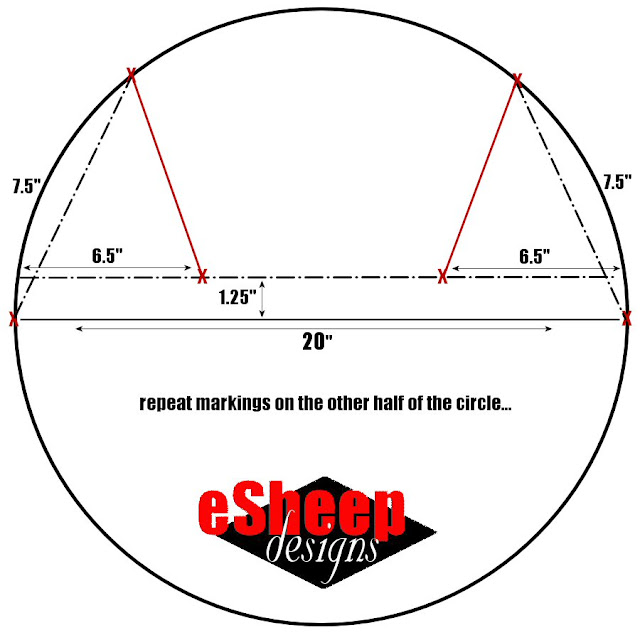
Now, back to my promise to provide you with some imperial measurements,
refer to the following diagram if you want to make my version of this
project.
I found that it was quite unnecessary to draw most of the lines that you
see. All you need to make are the markings that I've indicated in red (on
each half of the circle, of course); i.e., the six "X"s and the two
diagonal lines joining a couple of those "X"s. Those will actually end up
being sewing lines.
For quilting purposes, the area in gray below is what you need to cut for
fusible fleece. Fuse it onto the exterior fabric and quilt as desired.
(Note that whenever you quilt something, it will shrink a bit. To deal
with this, you may need to adjust the other circle of fabric to make it
match when you sew them together later.)

|
| Template for fusible fleece... |
Some kind of Vilene interfacing was used in the video for the
exterior fabric. I decided to use my supply of Decor Bond for extra
firmness. However, fused Decor Bond tends to wrinkle and crease
when handled excessively (like when you turn something right side out), so
if you choose to use it, do what I do and fuse it after turning. (I
gave instructions for how to do this in my
Collapsible Christmas Tree
tutorial.)
Finished size is about 9" in "diameter" across the top, and about 6" tall.
The base is approximately 3" x 6". For me, it's a nice size that's not too
large and not too small.
Installing the rivets took a bit of pounding, as there are two quilted
layers to go through, plus the pocket. All went well, however, with
the largest rivets from my rivet kit being just the right size for the job.

The fabrics used here are two selections from a purchase made five
years ago from old Craftsy. They are part of a collection
designed in 2013 by Ann Kelle called
Remix Metallic for Robert Kaufman. My decision to go
with a 20" circle meant that I couldn't use a fat quarter; these are
some of my (relatively rare supply of) complete yardage fabrics.

|
| Side view... |
That said, I really like the gold toned accent on these; definitely
adds a touch of elegance.
Oh, and for what purpose do you think I'm using this origami-ish
basket? Might you recall me stating that hubby started an indoor
garden this winter? (For which I got him a book this past
Christmas.) Well, when I'm called upon to lend a hand with said garden, I take this with me.

|
| It's my gardening bag! |
It fits right inside the top of this sturdy paper bag. The bag itself carries discards and trimmings back home to our organic waste bin. The fabric basket on top is for any actual harvests. In the above
photo, there are a couple of stalks of rapini (one of which flowered
way too quickly) and some carrots. I've used the little cone pockets to carry sprigs of basil, green onions and arugula.
It wasn't my intention to make the basket for this purpose, but it's always nice to
find a purpose for whatever I make!



I love that little basket. I'd like to make one to take to my patchwork group to use as a thread catcher and to sit various tools and things.
ReplyDeleteExcellent use for it! I hope your basket turns out to be just what you need.
Delete