That's a whole other story that may not merit any further attention here. What
it has to do with today's post, however, is that it came with some red window
coverings that he proclaimed to be too dark.
Therefore — of course — my first assignment was to come up with a brighter
solution. (
That story will likely show up as a
future blog post.)
When I looked closely at the fabric from the unwanted curtain panels and
valances, it occurred to me that it seemed rather Christmas-y. The print
features pine cones and pine tree tips.

|
|
Sorta Christmas-y, right?
|
I don't have any holiday themed fabric, so this was a good find for
repurposing. Coincidentally, around the same time, a festive table topper
project caught my eye on
YouTube. It came from
a crafter whose projects I highlighted
a few months ago.

|
|
Image courtesy of Estadistica Datos del Mundo...
|
To provide the contrast fabric for the topper, I looked to my stash and
pulled out a golden brown selection that came from Craftsy's Boundless line, called DECOdent.
By the way, I like that this is a six-pointed star. It can mean whatever
you want it to mean.

The contrast fabric needed to be made into bias strips, which I
immediately proceeded to do with my "
start with a single square" method. The 18" square yielded approximately twelve feet of 2" wide
bias tape.

|
|
Making twelve feet of a continuous bias strip...
|
Unfortunately, per the YouTube tutorial, I actually needed
4cm wide bias tape. Nothing I could do about it after it was
already cut; I would just have to be prepared to make changes later if it
affected anything.
The project consists of making six diamond shaped sections and then
joining them together. The diamonds measure approximately 15.75" tall and
9.5" wide (converted from metric). Given that they are diamonds, if
cutting from a regular piece of fabric, a "stack and stagger" method would
be best so as not to waste fabric.

|
|
Cutting my "diamonds"...
|
In my case, I had to fit them onto pieces of a certain size, so the best I
could do was cut them one at a time, linearly. I did this by cutting
rectangles measuring 15.75" x 9.5", folding them into quarters and then
slicing off the outside triangles. (This method results in twenty-four
scrap triangles, so again, a more efficient way of fabric allocation would
be preferred when using traditional fabric.)

|
|
One diamond finished...
|
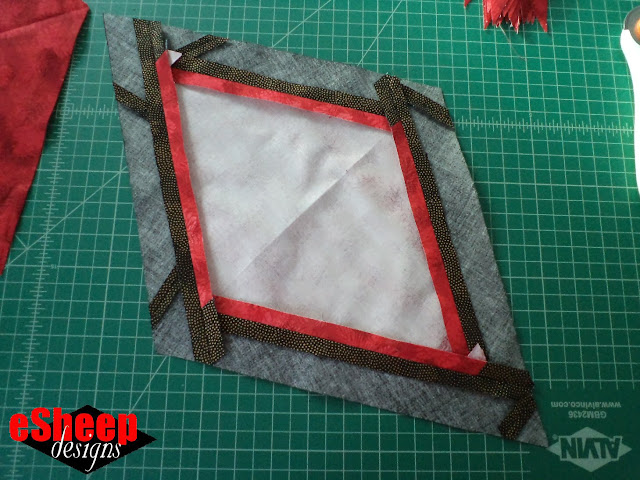
After trimming one diamond with the bias strip, it became obvious that I'd
need more than twelve feet of bias.

|
| Back view... |
As you get into the routine of this, you'll see that there's an optimal
way of proceeding from edge to edge regarding the placement of the bias
strip. It's not wrong otherwise, but you'll end up wasting more if you
don't pay attention.

|
|
Optimal way of placing the next bias strip...
|
As it turned out, the twelve feet of bias managed to trim three diamonds
and one side of a fourth.
Joining the six diamonds seemed to be a fairly straight forward process
until I attempted it and then didn't know exactly where to stop sewing in
the centre. In retrospect, I believe you need to leave an amount equal to
your chosen seam allowance unsewn when you get to the middle.

|
|
A weird little fold...
|
As it happened, I ended up with a tiny glitch in the middle of it all, but
given my fabric choice, no one is ever going to notice it. (Wanna know
another reason why no one is ever going to notice it? I decided to make
use of my Kenmore's fancy stitching cams for once. Decorative stitching
now hides the middle... but more on that later.)
Recall that my bias strip was cut 2" wide instead of 4cm? Once the
diamonds were sewn together, the entire piece wouldn't lie flat.

|
|
When unpinned, this will not lie flat...
|
I pinned the marked areas in the photo above to show where I'd need to
increase the seams in those six places in order to get it to lie flat.

|
|
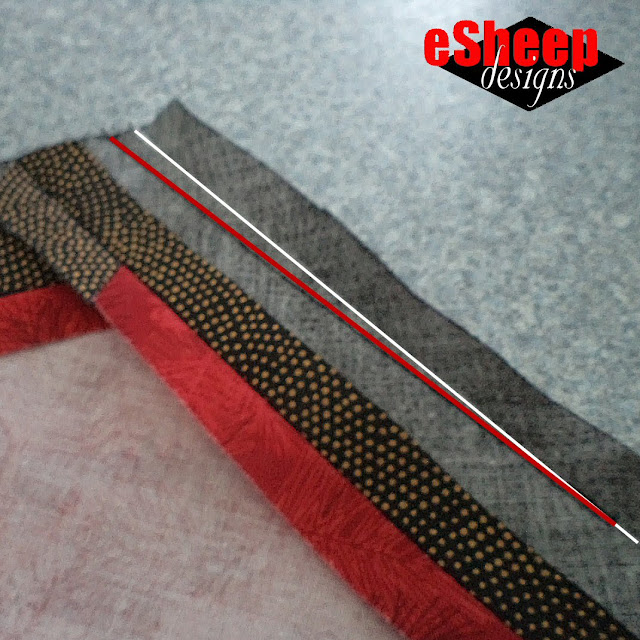
Adding a gradual increase to the seam allowance...
|
After a bit of fiddling, I marked and sewed along a 6" line deviating from
the original seam allowance (the white line above), making it
progressively wider. Then I unpicked the unwanted stitches along the
original seams, pressed them out again and here it is:

|
| Problem fixed! |
Ta da! Lies flat. (At least it does once it's interfaced with some fusible
fleece.)

|
|
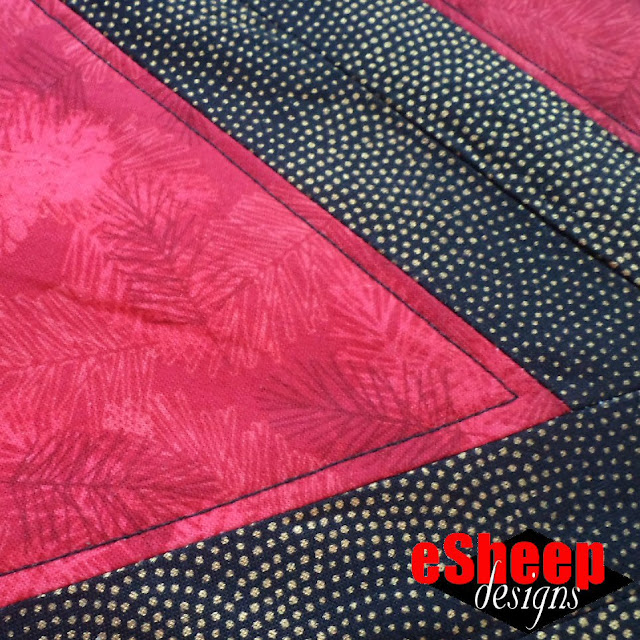
Adding a line of black stitching around the inside perimeter of
each diamond...
|
After the application of fusible fleece, instead of straight away putting
a backing on it and finishing it per the video, I wanted to add some simple
quilting.
Check out 2 MONTHS of FREE crafty classes at Creativebug!
 [affiliate link]
In a project like this, it's easy to keep going and not know when to
stop. (My other half kept saying at various points, "It's fine the way it
is!") However, it's a fairly large piece and with relatively "quiet"
fabrics, embellishments
do help to kick it up a notch.

|
|
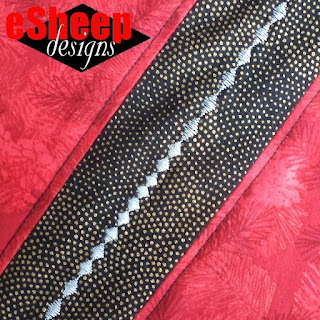
Decorative stitching adds interest...
|
I don't think I've ever used the
design cams that came with my Kenmore — never had a reason to, I guess — so I didn't hesitate to take
advantage of this rare opportunity.

|
|
Tighter stitching from higher speed?
|
The only difficulty I had was to keep a steady pace while trying to sew
straight. I had a seam line to follow, but the gold dotted brown fabric
occasionally made my eyes go buggy, leading me astray.
I tested the stitching on some scraps before starting, but my speed must
have varied a bit on the first go-around; the pattern is definitely more
compact for a couple of inches here. (In the manual, the stitch is
illustrated as looking like the longer pattern.)
I know I was going slow for the most part, because my foot pedal started
to heat up. It does that whenever I use a zig-zag stitch for an extended
period of time too.

|
|
Done... for now ;-)
|
After adding the back fabric, I chose not to topstitch around the
edge and instead used some
Stitch Witchery to seal up the turning
gap. For now, this is how the main side looks. I'm still thinking about
doing something with the back side to give this some
reversible value.
 |
| Decorating our coffee table... (with my adjustments, this measures 3' across, tip to tip) |
But no rush.
To close off with a holiday gift for you, may I suggest that you visit
Bernina's "other" blog. They've produced a sewing themed advent calendar that's totally fun to
open up. (The link I've just given you is to one of my old posts about their blog; click on any of the projects at the bottom of it and you'll get to their site.)
On that note, may you have a stress-free, relaxing Christmas, or whatever it is that you may celebrate. (And I sincerely hope you're not spending it at an airport!)


Have a blessed holiday. Our plans were altered due to extreme cold leading to frozen pipes and intermittent electricity at my daughter's home. So we packed up all the food, toys and dogs and brought them back to our house. No big tree but lots of food, games and visiting...just at an unintended location. The twins are 7yo so fairly easily entertained. Pumpkin pie was the only request by one child. Check. Baking cookies is requested by the other so that will be tomorrow.
ReplyDeleteI too feel sorry for air travelers. We gave that up about 30 years ago, choosing summer visits instead. /KrisH
Hello, I hope you had a wonderful Christmas. I've loved reading your posts since I found them and feel that you deserve a great Christmas - and 2023 for that matter.
ReplyDeleteMany thanks for the kind words and for saying that I "deserve" a great Christmas (and a corresponding new year). Let's just say that I'm always grateful for what I have and try to earn what I get. Best wishes to you in return.
Delete