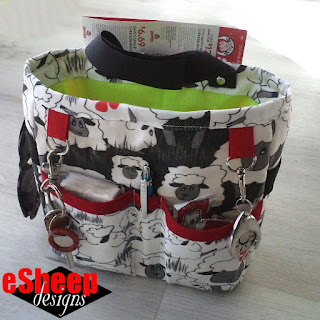
|
|
Modified Sew4Home Car Caddy & Waste Bin... |
During these trips, we usually stop for fast food along the way. Every time,
I've had to fashion some sort of waste container with a plastic or paper bag
for discarded packaging or even chicken bones.
How many times have I said to myself — usually as I attempt to hang and prop
open a plastic bag from the glove box door — why don't I make myself a fabric
trash bin? Many times. Many, many times.
And yet for whatever reason, it never got done. (Part of it might be that I
never came across the right project.)
Until now, when — ironically enough — we've sold our vacation home and won't be doing those long drives on a semi-regular basis any more.

|
| Back view... |
This combo car caddy and waste bin was made just in time for our last
trip out. It's a modified version of a project from Sew4Home, searchable on their site via that name.

|
| image courtesy of Sew4Home... |
In terms of changing the outward appearance, I did away with a snap secured
flap pocket on the back and replaced it with a simple open top patch pocket. I
didn't see myself needing to keep money in this, especially since this caddy
isn't likely to stay in any of our vehicles full time.
I also made the two front bellows pockets differently; different from the
pattern and different from each other; one is bigger.
Because I wanted the caddy to hang from specific spots in both our vehicles
(and not off a gear shift), the single strap as designed was omitted entirely.
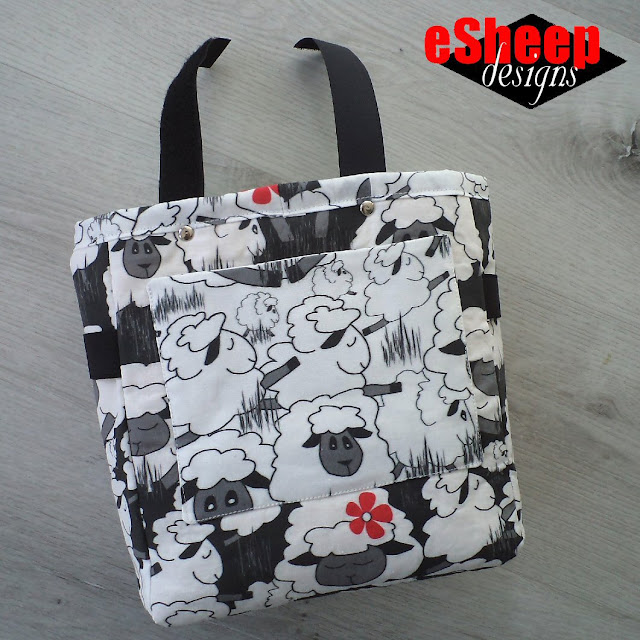
Instead, I used separate sections of hook and loop tape — attached to the back
with a couple of
rivets —to create a handle that can detach from itself.
Oh, and due to my "square shaped" fabric constraints (I used a couple of
selections from my
Just Sheep
collection from Spoonflower), I made the entire bin an inch shorter
(eight instead of nine).
By way of supplies, I do not have — and don't ever anticipate having —
fusible foam at my disposal. What I do have are remnants from a
section of an acrylic blanket that I trimmed up to fit in a duvet cover for my mother.
|
| Velcro handle that comes apart... |
As designed, the front pockets were to be trimmed with something called
foldover elastic from Dritz. Had none of that either, so I just went with bias tape.

|
| What do you think of the lime green interior?? |
I did, however, have the elastic for the side panels (from one of my
$1 belts), red grosgrain ribbon for the hardware attachments, as well as a "D" ring
and lobster clasp. I also had a supply of ripstop nylon for the interior...
albeit in an eye-popping shade of lime green!

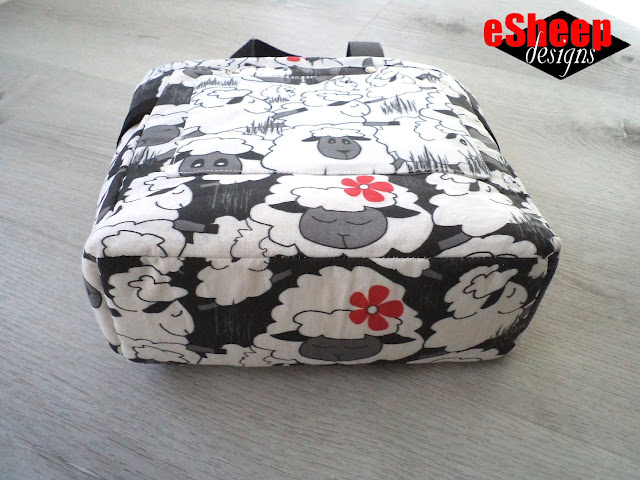
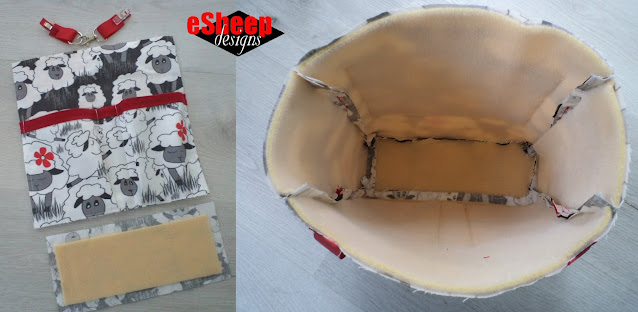
I want to draw your attention to the base of this item. The bottom of this rectangular shaped container has defined corners which are not rounded, nor boxed in the conventional way.
 |
| image courtesy of Sew4Home... |
Sew4Home offers an extremely helpful tutorial for how to sew this type of inset base to a four sided "tube". (The link to the tutorial can be found on the same page as the instructions for this caddy project, or you can search for it on their site via the title shown in the graphic at right.)
It was definitely a lesson learned for me, and worth a read if you're
interested in upping your sewing skills. If you're a regular reader here, you
may know that I like to take on projects that offer something
different, even if they're relatively simple. There's nothing otherwise
difficult about this caddy/bin, but I'd never sewn in a base like this before.
|
| View of the rectangular base... |
Further on the topic, I applied another recent lesson learned when I sewed the short side seams of the lining base to the short side seams of the exterior base. The result is that once it's turned right side out and the top edge is sewn down, the lining will never, ever pop out. (I used the same technique when I made my duffle; thank you to various YouTubers for that lesson.)
|
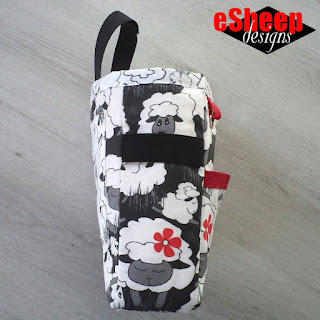
| Side view... |
As I said above, the sections of wide black elastic came from a belt that was
purchased a few years ago at a discount shop for one measly dollar. This
particular belt has now had its parts repurposed in three projects: the
elastic on this caddy, the connector links on my
Frankenpurse
and the buckle on the Oriole bag.
Regardless of what economic era you care to name, that definitely
qualifies as stretching a dollar!
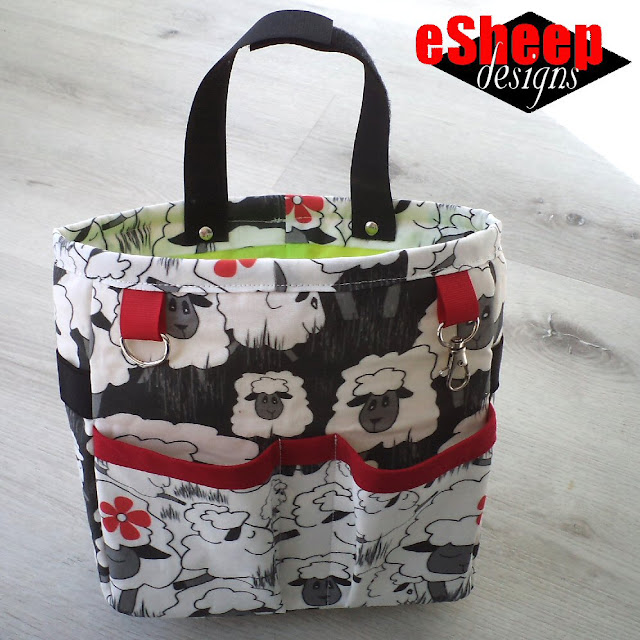
|
| A relatively quick sew.... |
As you may have suspected, dealing with the substitution of interfacing took up most of my time on this project. Without the fusibility factor, I was left to glue small sections at a time and wait for them to dry before pressing to remove "glue bubbles".
The sewing part was fairly easy and went relatively quickly, even with having
to adjust for my fabric. For instance, the top facing that joins the lining to
the exterior called for a 22" piece. Since I was dealing with fabric that only
measured 18" x 18", I sewed together sections to meet the requirement.

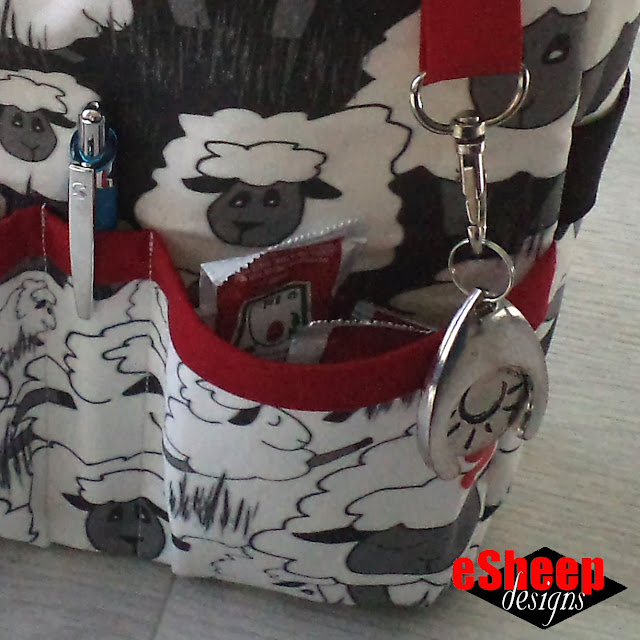
We once went out to our vacation home and forgot to bring the keys. Not to say that having a ring on which to hook them would have prevented that from happening, but it might have helped.
 |
| One of two ways to keep keys handy... |
Curious as to how we use the pockets? I stuffed a small packet of tissues for the photo shoot, but in actual use, I keep my phone and some napkins in this one.
The back one is for fast food
coupons. (Now you can see why I didn't want a snap/flap closed pocket.)

|
| Back pocket is perfect for fast food coupons! |
On the topic of fast food, whenever we buy anything that comes with fries, my other half is always quick to remind me, "Get ten ketchups!" (Lucky I don't want ketchup myself or it would be an embarrassing ask at the counter... and it's quite literally always me going in to do the purchasing.)
|
| A ketchup pocket! |
Therefore the bigger bellows pocket is intended for the scads of ketchup packs
required to keep hubby happy. (Oooh... does anyone else hear Wilma Flintstone
singing??)



This is cute and so useful, too. I use "Feedly" as my reader and under your blog for the day it says, "no content". Hmmmm, any ideas?
ReplyDeleteI really like this car 'dopp kit'. (It's so much more than a waste bin.) It is unfortunate that they removed the cigarette lighter knobs from cars. They really were handy for hanging trash bags! (Never used the lighter, lol.) Seriously. I looked at my car's cockpit and I couldn't see a way to hang the bag - except by the glove compartment... which contains no gloves...
ReplyDeleteFunny how our vehicle interiors are always less than what we would like them to be.
DeleteRe: the lighter knob, I remember when we picked up one of my dad's new vehicles back in the 70s, there was actually a plastic waste bag hanging from it. Why did car designers think that our need to hold trash would disappear when we quit smoking??
Today you can use the pre-pasted wall hangers & they work just perfect!
DeleteOf course, there's an idea! I'm guessing it's possible to buy them in colours that will match the interior of your car, too. Thanks for the input.
Delete