
|
|
A new home for my Kobo Mini... |
A couple of weeks ago, I left you with some homework... to solve a problem of how to recreate
the "harness" part of my eReader case.
I guess you don't much like homework, since I received
bupkis for feedback.
But as I keep telling myself, that's no biggie. In most cases, if I waited
for input, I'd wait forever. As I'm fond of telling myself, I'm here for me,
not for you. ¬‿¬
I will survive. (I survived losing the third of the four pillars of my youth
yesterday so I am nothing if not resilient.) And of course, I managed to
finish my Kobo Mini slipcase without any help.
By the way, if there are any eReader enthusiasts among you, let me recommend
a site called BookBub. (For the sake of avoiding future broken links, I'm not providing an
active link to the site, but yes, bookbub.com will get you
there.) Aside from my local library, I've been getting my reading material
from them for several years now. They offer ebooks for various platforms,
some free, some at greatly discounted prices. Sign up with your preferences
and you'll receive a weekly list of curated titles.

|
| View without eReader... |
My middle of the night inspiration worked out pretty well and wasn't
complicated to execute. Once it came to me, it seemed obvious: what I needed
was to make the harness out of two pieces of Peltex.

The top half would be covered by fabric. It was cut with a smaller allowance
this time due to the fact that the frame itself is only about 1/2" wide at the
narrowest point (along the sides). At corners and crannies, I cut slits
towards the frame to allow the fabric to wrap smoothly.

|
| Fabric is glued because the fusible side of the Peltex is facing up... |
With the Peltex fusible side exposed, I was able to fuse some of the
fabric to the back of the frame. This is what it looks like after a good press
with the iron.

|
| Top half of the frame completed... |
Always a good idea to check for sizing along the way whenever you make
anything. (Although the "Kobo" logo doesn't show as well as with the original
case, it wasn't going to be an issue.)
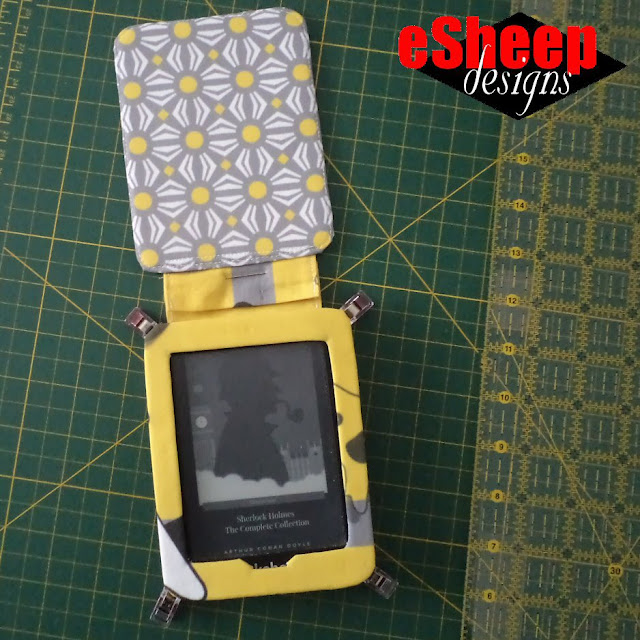
|
| Checking for correct sizing... |
With reassurance that I was on the right track, it was time to work on the
bottom half of the frame. For it, I sewed up four fabric pieces and then
stitched them carefully to the extreme edge of the frame, on the fusible side
of the Peltex.
[If you're wondering why I am doing things so close to the edge, it's because
of my personal fabric constraints. The pieces I had were only so wide; folded
in half they were just barely able to meet my needs here. Obviously, if you
were to do this, start with fabric wide enough so that you can at least sew
these seams closer to the middle of the frame.]
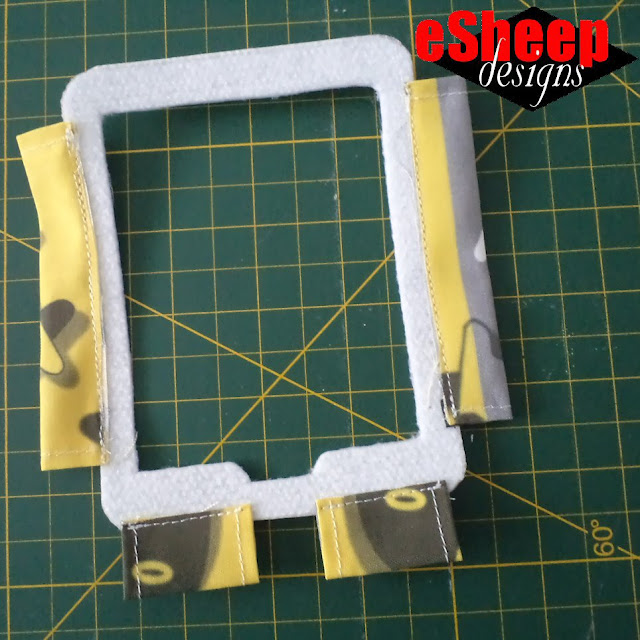
|
| This will be the bottom half of the frame... |
The two frames were then stacked and glued/fused together. Once dried, the
next step was to sew the ends of those fabric extensions to the bottom half of
the case.
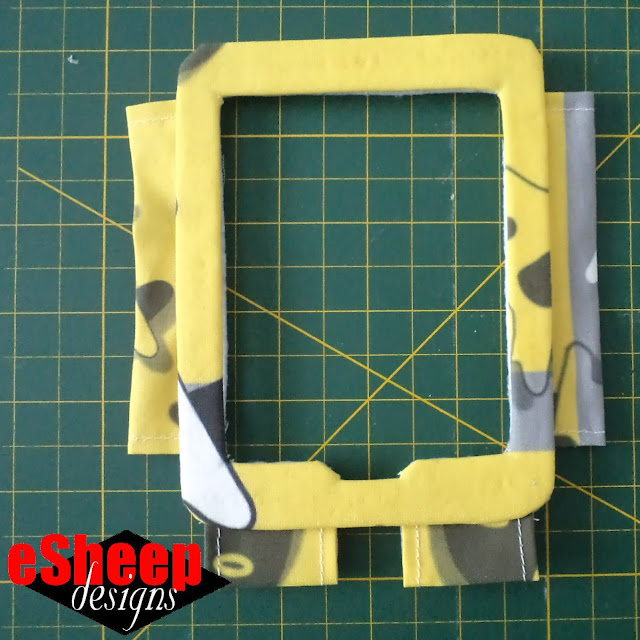
|
| The "harness" is done! |
Speaking of bottom half of the case, I didn't take photos of it being put
together (it would be pretty much the same as how I made the top half as
described in my previous post) but one thing that did create a bump in the
road was when I decided that the spine piece would be a bit too narrow.
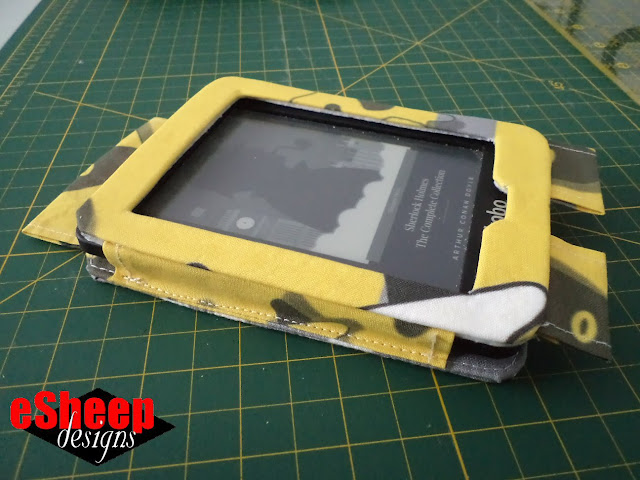
|
| The side support pieces are sewn to the base piece... |
With this two part harness adding thickness that I didn't originally
anticipate, it was just iffy to contemplate sewing the other end of the spine
to the bottom half of the case. Ideally, you always want sufficient
fabric inside a seam, otherwise it could easily tear out. In this situation,
either there wasn't going to be enough fabric or — if I forced it — the cover
of the case would end up not being able to close smoothly... not to mention
that there likely wouldn't be sufficient clearance to hold the stylus.
Long story short, I attached a second piece of fabric to the bottom half of
the case and eventually hand sewed the two together. (In the photo above where
I check for sizing, you can see that there is a pin holding the two pieces
together.)

|
| Here's the second piece of "spine" fabric... |
I determined that sewing the two side fabric pieces first would be the best
way to go. I was able to squish everything down to sew the bottom two pieces
afterwards.

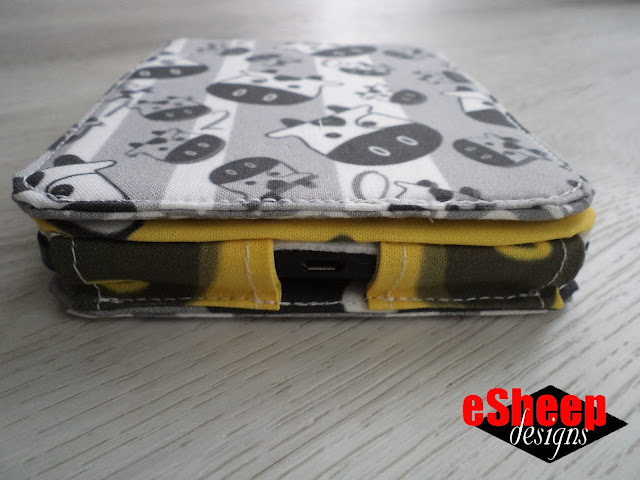
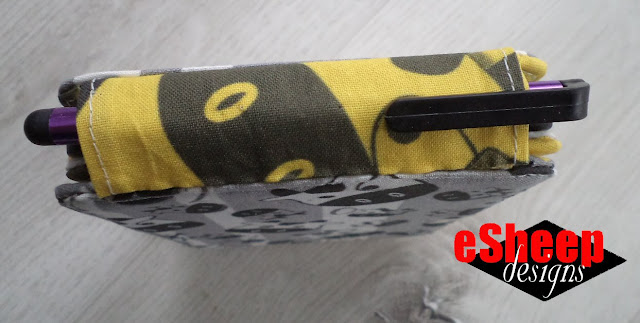
Here are some more photos of the completed case.
|
| View of the bottom... |
The gap at the bottom is to facilitate access to the charging port.
|
| View of the top... |
If you're wondering why I opted to change the orientation of the case (notepad
style instead of book style), it's because in the past, I've had the device
slip out of the top. This format prevents that from happening.

|
| Side view... |
In any event, the fit of the harness is perfect and I probably wouldn't have
the same slippage problem even if I had replicated the original book style.
The eReader is firmly held in place and won't come out unless I push it out.

|
| Open front and back view... |
This yellow and gray fabric (which comes in two sizes as you can see) is called Feel Like Playing Jacks and can be found in this Spoonflower collection.

If you've had the urge to make something like this for your eReader, I hope this example gives you encouragement to try.

|
| View of back... |
While it helps to have something original to compare against, the project should still be doable as long as you take good measurements and are precise with cutting.


To prevent bupkis again, let me just tell you that here at the bottom of Africa is someone who love your blog and all your projects... Inspiration is rife on your blog! Thanks for being resilient! :D Please don't stop writing!
ReplyDeleteWow — all the way from the tip of Africa! I am honoured by your feedback and will do my best to meet your expectations. Thank you!
Delete😊🌷💟
DeleteThank you so much for the bang on emoticons!
DeleteI plead bupkis.
ReplyDeleteBut in my defense... I need to know something (anything?) about a subject to comment on it. (Or is that un-American of me, haha?) I have never held an e-reader in my hands and know nothing about their cases or harnesses. I rest my case...
But great job you! (And I thoroughly enjoy the thought process/ problem solving skills.)
Please understand — and this goes for everyone reading and responding in future — I'm not fishing for compliments. I've said before that the hardest comments to respond to are those that simply say "hey that's great". Generally speaking, they boost the ego but don't do much otherwise. I was honestly looking for any alternatives to the solution that may have escaped me.
DeleteThat said, I'll let you off on this round, because I know you really do care. ;-) Oh, and I wouldn't comment on that "un-American" thought with a fifty foot pole!
Yes. I actually do care. I enjoy figuring out people's thought processes because it comes in mighty handy when I encounter my own problems. (In my life I've discovered many different types of people, most notably those who think they can, and do... and the others. Who could.)
DeleteAnd I have a fifty-one foot pole, lol...
DeleteHa! Let me also add that I know you're smart too. And I don't mean in that Homer Simpson S-M-R-T way. ;-)
DeleteHi Rochelle, sorry about the bupkis, but I am desperately trying to catch up on email. I have a new computer and have been trying to take everything off my old one (Windows 7) and add to the new one (Windows 10). I still have some hair left LOL. Also, I have been trying to re-cover my mobile phone case but after seeing this post, I may scrap that and use your method and make a new one. Thank you so much, hugs, Jenny
ReplyDeleteThank you so much in return, Jenny, for the lovely sentiments. I've done that Win 7 to 10 migration myself, albeit at least four years ago. It's time consuming (and hair tearing!), but be thankful that you still have a working computer to take your stuff from; I didn't.
DeleteHopefully your technology challenges will abate soon so that you can focus on sewing again. (Oh, and no apologies required for the bupkis!)