|
| Easy sew fabric storage crate... |
Three years ago, I came across this way of making three dimensional objects out of fabric, glue and Peltex.
I subsequently used the same method when I drafted up a pattern for a
vase. Then it was used to make a couple of boxes, this
match box
and this
exploding sewing box.

Usually, the best thing about making something using this method is that you don't need to account for seam allowances. Just measure the length and width of the individual pieces and you're set for both fabrics ("lining" and exterior) and the Peltex.
This past Christmas, I turned to the technique again to make my other half a
"storage crate" to help corral some toiletries in his bathroom.

|
| ... with a wipe clean interior... |
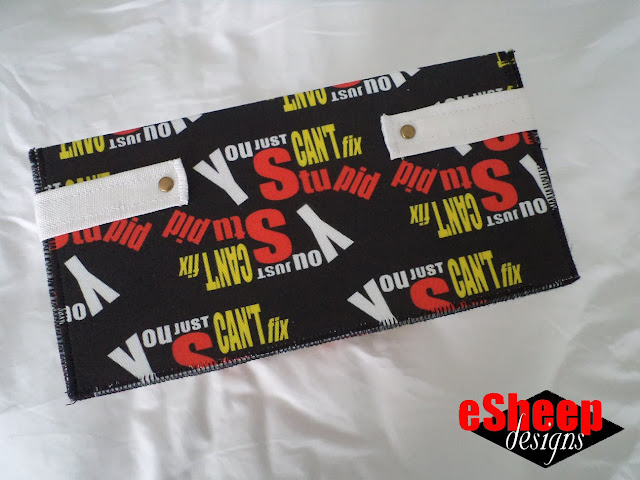
He had been using an old mandarin orange (cardboard) crate for this purpose, so I
just took the measurements from it and made him a same sized box out of his
You Just Can't Fix Stupid
fabric. (It was a fat quarter of lightweight cotton twill left over from the
neck pillow project
back in 2019.)

Usually, the best thing about making something using this method is that you don't need to account for seam allowances. Just measure the length and width of the individual pieces and you're set for both fabrics ("lining" and exterior) and the Peltex.
For this particular project, however, I wanted the top of the box to have a
cleaner finish than the usual rough edge, so my solution was to sew together
the exterior and lining fabrics and wrap it around the
Peltex piece.
 |
| IKEA pet bed cushion cover... |
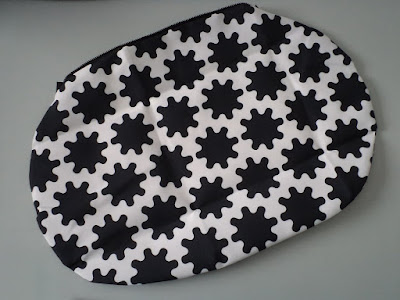
For the lining, I had this IKEA Lurvig pet bed cover that I
snagged for a few dollars a couple of years ago (it yielded this water
resistant poly fabric and a long black zipper). I figured if anything
spilled on the inside, this material would be easy to wipe clean.
Hubby's original cardboard box was 12" long x 8" wide x 4" high. This means
the box base is 12" x 8", the end panels are 8" x 4" high and the side
panels are 12" x 4".

|
| The five pieces needed to make this crate... |
For the exterior fabric, I added two inches to the height to accommodate the
wrap-around and therefore cut them to 8" x 6" (x 2, for the ends) and 12" x
6" (x 2, for the sides).
For the lining fabric, I cut them to 8" x 2.75" (x 2, for the ends) and 12"
x 2.75" (x 2, for the sides).

|
| Interior view... |
The extra .75" takes care of the eventual 1/4" seam allowance and the fact
that the whole piece needs to accommodate being wrapped around the
Peltex. (Anything that overhangs can be trimmed off later.)
Order of construction is:
1) cut fabric,2) seam fabric pieces,3) fuse exterior fabric to Peltex,4) glue interior fabric to back of Peltex,5) finish the short edges of each side panel with a zigzag stitch,6) attach the side panels to the base with a tight zigzag stitch, and7) finish corners with fabric bands and rivets or hand sew them together.
I chose to fuse the exterior fabric to the Peltex, primarily because
it's a strong cotton and I can blast the heat on it. (I would have had to be
more careful with the poly.)
In any case, a good fabric glue works just fine, especially if you only
have non-fusible Peltex at your disposal.
As stated before, I sewed the two fabric pieces with a 1/4" seam allowance
and then finger pressed the resulting seam as shown above.
Next, zigzag stitch the short edges of all four side panels to provide
protection and a consistent finish.

|
| Finish the short (corner) edges with a zigzag stitch... |
Butt each side panel up against the base piece and zigzag stitch them
together. Here is what it should look like after you're done.

|
| The box is essentially done at this point... |
I won't bother describing this sewing process in any great detail; check out
my
match box tutorial
(the "inner box" of that project is the exact same as this) if you need more
information.
When I started the project, my intent was to hand sew the corners in the same
way as for the match box. Shortly after finishing the edges of those
corners, however, the idea to secure them with a contrasting band of fabric
and rivets came to mind, so I ran with it.

|
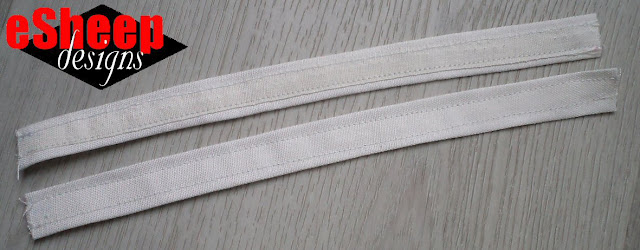
| Strips of leftover fabric (about 9" long) stitched up and ready to be cut in half... |
The strips of fabric in this case came off the border of the
Spoonflower
fat quarter. I sewed them together as efficiently as possible to hide the
raw edges and then zigzagged the ends. (If you have any twill tape, that
will do the job nicely too.)

|
| Carefully punch holes in the fabric strips and the sides of the box... |
For the process involving the rivets, I punched holes at the ends
of the strips first and then used them to mark the position of the
required holes on the side panels. (The reason you see the strips clipped to
the panels was to keep track of which strip was used to mark the holes at
that particular location, because they weren't all exactly the same.)
Install the rivets when all the holes are done.

|
| A closer look at the finished corner attachments... |
If you can manage it (i.e., if you have
a rivet set), this contrasting finish is a nice looking alternative to the hand
sewn option.
Another way of finishing would be to use a combination of rivets and snap
fasteners, which would then allow the box to be stored flat when not in use.

All in all, I was quite happy with how this turned out. It took me a few days to make because I didn't want the other half to see what I was doing, but it's actually a very quick project to put together.
The bonus part is that you can use this technique to make a box of any size. Even a three-sided one...

|
| A triangular organizer... |
It's what I crafted out of the remnants a couple of weeks later. I only had
enough of my own fabric to do the sides; both of the bottom pieces are from
the IKEA material. (Dimensions of this are 8" x 2.75" deep.)

|
| A right angled triangular box... |
The right angled design makes it ideal to be put against a corner on a
counter.
Remember that the same technique allows you to make a lid for these too, if you want one.
(Follow the instructions for my
exploding box
project.)

|
| Ideal for corner placement... |
One feature that I briefly considered but ultimately didn't add
was a strip of elastic along the inside, sewn (or rivetted) down at
intervals to enable contents like skinny tubes or bottles to stay in place.


No comments:
Post a Comment
You have the power to brighten my day. Leave me a comment; I'd love to hear your thoughts... you can even remain ANONYMOUS! And rest assured that I acknowledge all comments, either here or via email. (That is, if you don't see a response from me here, I would have responded privately to the person.) Spam or generic comments with unrelated links, however, are promptly removed... and I may take appropriate action or report you to Google. Thanks for reading! (✿◠‿◠)