|
|
Make some selvage fabric... |
My preference is to fuse selvages onto medium weight interfacing like
Decor Bond. Once fused, edges can be sewn with zigzag stitching or
regular straight line stitching. For today's project, I added a layer of
fusible fleece to the back because I wanted to quilt it also.
As usual, for a quasi tutorial, I am assuming that you know how to
measure for what you need, as this is a "make it any size" type of project.
I've mentioned before that hubby has an indoor garden that keeps him busy in
the winter. (Which, by extension, keeps me busy as well, which also
partially answers the question of what I am going to do with some of my free
time going forward.) I wanted to keep some basil growing at home, so I made a
self-watering planter by repurposing a plastic Coffee-Mate creamer jug. (Products common to both sides of the border are often
sold in different containers; I'm pretty sure the 1.89 litre jug that I used
is a Canadian thing. In the absence of this, a two litre soda pop bottle –
which apparently is a thing in the US – will also work.)
While the concept is kind of neat – you slice the container in half and put
the top part into the bottom, adding a wick of some sort that allows for the
uptake of water when required – I didn't much like the look of the plastic jug
by itself, so I had a thought to wrap it in something nice.
I will say, however, that one of the reasons I chose not to add fabric to
the back is because this sits in the windowsill where sunlight will hit it.
If there is a patterned fabric on the back, the print will likely show
through.
Watch live classes for FREE at CreativeLive!

[affiliate link]
I ruminated for a time on how to finish this cozy. The first thing I tried was to sew together the two short ends so that it could just slip over the planter. Unfortunately, there wasn't enough material for this to happen easily and I figured that if the fit was too snug, well, I'd have a mess on my hands trying to put it on and remove it.
Getting the pieces sewn onto one end is fairly easy. Just stitch along the same sewing line as was used to secure the binding. (If you use appropriately coloured thread, the stitching should be somewhat invisible.)
Check out crafty classes at Creativebug!

[affiliate link]
Since I sort of flew by the seat of my pants with this, you may wonder if I had any specific plans for how to finish it when I originally measured the circumference. Yes indeed: I was going to sew a button on each side and use an elastic to hold the ends together.
I was able to use up some leftover binding for this, so that was satisfying. As you saw, the fusible fleece was pieced together from large remnants. It's always a cause for celebration when something can be made out of almost throwaway scrappy bits and pieces, and that's got to be the true charm of selvage projects.
Hence, the idea of a planter "cozy".

Since my first selvage project back in 2019, I've gradually accumulated more of them... enough to take on another project. A couple of years ago, I made a canister out of a piece of selvage fabric. In fact, it was this very same canister that made me think about using selvages to make this planter cozy.

Since my first selvage project back in 2019, I've gradually accumulated more of them... enough to take on another project. A couple of years ago, I made a canister out of a piece of selvage fabric. In fact, it was this very same canister that made me think about using selvages to make this planter cozy.
The first step is to measure the height and circumference of your planter;
mine was 5" high by 15" around. (If your planter does not have straight sides, I recommend you measure
with paper and make yourself a template*.) Cut a piece of medium weight fusible interfacing to your
required dimensions and then gather up your selvages.
[* Or, copy this link into your
browser and see if any of the templates there will work for you; it's a
tutorial from Spoonflower: https://blog.spoonflower.com/2023/09/19/fabric-flower-pot-cover/]

|
| Lay out and pin selvages to the interfacing... |
By the way, the edge along the other side of a full width piece of
fabric is also classified as selvage, so if your mixture is too much white
and not enough colour, you can use a strip from that side to punch it up.
My previous piece of selvage fabric had the selvages running horizontally; I
really like the look of a diagonal pattern, so I went for a herringbone sort
of effect here.

|
| A relaxing activity... |
I have previously laid out strips so that the raw edge of the fabric on one
strip is overlapped by the bound selvage edge of the adjacent strip. In this
case, I didn't bother; all of the strips are just right up against one
another. (People who have done a lot of selvage projects probably have a
preferred way of doing this, but it's not like there are rules.)
Once the strips are laid out, it's time to activate the fusible interfacing
and then trim back the overhangs. Then – if you want to do some quilting –
add some fusible fleece to the back as well. (I used scraps.)

|
| Fuse on all required interfacing... |
I used red thread to sew a regular straight stitch over most of the edges of
the strips, then I did some free motion quilting in white thread over the
entire surface.

|
| Sewn and quilted... |
I chose to leave the back as is, because this is just a planter cozy. If the
unfinished look is just not your thing, you can add a layer of fabric before
continuing.

|
| Growth is happening! |
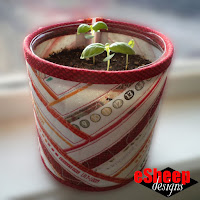
And in fact, here is a more recent photo of the planter sitting in a
windowsill, with sunlight shining through the container and fabric.

I ruminated for a time on how to finish this cozy. The first thing I tried was to sew together the two short ends so that it could just slip over the planter. Unfortunately, there wasn't enough material for this to happen easily and I figured that if the fit was too snug, well, I'd have a mess on my hands trying to put it on and remove it.

|
| Edges bound... |
But that is definitely one way to approach this if you're considering the
project. Add a half inch or so to the circumference so that the ends can be
seamed together. Then all you need to do is add binding to the top and
bottom edges. Or, if binding is not your thing, you can just zigzag or satin
stitch the top and bottom edges.
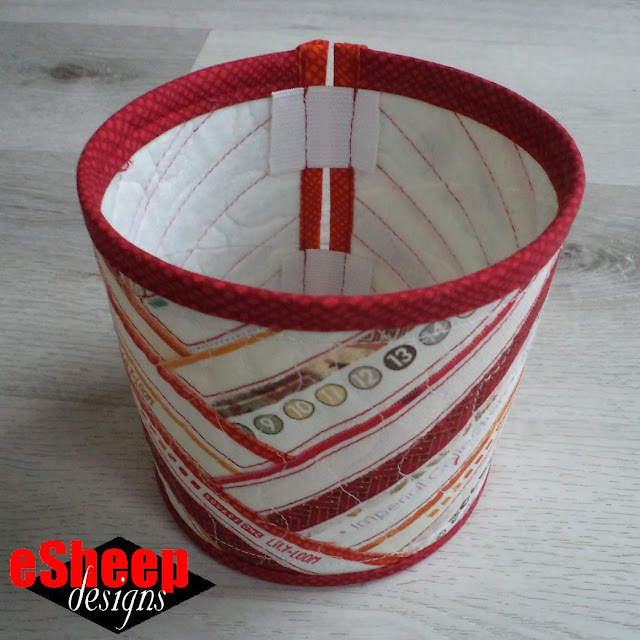
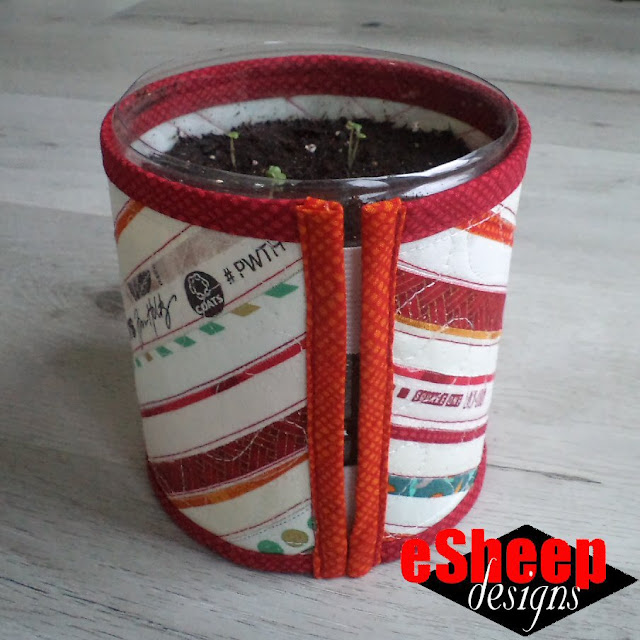
I ultimately decided that I was going to add some elastic to the ends so
that the cozy can be stretched out to fit around the planter. That's what
you see in the picture above: two pieces of 1" wide elastic, each cut to
1.5" long.

|
| Join the ends with pieces of elastic... |
Getting the pieces sewn onto one end is fairly easy. Just stitch along the same sewing line as was used to secure the binding. (If you use appropriately coloured thread, the stitching should be somewhat invisible.)

|
| Flip wrong side out and sew from the front side... |
To sew the other end, it's obviously a bit trickier. The best way to do this
is shown above. Flip the cozy wrong side out, pin the elastic appropriately
and sew along the stitching line from the front.
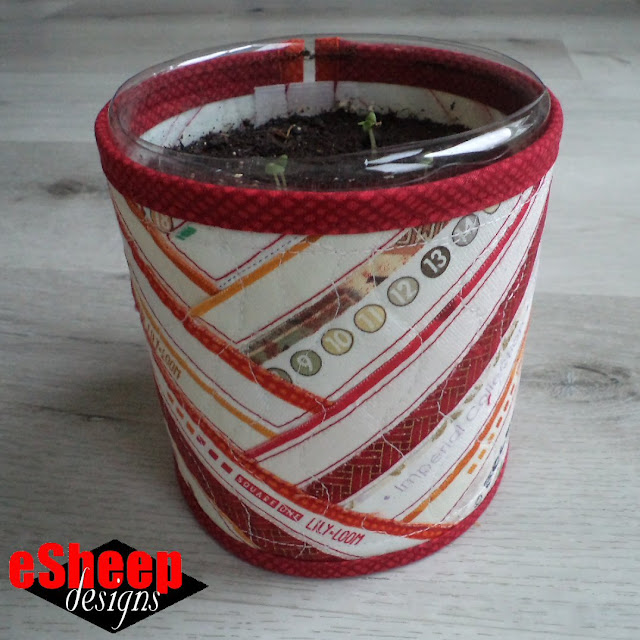
Flip it back right side out and it's ready to use.

|
| Finished! |
I've come across projects that involve sewing an entire pot cover with a
bottom – essentially a fabric plant pot – and wonder about the
necessity of it all. As in, why bother with the bottom when it's never seen?
(Not to mention that hand sewing that particular circular piece is not
especially fun to do.) Anyway, I'm all about practical, so to me,
this particular design does the job that it needs to do... and I don't have
to waste any fabric or effort on my part.

Since I sort of flew by the seat of my pants with this, you may wonder if I had any specific plans for how to finish it when I originally measured the circumference. Yes indeed: I was going to sew a button on each side and use an elastic to hold the ends together.

|
| "Back" view... |
That is therefore still another option for making a closure. (I ultimately decided
against it because I didn't have the big red buttons that I thought I
had.)

|
| "Front" view... |
I was able to use up some leftover binding for this, so that was satisfying. As you saw, the fusible fleece was pieced together from large remnants. It's always a cause for celebration when something can be made out of almost throwaway scrappy bits and pieces, and that's got to be the true charm of selvage projects.
Speaking of celebration, let me wish you a joyful Christmas if that
holiday is on your agenda in the upcoming days. Hope to catch you back here
in a week for my final regular blog post!
Until then...


Why did you not add a bottom to the cozy? Also, can we use this pattern for coffee cups?
ReplyDeleteAs I wrote above, "Why bother with the bottom when it's never seen? (Not to mention that hand sewing that particular circular piece is not especially fun to do.) Anyway, I'm all about practical, so to me, this particular design does the job that it needs to do... and I don't have to waste any fabric or effort on my part." Anyway, that's why. 😜
DeleteOh, and I suppose this same general idea can be used for coffee cup cozies without any issues.