|
|
Who doesn't like tips to save time and money? |
In another "wow", today's post is a collection of tips, tricks and hacks that I may never actually
use, but are so amazingly awesome that I feel compelled to share them.
And the only reason I say that I may not use them is due to my not
engaging in the type of sewing that these tips relate to... but you might.

The first two tips are ideal for the quilters among you. I personally don't foresee needing diagonal patchwork squares, but here is a phenomenal way to make thirty-two of them in one pass.
The photos above highlight the process involved, but even if you'll never need to do this, I highly recommend you check out the four minute video, which can be found here: https://www.youtube.com/watch?v=hURvNSTLAeA
Some are so marvelously simplistic and easily accomplished that they might
cause you to smack your head and say to yourself,
why didn't I think of that?
I found these all on YouTube and will provide text only links
(i.e., non-clickable; you'll have to cut and paste them to your browser)
to them for reference.

The first two tips are ideal for the quilters among you. I personally don't foresee needing diagonal patchwork squares, but here is a phenomenal way to make thirty-two of them in one pass.
The video is from
Estadistica Datos del Mundo, whose nifty projects I have previously featured.
|
| image courtesy of Estadistica Datos del Mundo... |
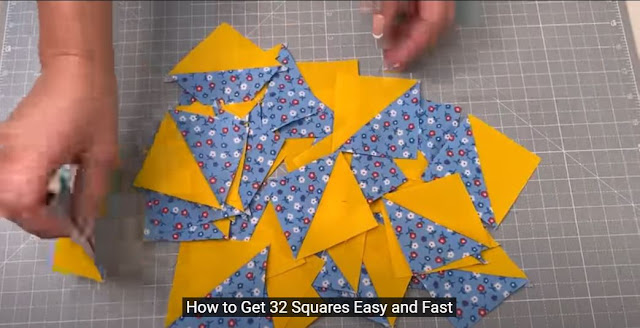
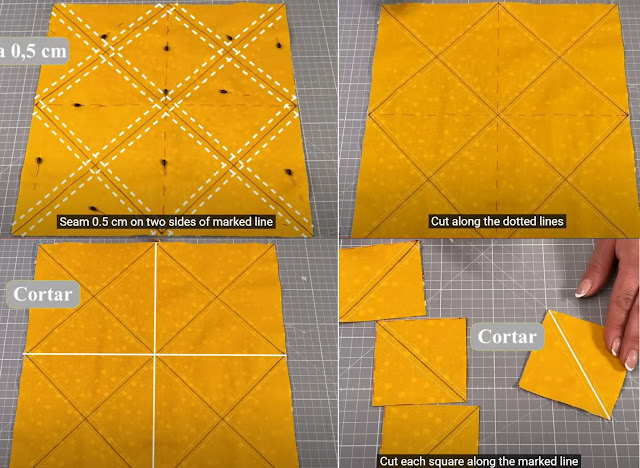
In this engrossing demonstration, Ulyana takes two pieces of quilting cottons measuring 33cm square (essentially 13" for those of us still stuck in imperial world), draws lines for cutting and sewing, sews and cuts, and then cuts again to produce a pile of 7.5cm (just shy of 3") patchwork squares as if by magic.
|
| Quick patchwork squares method demonstrated by Ulyana of Estadistica Datos del Mundo... |
The photos above highlight the process involved, but even if you'll never need to do this, I highly recommend you check out the four minute video, which can be found here: https://www.youtube.com/watch?v=hURvNSTLAeA
In this second video, Ulyana makes an amazing twenty-two metres (just over seventy-two feet!) of bias binding in one fell swoop.
In about four minutes, you can see how a 137cm x 76 cm (about 54" x 30") piece of fabric is transformed into a continuous 4.75cm wide (just under 2") bias strip, just by sewing three seams.
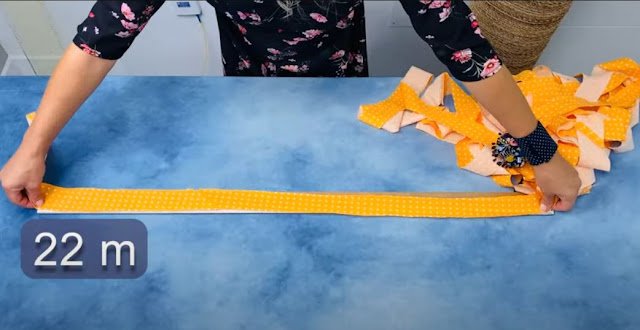 |
| Fantastic way to make a whole lot of bias binding... if you need this much! |
In about four minutes, you can see how a 137cm x 76 cm (about 54" x 30") piece of fabric is transformed into a continuous 4.75cm wide (just under 2") bias strip, just by sewing three seams.
Now you may wonder why I might never do this. Simply put, I can't see having a need for this amount of binding. (My normal go to method of using a square — usually around fat quarter size — will suffice for me.) But for quilters, I can definitely see how this would be a tremendous time saver.
Watch live classes for FREE at CreativeLive!

[affiliate link]
These next tips come from a YouTube channel originating from Germany called Tale Handmade. (If you want to build your skills for clothing sewing well, I highly recommend the channel.) The first few are hacks for DIY-ing seam allowance guides to help you sew straight — or curved — seams.
These first two are basically the same. In the one using the thicker plastic foam, she inserts a couple of used sewing machine needles to hold the seam in place underneath. The other one uses (thinner) cardboard with four regular pins through which you would slide the seam in a staggered fashion to hold it in place.
This little trick with a binder clip (wonderful little tools, by the way; go look up all the things you can do with them when you get a chance) lets you pull on the elastic without losing control of your sewing. Video is at https://www.youtube.com/watch?v=L5EFLfqsqIg
Check out crafty classes at Creativebug!

[affiliate link]
This final tip is pretty cool in its simplicity again. While you may have a large bowl to trace around, what if you needed one slightly bigger? Check out how Laura of Sew Very Easy fashions a compass-like tool out of a piece of cardboard to add some extra inches.
You can find this trick in her tutorial here: https://www.youtube.com/watch?v=2iapdZ1VLsg&t=237s
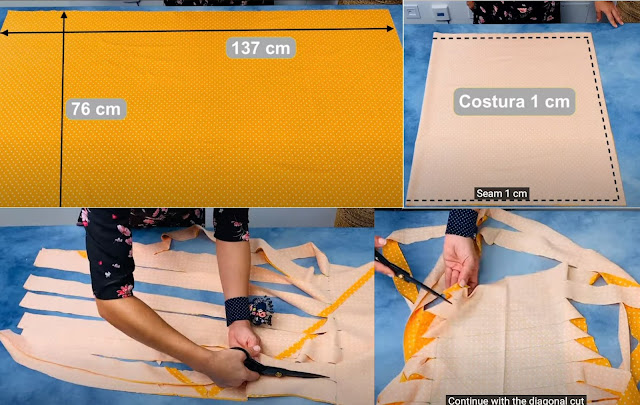 |
| It's a matter of sewing a few seams |
Also, for those who like the idea of recycling textiles, an old bedsheet would be a perfect candidate for this purpose.
This isn't a secret or proprietary method, by the way. If you search through YouTube, you'll likely find other videos demonstrating the same technique. But if you want to see this one, it can be found here: https://www.youtube.com/watch?v=X5S3KisE_Eo

These next tips come from a YouTube channel originating from Germany called Tale Handmade. (If you want to build your skills for clothing sewing well, I highly recommend the channel.) The first few are hacks for DIY-ing seam allowance guides to help you sew straight — or curved — seams.
These first two are basically the same. In the one using the thicker plastic foam, she inserts a couple of used sewing machine needles to hold the seam in place underneath. The other one uses (thinner) cardboard with four regular pins through which you would slide the seam in a staggered fashion to hold it in place.
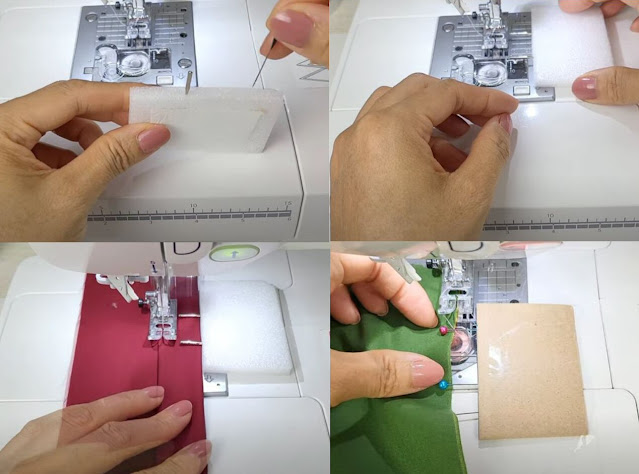
|
| Seam allowance guides courtesy of Tale Handmade... |
The plastic foam or cardboard piece is held in place with double-sided tape on the sewing machine. Pretty simple and effective, don't you think? You can check these out for yourself at https://www.youtube.com/watch?v=FPI98UNnfKU and at https://www.youtube.com/watch?v=-nIuh4GUzuo
This next one seems ingenious in its simplicity. Help yourself around a curved neckline by sticking a bottle cap or lid in an appropriate spot on your sewing machine.
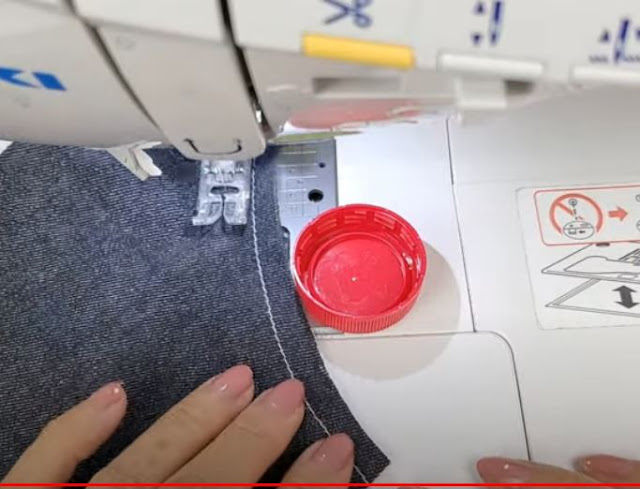
|
| Curvy seam allowance guide courtesy of Tale Handmade... |
The only thing that may be a bit of a puzzler is knowing where exactly to place the guide, but I suppose that might be something you'll know when you need to do it. (I don't have the link for this video, but she doesn't exactly describe how to position the thing, so maybe just try it out.)
Another cool trick from Tale Handmade is this method of controlling elastic as you sew it. If you've ever sewn elastic onto something, you know that you have to keep it taut as you go, but it's not easy to pull on it while ensuring that the fabric underneath keeps feeding normally.
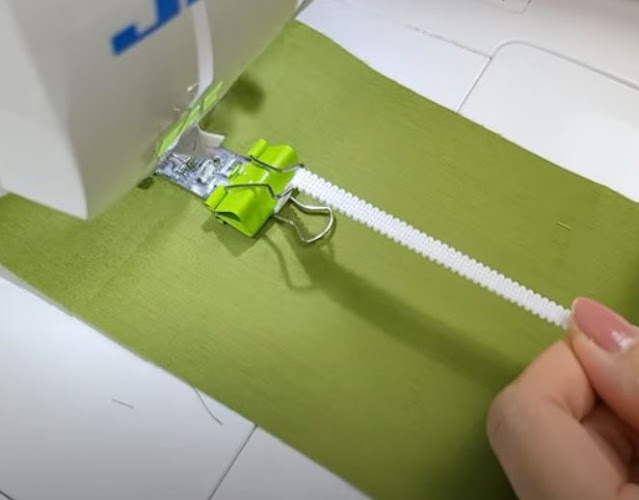
|
| Hack for sewing elastic courtesy of Tale Handmade... |
This little trick with a binder clip (wonderful little tools, by the way; go look up all the things you can do with them when you get a chance) lets you pull on the elastic without losing control of your sewing. Video is at https://www.youtube.com/watch?v=L5EFLfqsqIg
This last one (still from Tale Handmade) is for anyone who has considered purchasing a bias binding foot. Before you spend any money, take a gander at this simple little hack and see if it might do the job for you, for zero dollars.
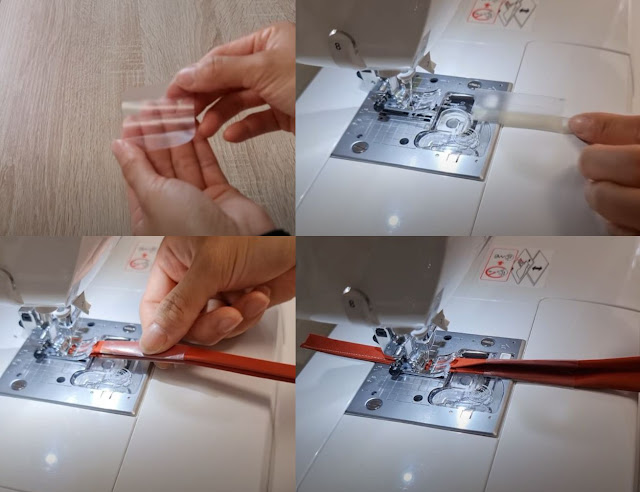 |
| Hack for a bias binding "foot" courtesy of Tale Handmade... |
All that's required is a piece of plastic, folded and creased like bias tape. To use it, "thread" it with binding and secure it to the front of your sewing machine with some double-sided tape. Even if the binding hasn't been pressed to perfection, it will feed itself through the plastic guide. (To answer your question, yes, it can also double as a bias tape maker.)
For the entire demonstration on how to use this handy little hack, check out the whole video here: https://www.youtube.com/watch?v=cPW3Q9W1prQ

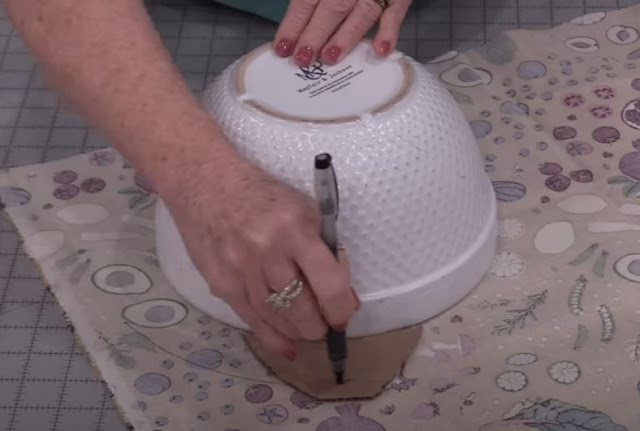
This final tip is pretty cool in its simplicity again. While you may have a large bowl to trace around, what if you needed one slightly bigger? Check out how Laura of Sew Very Easy fashions a compass-like tool out of a piece of cardboard to add some extra inches.
|
| Circle drawing hack courtesy of Sew Very Easy... |
You can find this trick in her tutorial here: https://www.youtube.com/watch?v=2iapdZ1VLsg&t=237s
With all of the above YouTube channels, there is plenty more to explore and discover from these talented ladies, apart from what's featured here today. Go and take a look through their archives and remember: if you find a video that's been helpful, let it run all the way with ads so that the YouTuber can collect some coinage in return. Again, it doesn't mean that you have to sit/stand here and watch it; run the video and go sort your laundry, water the plants, grab a cup of tea or whatever!


Wow, there is some great information here! Thank you for all the links!🌷💕
ReplyDeleteYou are most welcome!
DeleteThese are all great tips! Thanks Rochelle!
ReplyDelete