 |
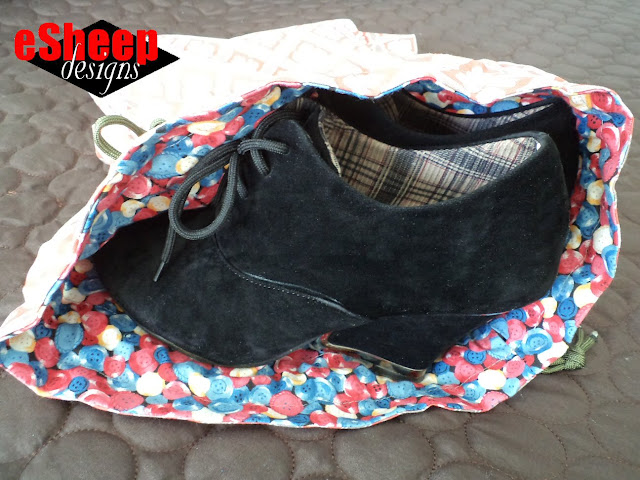
| My new shoe bag! |
So taken was I, in fact, that I subscribed. I never do that!
Never mind the fact that I usually try to avoid YouTube entirely, since it can be such a time-wasting place. But on that day — and I don't remember exactly why I was there — one of her videos was recommended to me and I ended up spending a few hours checking out her various projects. (Oh and coincidence of coincidences, she has a video for a project called Hanging Door Pockets, which looks very much like the item that inspired my own Portable Pocket Pouch! Talk about a small — crafting — world!)
Today I'm featuring a project that I saw on her channel just a few days ago (direct link at the end of this post). It involves the absolute easiest method of making a drawstring bag that I've ever seen.
 |
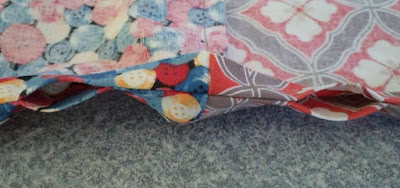
| The reverse side of the bag... |
Truly. I am not kidding.
If I dare call myself an old dog, I would say that I've learned a new trick and am over the moon about it. Let's put it this way, I've seen enough drawstring bags and variations thereof over the past five years to have made one already... but I haven't ever. (Apart from my Bindle Bag, which is slightly different.) It's not like drawstring bags are difficult to make, no matter what method. But even though I've been needing a new travel shoe bag for a few years now, I've never felt the right push to do so.
Oddly enough, it's almost as if I've been waiting for this particular drawstring bag to come to my attention.
And come to my attention it did. I saw the video late Wednesday morning, went out shopping with Mom in the afternoon and made my bag that evening. Quite possibly, it was the fastest turnaround I've ever had with a project from "seeing" to "finishing".
To make this unique variation on the basic drawstring bag, start with two long rectangular pieces of fabric of whatever dimensions you want. My pieces were 36" long by 15" wide. Ensure that the fabrics don't have a directional print.
With fabric right sides together, sew the short edges together (I used a 1/4" seam allowance) at either end. Shift the resulting tube so that the seams are in the centre, directly over one another.
 |
| Stack the two seams on top of one another... |
Fold one seam to one side and the other to the opposite side. You may want to pin this so that everything stays straight while you work on the other seams.
 |
| Lay down the seams in opposite directions like this... |
What you have now — ta da! — is the exterior and the lining of your bag already attached to one another.
The next step is to mark the casings for the drawstring. I went with a 1" wide casing, positioned 1" down from the top edge of the bag (i.e., where the centre seams are currently stacked). Make marks as shown here on both sides.
 |
| Make two marks on either side of the stacked centre seams, 1" away and then another 1" away... |
Do some pinning if you need to, as you're now ready to sew up the side seams. (I used a 1/2" seam allowance; I wouldn't recommend going with much smaller.) You are going to need to stop and start during this sewing process.
Basically, you'll stop (and reinforce) your stitching when you get to the casing opening, skip over it, and then restart (and reinforce) your stitching on the other side of the casing opening, continue sewing over the centre seams, and then stop (and reinforce) your stitching when you get to the casing opening on the other side, etc.
 |
| Stitch and stop, stitch and stop, stitch and stop... i.e., avoid stitching over the casing openings! |
Decide what fabric is going to be your lining when you do this step. Whatever you choose, leave a 4" turning gap along one side of that fabric. Yes, it's reversible, but one side is going to need to be stitched up after turning. If you don't want to ladder stitch it by hand for that perfect look (I didn't), you might want to choose the side that you intend as the lining, or the side with the fabric that features a busier pattern so that it's not as noticeable when you edgestitch the opening by machine. (I put the turning gap on my "buttons" fabric.)
The next step is rather nifty, I must say. To ensure a neat and tidy opening to the finished casing — without any stitching — use fabric glue!
 |
| Put some glue under the seam allowance at the casing openings... |
There are, of course, eight spots where the glue must be applied. This is what one side will look like when you're done:
 |
| Seam allowances glued down around the casing openings... |
Since the glue may in fact penetrate more than two layers of fabric, take care to ensure that the actual opening for the casing doesn't get glued shut!
You have the option now to box the bottom corners of your bag if you want — and I did — but if you do, this is where I deviate from Laura's suggested approach. Instead of cutting a box out of each corner, just squish the corners down and sew across at a predetermined distance from the tip. Because this bag has no bottom seam, the "cut a square out of the corner" technique does not totally work (mathematically speaking) and may frustrate you; therefore, don't do it.
Or, in keeping with simplicity, just leave the corners as they are!

Whatever you do or don't do to the corners, the next step is to turn the bag right side out.
 |
| Turn the bag right side out... |
Sew up the turning gap and then stuff one side into the other.
 |
| Insert one side into the other and give it a good press with an iron... |
Go to your iron and give the top edge a good press before continuing.
Now it's time to do the last bit of sewing to create the casing. If you went with my measurements, sew 1" down from the top edge, all the way around. Then sew again, another 1" away from the first stitching line. (I always have a bit of black electrical tape on my sewing machine to help guide my way in this kind of situation.)
All that remains is to thread your cordage. How much cordage? You'll need two pieces, each measuring (2 x finished top width of bag) + 9" (or 23cm). Thread one cord from one side all the way around back to where you started and then tie off. Thread the other cord from the opposite side all the way around and tie off.
 |
| Each cord needs to enter and exit from the same side of the bag... |
This was the first chance that I've had to use this bodkin since it was purchased (at a dollar store; $1.25).
And it's done! Wasn't that quite honestly the most simple approach to sewing a lined drawstring bag that you've ever encountered? I may never make one again, but if I do, this will definitely be my "go to" method! Because you can choose the size to make it, it's a versatile project that's also great for using up scraps. In Laura's video, she has one fabric that was pieced together from various remnants.
And now my shoes have a new bag to travel in...
 |
| This bag can easily fit two to three pairs of shoes, depending on style... |
I will happily retire my old shoe bag (which was an unlined Christmas gift bag from many, many years ago) and replace it with this.
By the way, this finished out at 13" wide at the top x 16" high. (Therefore each cord was (2 x 13") = 26" + 9" = 35" long.) The boxed bottom is 12" wide.
 |
| A quick, easy and totally useful item! |
Materials used? The fabrics came from my seemingly bottomless gift box, the cordage was purchased from Walmart, first seen used for my bucket bag in waxcloth, and my fabric glue was a discount store purchase a couple summers ago in BC.
Oh — mustn't forget — here is the direct link to original drawstring bag video. Enjoy and thank you, Laura!

thanks a great tutorial might make one for my sandals as away next weekend and no way can I wear one pair of shoes for 3 days, feet would ache terribly as will be on them all day looking at over 700 quilts and also new sewing machines so maybe a big hole in the bank balance!
ReplyDeleteYay for a new shoe bag! Isn't it great when a new technique is found. Well done on the super quick turn around - very impressive.
ReplyDeleteI think I may have seen another YouTube tutorial from that same woman before because she looked familiar, but I don't remember what it was,lol! The drawstring bag looks very easy and is so handy to be able to make it in any size.
ReplyDeletelove this bag! i've already made several to give for gifts. thanks for the clear instructions
ReplyDeleteYou're so welcome! Glad you enjoyed.
Delete