
|
|
The bottom of my patchwork pouch... |
Or, sometimes a relatively straight forward project can appear to play a prank
(or two, or three) on you.
In the latter part of August, I was scrolling through sewing video
recommendations on YouTube when I came across one that caught my
attention instantly.

That said, it's impossible to suppress EfficiencyMe. After I watched the video a couple of times, I began ruminating on how best to eliminate fabric (and fusible fleece) waste.
It was only a zippered pouch, but done up patchwork style with hand quilted
embellishments. What really drew me to it was the method of construction;
the intersection of four identical panels forms its cross shaped base. The
configuration results in the patchwork strips running diagonally across the
finished pouch.
Having recently gone into my supply of Tim Holtz fabrics to
make my
notebook cover, I knew I had some scraps that were just waiting for a project such as
this.

|
| A patchwork pouch made up entirely of Eclectic Elements scraps... |
Not only that, I was actually thinking that a project involving manipulating
strips of fabric would be a welcome change of pace. Kind of like taking on a
deliberately slow, relaxing task. (And yes, I know that I've said in the
past that
cutting and piecing are not my thing... at least not on a regular basis.)

That said, it's impossible to suppress EfficiencyMe. After I watched the video a couple of times, I began ruminating on how best to eliminate fabric (and fusible fleece) waste.
The video shows the process of taking four rectangular patchworked panels
(each just over a foot long by four inches wide, formed by joining three
strips of fabric) and then slicing off a triangular portion from one end to
create the required shape going forward.
You already know, right?
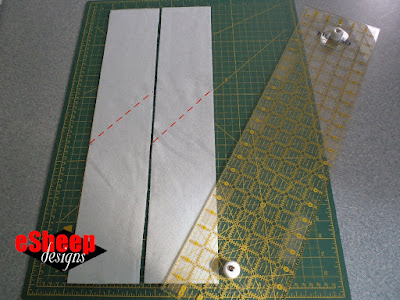
|
| An efficient way to cut the fusible fleece... |
I hated the idea of wasting a 4" isosceles triangle's worth of fabric and
interfacing. (That would be a total of 8" x 4" of wasted material.) In much
the same way as I eventually worked out a better method of cutting the
strips for my version of the
tropical leaf rug, I decided that if I could somehow determine the length of the individual
strips, it would cut down on fabric waste. The way to do that would be to
cut out the piece of fusible fleece first and then measure down along its
sloped edge for the three strips of fabric.
My next thought was, is there a most efficient way to cut the fusible fleece?
At this point of the project, it was time to add the hand quilting. Due to the
"busy-ness" of the other fabric prints, I ended up only quilting on the two
Dictionary strips.
As it turns out, a rectangular piece 8" wide by (12 5/8" length of long edge
+ 8 5/8" length of short edge =) 21 1/4" would do it.
Slice it in half lengthwise, mark both sides 12 5/8" up from each end and
then make the required angled cut. The resulting pieces are identical.

|
| No wastage... or so I thought! |
Before I go any further, I should identify the YouTube tutorial that
I'm referencing here. It's from a channel called
Amika Crafts and was uploaded August 23, 2022. (Search for "DIY zippered pouch Sewing from strips of fabric Patchwork for
beginners".)
The tutorial called for twelve strips of fabric — each 12 5/8" long — with
four of them slightly narrower than the rest. (In usage, the narrower strips
are for the middle of each panel.)
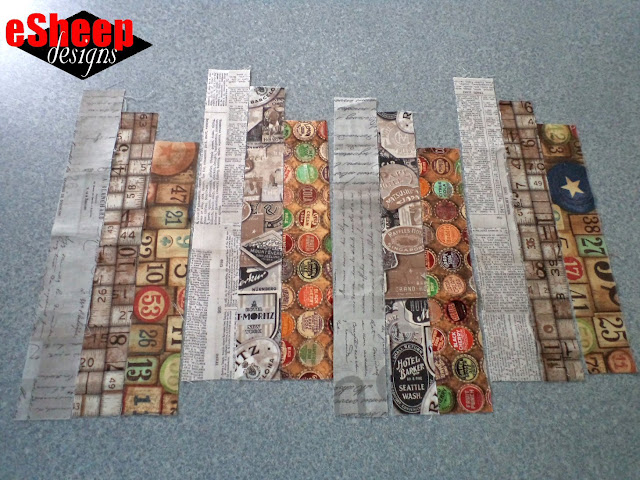
|
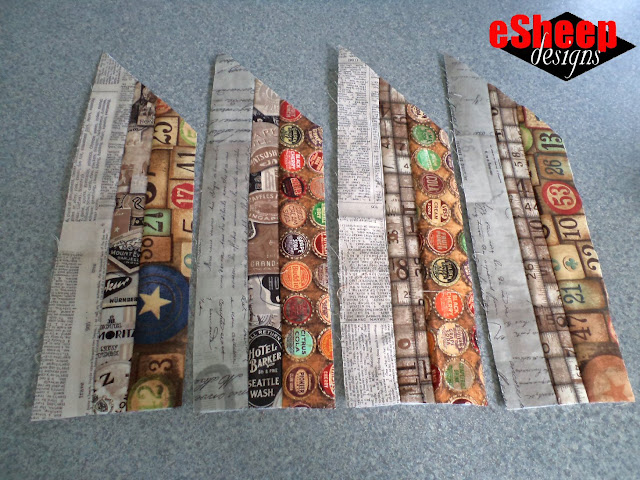
| My four sets of three staggered fabric strips... |
Now that I had the fusible fleece already cut, it wasn't too difficult to
approximate how long each of the three strips needed to be: 12 5/8"
(obviously), 11 1/4" and 10 1/8". (Per the YouTube video, the two
outside strips are supposed to be 1.75" wide, while the middle strip is
supposed to be 1.5" wide.)
Armed with my selections of Eclectic Elements scraps, I proceeded to
cut four strips of each size, laying them down in sets of three. Once that
was accomplished, it was time to sew them onto the fusible fleece.
Which leads us to my first hiccup with this project.
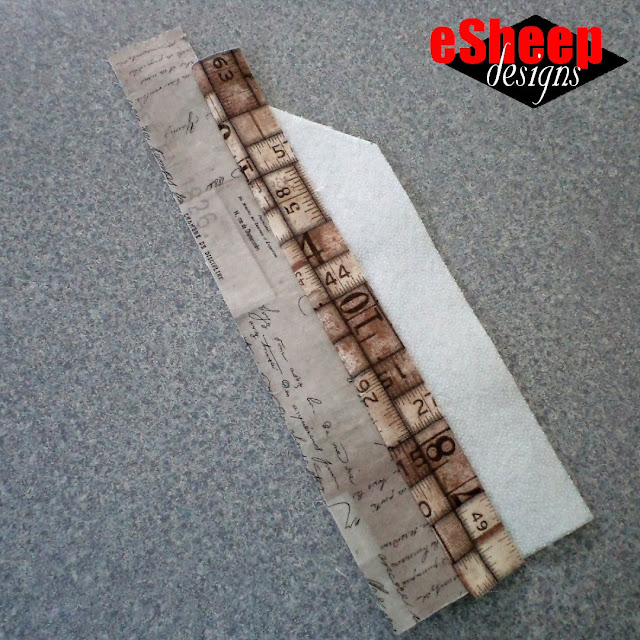
|
| Hmmm... that looks like quite a bit of white space left over... |
Sewing up the four panels involves lining up the first strip so that it
extends 1/4" beyond the edge of the fusible fleece. The second strip is then
laid — right side down — on top of the first strip and stitched with a 1/4"
seam allowance along the right edge. That strip is then flipped over (so
that its right side shows) and the third strip is then placed on top of it
and stitched in the same fashion.
Except that as soon as I finished sewing the second strip, it clearly did
not look like the third strip would be able to cover the remaining fusible
fleece, much less extend a 1/4" beyond it like the first strip did.
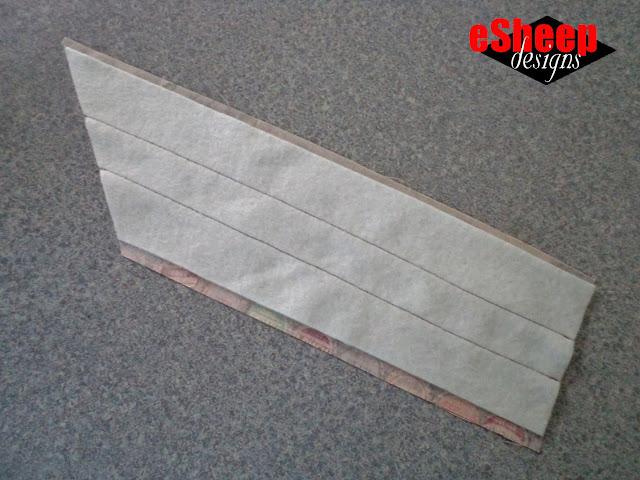
|
| This is what a finished panel is supposed to look like from the back... |
I don't know if the provided measurements were wrong, or if the slight
variances in the conversion from metric to imperial resulted in the
discrepancy. In any case, my best option was to slice away 3/4" from each
fusible fleece panel to allow everything to fit. (Despite the "skinnier"
panels, I was certain that the pouch would still work out fine. The
dimensions of the lining piece, however, would have to be recalculated from
what was provided.)
But so much for being efficient about cutting the fusible fleece. ◔̯◔
|
| Despite the first hiccup, four panels are complete... |
And then I encountered the second hiccup.
Let me say right off the bat that it was totally my fault for not paying close
enough attention, but I ended up joining the four panels the wrong way.
How is there a wrong way?
Well, after sewing them together in pairs, this configuration is supposed to
result...
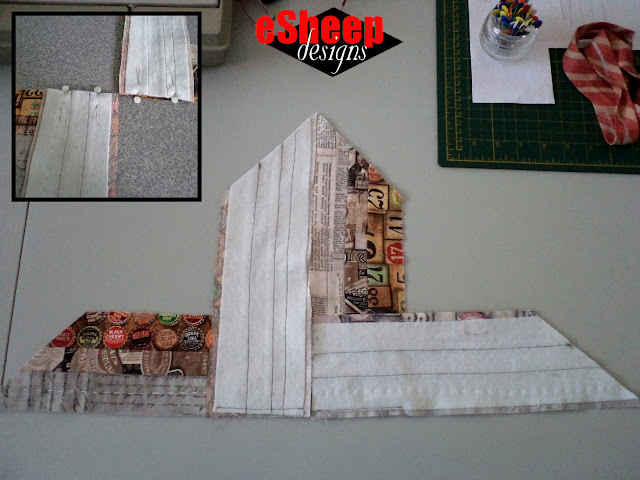
|
| Second time's the charm for me to get this right... |
You see how the peaks of the two vertical panels come together in the
picture above to form a "roof" line? The first time, what I ended up with
was the two peaks facing the opposite way (like the letter "M"). When
I tried to form the body of the pouch, it just didn't work.
Of course, I discovered the problem by reviewing the video. But after I
unpicked the stitches holding the panels together, I also saw that I cut the
angles on the fusible fleece opposite to how it was shown in the video.
The tutorial shows the angle going from low to high, whereas my cut was made
from high to low.
As one part of me screamed silently, another part held fast to the idea that
this should still work!
|
| All figured out and smooth sailing to the finish line? |
I will admit, however, that I put it down and walked away at this juncture. I
needed time to clear my head.
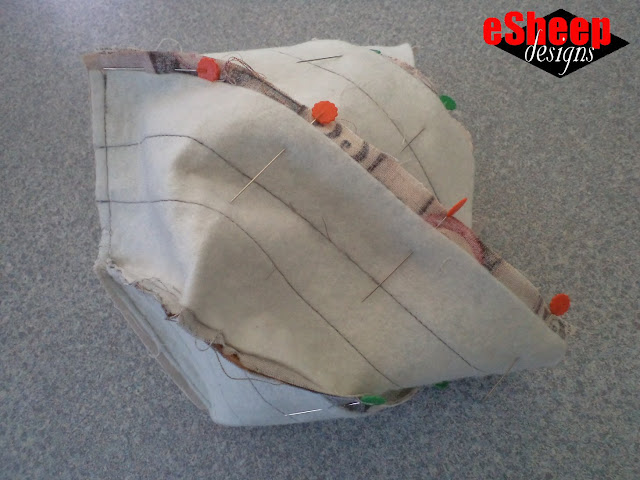
|
| The four seams that form the pouch are pinned... |
Infused with renewed doses of calm and clarity the next day, I discovered that
I merely had to "go the other way" when joining the edges to form the pouch.

|
| Cut a slit along here to allow the corner to be formed more easily... |
And because this ends up being an awkward wonky piece while this is being
done, I opted to hand baste the seams so that everything would go smoothly at
the sewing machine.
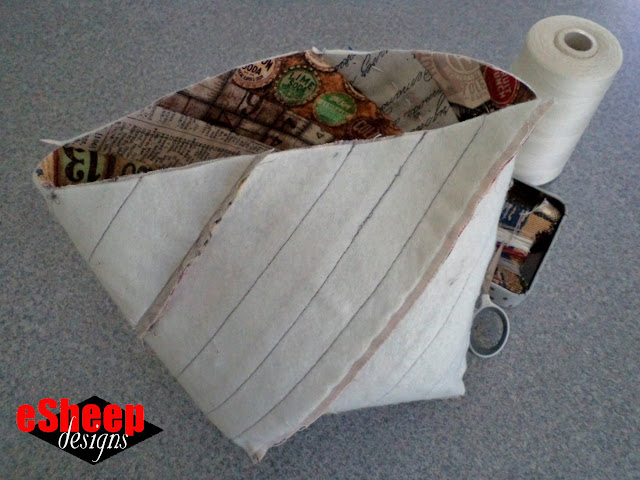
|
| Exterior sewn and ready for the lining... |
Now it's time to determine how big a piece of fabric is needed for the lining.
Not really that difficult to do; just take some measurements from the
exterior...
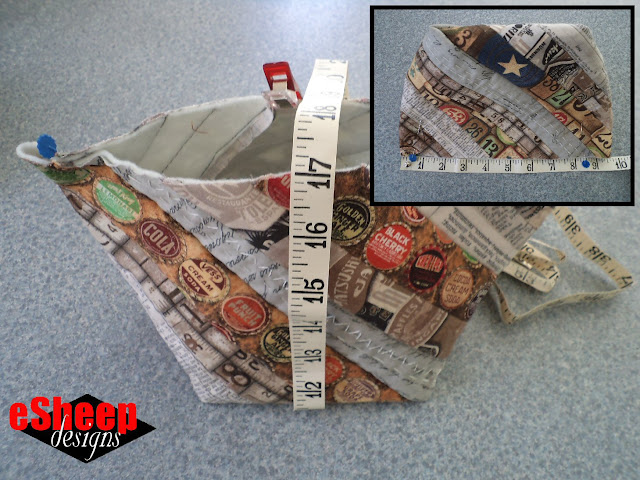
|
| Measuring for the lining... |
Measure all the way around the bottom from one side to the other. Then flatten out the top edge and measure its width.
Since this lining is designed to be one piece of fabric, folded and then
boxed, the "all the way around" measurement can be used as is. The top edge
measurement, however, needs to accommodate a seam allowance on both ends.
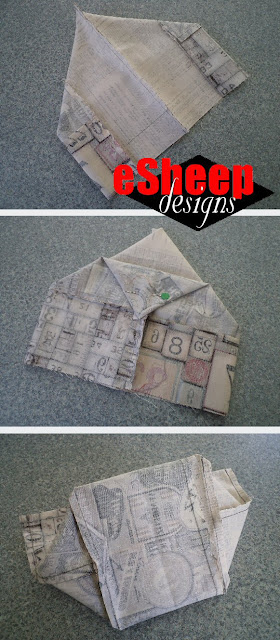
|
| Sewing up the lining... |
In this case, I needed a 10" (9.5" + two seam allowances) wide x 17" long
piece of fabric. I again looked to my scraps and pieced together what I
needed from four different selections.
One final measurement is needed to finish the lining.
Once it's been stitched up along both sides — I used a 3/8" seam
allowance to make the entire thing just a tad smaller than the exterior,
thereby eliminating that annoying "loose lining" syndrome — it needs to
be squished down so that the seams are on top of one another, in
preparation for boxing the corners.
How big to "box"?
The base of the pouch's exterior provides that detail. It turned out to be
a 5" base, so I measured off the corners of the lining at just under
5" across. Then I pressed it with a hot iron and sewed along the crease
mark. After sewing, the corners are cut away. The lining is done and ready
to be dropped.
Speaking of dropping the lining, because the exterior does not have
traditional side seams, be aware of where the corners of the pouch
are intended to be when inserting the lining. (Guess why I'm
taking the time to point this out?)
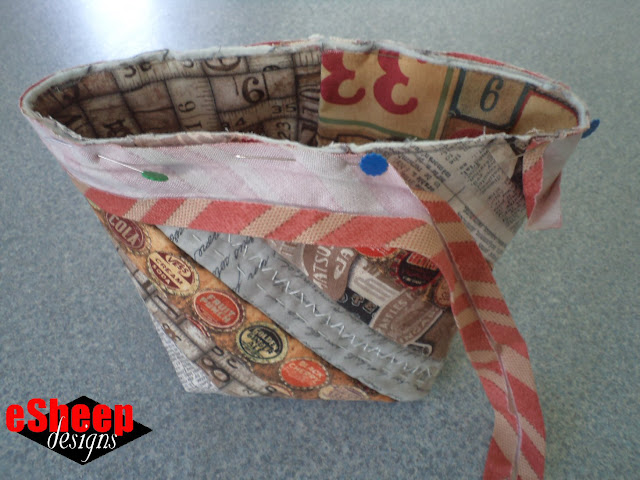
|
| Another hiccup... starting the binding on the wrong side... |
After inserting the lining, the top edge is basted together prior to
binding (this binding is also made out of a Tim Holtz selection
called Ticking.). As a final oopsie, I forgot — for
my preferred way of binding
— to start on the lining side. Due to the fabrics being so
wonderfully distracting, however, this little hiccup isn't really
noticeable.

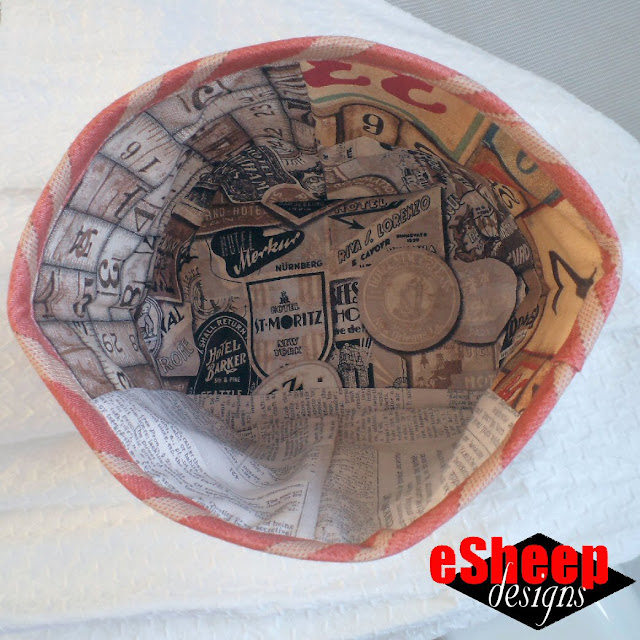
I was back and forth on the idea of whether to put a zipper on this thing all the way through the project. I used the Eclectic Elements fabric throughout because I wanted it to be featured prominently, so I was mostly against having a zipper interrupt the two sides of it.
|
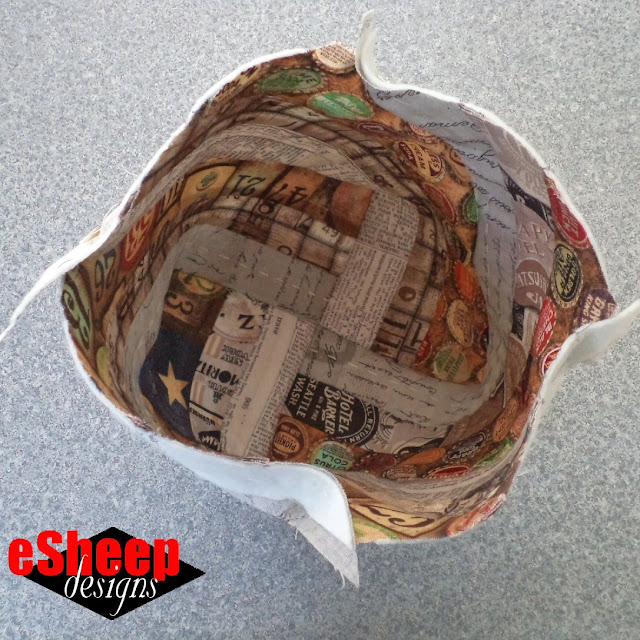
| View of the interior... |
In addition, I didn't know what I wanted to use this for, so it didn't
seem important to decide at the time whether it needs a zipper. (The
zipper installation is done after the binding, so there is no issue if I
come back to this at a later date to add one.)
I'm more likely to use this as an open container basket in the meantime.
Therefore, to complete the project for now, I added a label to the side.
(It's a section cut from the ribbon that tied together the whole bundle of
fat quarters when I purchased it.)
As I admired my handiwork, it occurred to me that had I cut that fusible
fleece angle from low to high, the directional fabrics might be oriented
more right side up than upside down.
What can I say? I was pranked.
But y'know what? I dare you to dispute that this isn't a dang fine pouch
no matter what!


I agree that it is a "dang fine pouch" and you have much more patience than me. I'm sure I would have given up with those pranks
ReplyDeleteThank you. I do so little sewing these days that I seem to have gained more patience in the process. Not to mention that the problem solving aspects are always good for an aging brain!
DeleteThanks for the wonderful E-Mail. You have a lot of patience. It's a good looking bucket.
ReplyDeleteMany thanks for the feedback and kind words.
Delete