|
|
Lessons learned from a big project... |
If you were to be totally honest, would you say that you sometimes fall into
bad habits and/or take the easier way out?
I'm talking about sewing, but I guess the question might apply to life
in general too.
Not being here to judge your real life decision making — not today, anyway
¬‿¬
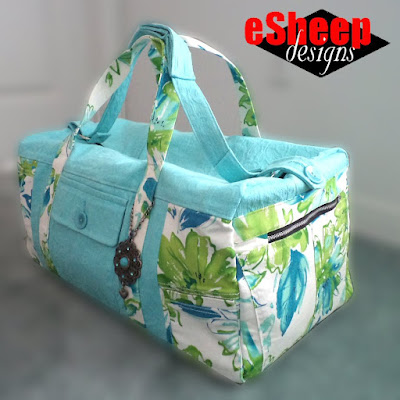
— this post is about lessons relearned during my recent "big" project, the
jackets to duffle
duffle bag.
As you can see from the title of this post, these tricks are not necessarily
new, just that we sometimes ignore them at our peril.
I thought I'd round them up for you just in case you may have fallen into bad
habits. But then again, who knows? Maybe these are new tricks to you.

About Pinning
Something that became my mantra while making the duffle was "pin well and trust your pinning". I don't know how many times I repeated this to myself during the final
stages, when the layers got thicker and the "thing" that I was sewing got
bigger.

|
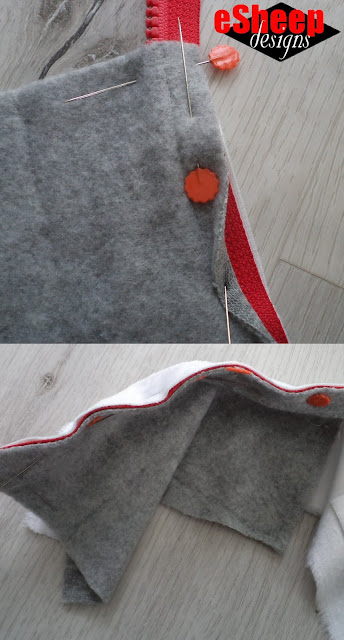
| Bottom version is pinned well... |
You know how sometimes we pin quickly and/or haphazardly because we're in a
hurry and figure we can just adjust it during sewing?
Well, guess what?
We're really not supposed to be adjusting our pins when we sew.
When we're sewing, it should be a matter of trusting that we pinned
correctly and removing each of them before the needle runs into it. Having
to adjust pins on something that's under your machine's presser foot is just
not optimal.
Therefore, always take the time to ensure that edges are aligned when you
pin, use enough pins — and wherever you can, place them
perpendicularly — and check for any shifting of "sandwiched" layers
before going to the sewing machine.
In the two photos shown above, the first one shows that even though it may
look good on the surface, peeling back the top fabric shows that the red
(zipper tape) layer has shifted slightly. The lower photo shows the problem
fixed, with all three layers aligned evenly.
About Clipping Curves
Undoubtedly you've heard of "clipping" curves. It's when we make small
cuts into the seam allowance to enable curved seams to lie flat(ter). We
most often do this after sewing a seam, but there are times when
it's actually necessary to do this before sewing.

|
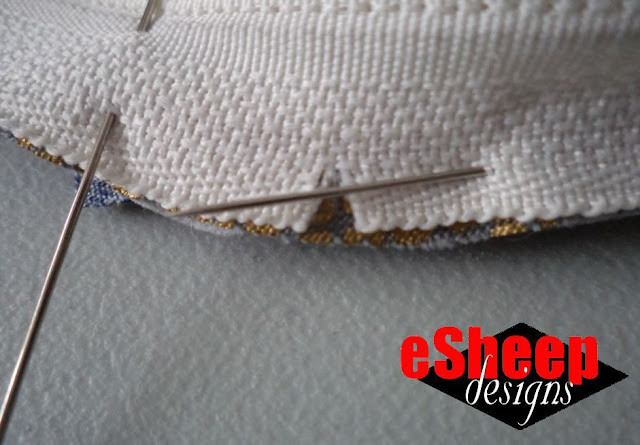
| Snip into a zipper tape to allow it to curve along an edge... |
This is particularly important if you're attaching a zipper against a
curved edge. Zipper tape can be stiff and difficult to bend. If you make
small cuts into the edge, it can effectively spread out and curve around
something without you having to apply muscle at the sewing machine.
When I attached the end panels of my duffle onto the "giant tube" that was
the base and side/top pieces sewn together, I knew that clipping the
curved areas of the tube first would have made the sewing go much more
smoothly.
But I didn't do so, instead opting to... baste.

About Basting
Sometimes you just have to hand baste. I don't like hand
sewing, but I've come to realize that hand basting is a necessary "evil"
in my sewing world. Would that I could replace it with
machine basting, but in many cases, it's simply not a viable
alternative.
That's because the reason why you need to baste is often the reason you
can't effectively machine baste. It comes down to the very real conundrum
that if a particular area or item is going to be difficult to machine sew
without basting, how are you going to run a machine basting stitch around
that same area or item?

|
| My tropical leaf rug had to be hand basted a couple of times... |
In the case of attaching the end panels of my duffle bag, I didn't want to
take the "big tube" to the sewing machine and rely only on pinning (done
well or otherwise). My decision to hand baste was to ensure that the bulky
layers wouldn't shift around while I sewed. In retrospect, I should have
clipped the curved areas also.
About Seam Allowances
It is easier to sew a curved seam with a smaller seam allowance than
a larger one.
I first learned this lesson when I made some
kimono slippers
many years ago. The heel of this item had an extreme curvature — as you
might imagine — and it was very difficult to sew around it with a 1/2" (or
even worse, a 5/8") seam allowance. When I made subsequent pairs, I went
with a smaller measurement and had an easier time of it.
With the benefit of hindsight, however, might the initial job have been
easier still if I had clipped that curve and hand basted it first? Most assuredly.
All other things being equal, if the thickness of what you're sewing
together is manageable and the seam won't be subject to undue stress, go
with a smaller seam allowance if the item is curvy. In the case of my
duffle, I sewed everything with a 1/2" seam allowance to ensure that
sufficient material was in the seams, to reduce the chance that they might
come apart over time due to heavy loads.

One last reminder if you have an older sewing machine like mine: position your needle down before turning or adjusting anything. I believe that some (most?) modern machines have a setting allowing them to stop with the needle up or down automatically, which is quite helpful. I was wishing I had that function a few times during my duffle project.
This is particularly important if you're sewing something with many layers,
because you could lose control of all of them if you lift the presser foot
without keeping the needle down. If you
pin well and trust your pinning, the result may not be that bad, but
only if you haven't already pulled the closest pin at that point. Which is
why basting is — again — a potential game changer.
See how all of these old tricks tie together to prove that you shouldn't
take the easy way out?

|
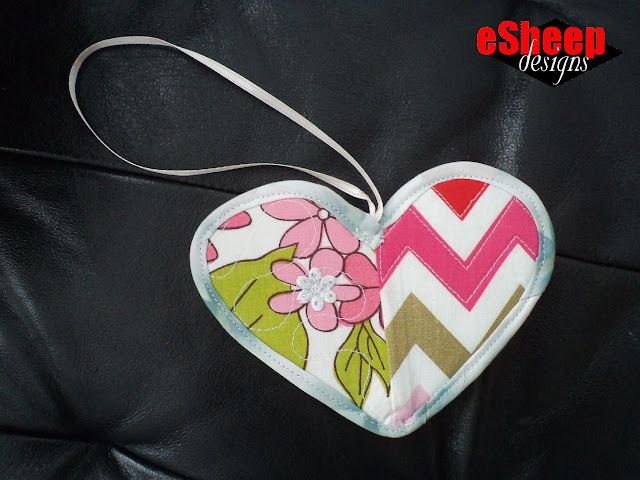
| My second attempt at giving away a heart... |
So this update is not about that heart, but about a second one. This
one is made up of three different fabrics (seen in the past on
this project,
this one
and
this one) and is bound with my
Winter Webs
fabric, which no one else has. A bit of daisy chain ribbon adds sparkle.


I so agree about getting lazy. I am new to bag sewing, though. So that makes me an old dog (sniff, sniff, scratch) learning new tricks.
ReplyDeleteLindaR
Well, welcome to the world of bag making. The good news is that there is now a lot of good info online to help someone along... whether they be new or old dogs!
DeleteHi Rochelle, your post is a great reminder! Thanks! I have learned one trick that replaces pinning, and hand basting…. Double sided leather basting tape in 1/4”and 1/8” width. I first bought this in anticipation of sewing up my leather collection that can’t be pinned or even clipped. Then Caroline from SewCanShe mentioned sewing in zippers that are glued down with double sided tape… it’s was just mind blowing to sew in a 12” zipper in 20 seconds! Then I sewed an awning for my brother and again this double sided adhesive tape was magical in that it allowed me to ‘stick’ my fabrics together, readjust if needed, and sew as fast as I could with a perfect outcome. My supplier is Wawak if this sparks your sewing interest…😊 Marie
ReplyDeleteYes, I know about the double sided tape method for keeping things together when it's not possible to pin or clip. (I actually have some.) For some leather work and large projects like your awning — kudos! — it's probably necessary.
DeleteMy concern about using it anywhere else on a regular basis — like with zippers on fabric — is the possible transference of sticky gummy adhesive into my sewing machine. I don't know whether it does or does not happen, so I'd just rather not chance it.
BTW, your original comment posted four times... hope you don't mind that I deleted the other three! ;-)
Oh thanks for deleting, not sure how that happened…😐 But the 2-sided tape I get has no sticky effect on my sewing machine and I’m finding lots of new ways to use it! For example: closing the opening of pincushions with walnut shells, or any stuffed sewing item! It’s the best sewing trick I’ve learned, after putting my walking foot on and never taking it off!
DeleteGood to know. That part about pin cushions or stuffies is super helpful indeed. Thanks for the tip!
Delete