|
|
A versatile item... |
Mine did, but not for reasons of difficulty. While dragging my bolt of
Decor Bond interfacing off the kitchen counter, I inadvertently caught
my
magnetic pin jar
in the process and sent it flying through the air.
The pins scattered across the floor, with several of them winding up under the
range/stove. Of course, one has to remove the drawer at the bottom of that
appliance to access the floor below and once I did that, I figured I should do
some cleaning down there too. What followed next was at least a ten minute
struggle to put the drawer back on its rails, before I finally gave up and
called for some assistance from hubby.
When all was said and done — a good half hour later, after repairing my pin
jar (the magnet had come loose) — I decided to set the project aside for the
day.

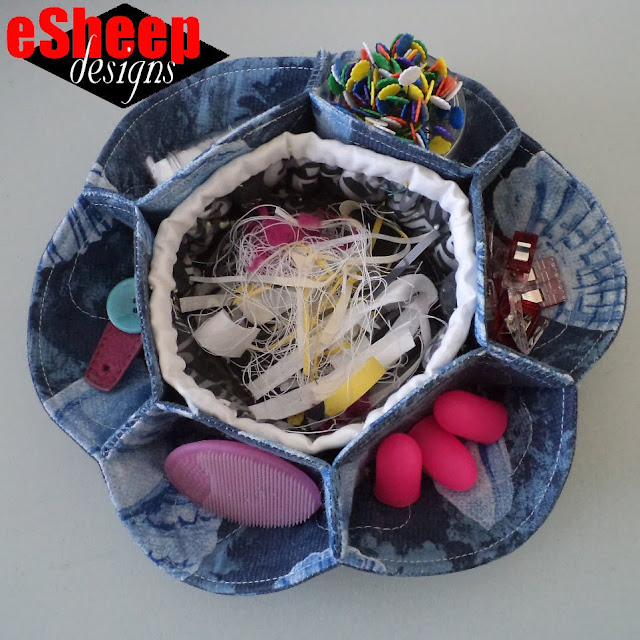
My tale of clumsiness aside, this multi compartment round organizer is easy to make and yes, it shouldn't take you any longer than an hour. You can start with a circle of any size, although know that going with anything less than 9" (23cm) across may result in compartments that are a bit on the small side.

|
| This is how it's currently being used on my sewing table... |
Most of the versions that I've seen use a 10" to 11" (26 to 28cm) circle,
which may or may not include a seam allowance. Don't worry, the vagueness
just means there aren't any hard and fast rules, meaning it's almost
impossible to go wrong.
I must preface by offering my usual disclaimer:
this is not my creation. I've seen several versions of this on
YouTube, and more than likely, none of those crafters were the originators of
the design either.

|
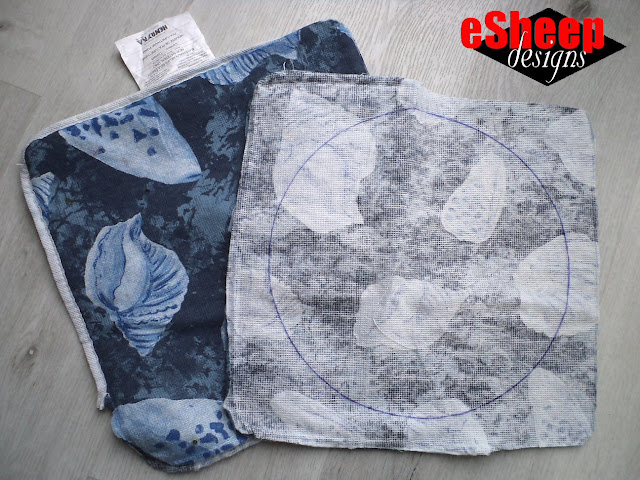
| A repurposing project! These are my old chair pad covers... |
You'll need four pieces of fabric, some mid-weight (like
Decor Bond) interfacing, some chalk or fading marker and a ruler for
this project. (A large quilting ruler is helpful; otherwise a measuring tape
will do.)
Sew Two Circles
Find a large plate or fry pan cover to trace around. (I used a 10.5"
Corningware quiche pan.) Fold your interfacing in half — because
you'll need two pieces — and pin and then trace a circle onto it.
Cut out the circles of interfacing and pin one of them to a piece of fabric.
Cut around the fabric with your preferred seam allowance and then use the
resulting fabric circle as a template to cut three more fabric circles.
Fuse the interfacing onto the back of two of the fabric pieces.

|
| Two sets of two fabric circles pinned right sides together with interfacing on one half of each... |
Pair up one interfaced fabric circle right sides together with a non-interfaced fabric circle and pin. Do the same with the other pieces. Using the edge of the interfacing as a guide, sew all the way around. Yes, close it up entirely.
Until just two days ago, all of the tutorials that I'd seen had instructions
to leave a turning gap along the side. This week revealed that I'm not the
only clever one to decide that it's not necessary.
Once sewn, snip into the seam allowance at regular intervals to help ease
the curvature.

|
| Snip into the curved edge all the way around and then cut a small hole in the middle... |
And now here's why it's not necessary to leave a turning gap along this
(typically fiddly) curved edge... you can cut a hole in the middle
instead.
To turn these right side out, pull the two layers apart and cut a small hole
in the middle of the interfaced layer. Cut only as large an opening as you
need to reach in and turn it right side out.

|
| You don't need a large opening to turn it right side out... |
Once turned, run a folding tool or chopstick along the entire inside edge,
to push the fabric out evenly. Press well and topstitch around the edge.

|
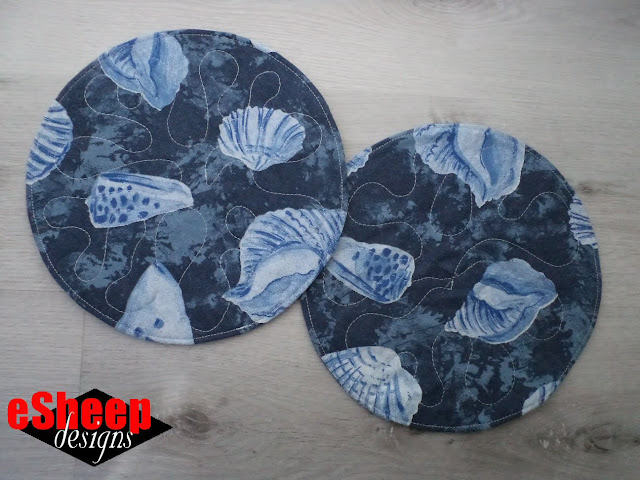
| Two fabric circles finished... |
Although not required, I ran some lazy quilting across the entire surface to
firm up the fabric. If you choose to do this, work from the side
with the hole — so that the raw edges don't get caught up against the
feed dogs — and start and stop your quilting in the middle.
For the purposes of the remainder of this tutorial, let's call the side
with the hole the WRONG side and the other side the RIGHT side.
Take one of the sewn circles and fold it in half and then into quarters —
fold with the WRONG side on the inside — to find the center point.
Mark the center point with chalk or whatever fading marker you use and
unfold the quarter fold.
This next part can be done in a number of ways, including just eyeballing
it if you're good at that. Other methods include using a paper template — i.e., of a circle folded into equal sections — as a guide.
With the piece still folded in half, mark the two end points. Unfold and
draw a 2" (5cm)* long line from
each end point towards the middle. (Note: these lines should be drawn on the
RIGHT side of the circle.)
Next, if you have a quilting ruler like this one, place the 30 degree marker
over the center point of your circle, lined up horizontally with the lines
that you just drew to the left and right.

|
| Using a quilting ruler to mark the 30 degree angles... |
You'll have to move everything to the edge of your table to reach, but what
you want to do is stick a pin at the end of the two lines that run from the
30 degree marker. Once you have those points pinned, fold the circle back in
half again and mark the corresponding spots on the top half of the circle.
Place your ruler across the entire circle to draw four more 2" lines*
from each of the 30 degree points.

|
| Draw 2" (5cm) lines to mark the six divisions... |
Like I said, there are other ways of measuring these divisions. If you don't
have a quilting ruler, use a measuring tape to determine the half circle
distance of your fabric piece and divide it by three to get the required
distance between the lines.
Stack this circle on top of the other, ensuring that the WRONG sides are
facing one another (so the holes that you cut will be hidden in the finished
item).

|
| Lines sewn... |
Clip or pin as required and then sew along those 2" (5cm) lines*
that you drew. (I chose to start from the inside and sewed to the edge, but
how you do it is totally up to you.)
At this point, if the tray is intended for storage of really small things
— like tiny beads, for instance — you may want to sew a circle around the
middle to close off this area. If you do this, sew about 1" (2.5cm) away
from the ends of the lines that you just stitched.

|
| Almost done... |
Separate the openings along the edge and apply clips as shown to help you
determine how much you need to (hand) sew to create the compartments that
you want.
I ended up sewing sections about 1.25" (about 3cm)*
long.
* The dimensions and measurements for this project are basically
up to you. Most tutorials go with a 2" (5 cm) length for the machine sewn
lines, but if your original circle is larger than 10" (26cm), you could
make that line up to 3" (7.5cm) long. Generally, increasing this length
will decrease the overall size of the center compartment. Similarly,
increasing the length of the hand sewn area decreases the size of the
opening into the center compartment.

The result is a surprisingly sturdy and versatile container with multiple compartments that can be used to organize things from crafting supplies to snacks to hardware to makeup. Since I often take my sewing prep down to the kitchen — as evidenced by the incident that preceded this very project — I can certainly use something like this to organize some supplies.
As I've demonstrated, this is a perfect project for upcycling found fabrics.
(I saw a really nice one made out of denim.)

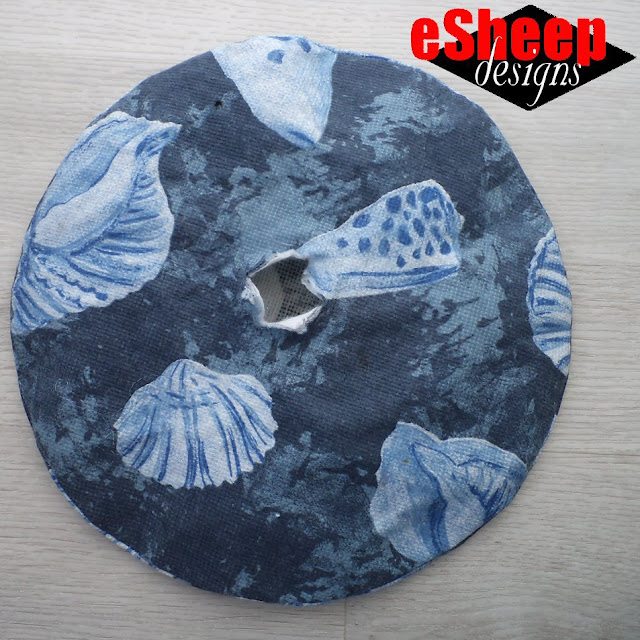
|
| View of the bottom... |
It's been a while since I took the stuffing out of some chair pads to make
my
shinto stool covers, but with the
origami gift box
and now this tray, the old covers have now been repurposed into new and
useful things.
By the way, nothing says that each piece of fabric has to be the same, so I
wouldn't hesitate to make this out of four different fabrics if that's
what's available.

|
| A seemingly endless supply of free skincare samples... |
I believe my instructions for this are fairly clear, but if you need to see
this being done, go check out the numerous videos on YouTube for this
and other variations, such as with eight compartments or an additional layer
of compartments (i.e, made out of three fabric circles). Try searching for
"multi compartment round fabric organizer".


FYI: I learned years ago when sewing around a circle entirely (or other shape), instead of pulling up the fabric in the center and cutting a hole after you sew around the circle, if you fuse a small piece of fusible web in the center of the circle on one piece and use a rotary cutter to make a slit into the fusible web before you sew around the circle, it makes it easier to just turn the circle instead of fiddling with trying to cut a hole after sewing. Then once it's turned right side out, you can smooth out the cut slit with your hand and press and the fusible web to close the hole. It makes it much easier and neater and more stable too. Your organizer reminds me of one of those dinner roll holders too.
ReplyDeleteGreat tip!
DeleteHi Rochelle, your instructions were perfect!!! That’s what I love about your blog! I went to bed thinking I should start my garden clean-up, but was surprised to see everything covered in a few inches of snow- perfect for spending the day sewing- thanks for the inspiration! Marie
ReplyDeleteThanks, Marie. Sewing over gardening would be my preference too, and not just because we still have about a foot of snow on top of our yard. This project is a quick win, though, so your gardening plans don't have to be sidelined for long.
DeleteGreat tutorial, thanks!!
ReplyDeleteYou are very welcome!
Delete