|
| My Wave Around Tote Bag Organizer... |
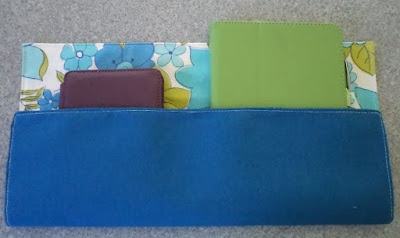
Take the idea of a tote bag organizer. I had been considering making one for almost a year. You'd think — given that my first tutorial for this blog was a purse organizer — that it would be a simple thing to do.
But, nooo. I hemmed and hawed like it was a potentially life-changing event.
However, all of that eventually produced a design that I think is actually kind of neat, considering that it literally piggybacks onto my Wave Purse Organizer.

|
| Opposite side of my Wave Around Tote Bag Organizer... |
How did that come to be? Shortly after I came up with the WPO idea, I made a couple of extra ones that were destined for my market friend's sales table. For a host of reasons, they never made it. While staring at the fabric remnants from my customized tote project, I was suddenly reminded of the fact that I had a WPO made out of that same fabric combo tucked away somewhere.
When I located it, an idea suddenly came to me that I could incorporate that organizer into this one!
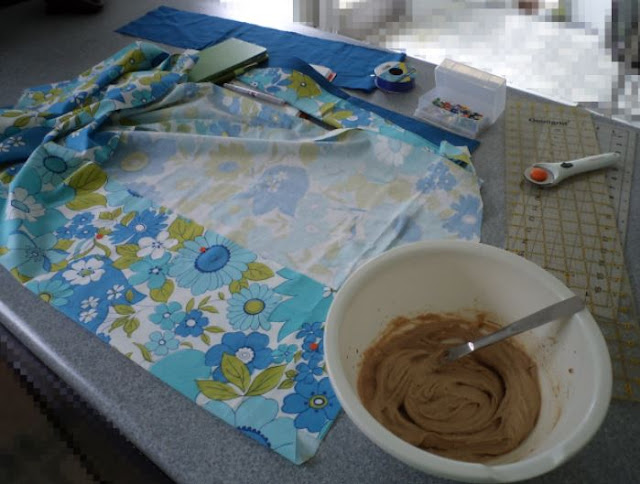
Not that it's in any way pertinent, but I thought I'd share what my work space looked like during this period of great inspiration. Because it's brighter in that part of the house, I often work on the kitchen counter and on this day, making some oatmeal raisin and coconut cookies was also on the agenda...

|
| Doesn't everyone sew like this?? |
And now, back to the subject at hand... :-D
Last month, I showed you a large-scale tote bag organizer created by Barbara and her sewing buddy Cindy that was simply marvelous and marvelously simple.
I, however, being still somewhat frugal with my fabric, wanted to come up with an organizer that could hold my various belongings in place inside a cavernous tote bag, but wouldn't require almost the same amount of fabric needed to make that tote bag. (You can tell from the picture above that I was constrained by the small amount of solid blue fabric that was remaining.) If you are similarly "cheap", this may be the way to go.
Here is what my creation looks like inside my tote.

|
| Looking down into my tote bag with my Wave Around Tote Bag Organizer inside... |
This design keeps the contents of the organizer against the interior lining of the bag, leaving a central opening for your other stuff. The idea is pretty much the same as if you had regular pockets in the bag, only these ones are removable.

|
|
I grabbed some random stuff for this photo shoot, but obviously, you
would probably use the WPO side for smaller things... |
Wanna make one?

and continue for only $4.95 a month!
Materials Required
First, go to my Wave Purse Organizer tutorial and make one of those, but do not create any pocket divisions yet. Also, if you want the key clip feature, make it but do not attach it; you will instead attach it to the larger piece later.For the larger side of the organizer, you will need the following:
- a non-directional piece of fabric, 16.5" wide by 26" high, and
- enough medium weight fusible interfacing (I used Pellon 809; AKA Decor Bond) to cover half of the above piece inside of a seam allowance; i.e., approximately 16" wide x 13" high
Cut and Prep Fabric
As I said before, organizers that are meant to be moved from bag to bag need not match any particular bag, so if you have scraps of fabric that you can patchwork together to arrive at a final piece that is the required size, bonus for you!In my specific case here, I took two strips of solid blue fabric (each about 16.5" wide by 6.5" high) and sewed each of them to the long edges of the 16.5" wide by 14" high flowered fabric.

|
|
If using different fabrics, sew them together to achieve a 16.5" wide x
26"high piece; then fold in half... |
However you arrive at your final piece of fabric, fold it in half with wrong sides together as shown above. Slip the fusible interfacing in between, right up against the folded edge and centered from side to side. Fuse in place.
Sew Main Piece
Once the interfacing is set, re-fold your piece of fabric in half the other way, with right sides together. Sew around the (three) open edges. Leave a 5" gap somewhere to turn the whole thing right side out. (Use a 1/4" to 3/8" seam allowance; whatever you're most comfortable with.) NOTE: If you are attaching a key clip, leave the turning gap close to the top folded edge along the side, such as where I've circled in red here...

|
|
Topstitch all the way around once you've turned it right side out (and attach your key clip in the process if making one)... |
Topstitch all the way around (at or just under 1/4") to close the turning gap (and to enclose the key clip, if making).
Mark Pockets
Now it's time to size up your pockets. Grab the main things that you intend to accommodate with this tote organizer, including the small things that will be put into the WPO side.Divide WPO
Create pocket divisions on your WPO according to your needs, keeping in mind that you will lose about a 1/2" at each end as a result of it being sewn together with the larger back piece.Plan Large Pockets
With your large piece of fabric, place your big items on top of it and fold the bottom edge up so that you have about 5" of coverage.

|
| Ensure that the amount of fabric covering your items is sufficient... |
Decide whether or not you eventually want to have closed ends on this large side. In the above picture, if I were to sew a line down each outside edge, there would be no room for any further pocket divisions.
However, by leaving the edges open, I can fit another pocket in between the eReader and tablet pockets...

|
| Leaving the sides open gives you more storage space... |
Use pins to mark your pocket placements just on the bottom half of the large organizer piece. (That is, do not pin all the way through both layers.)

Attach WPO
Flip the large organizer piece over and put the WPO on top of it.

|
| The finished WPO forms the reverse side of this "super" organizer... |
Tuck the ends of the WPO into the open side edges of the larger piece and pin to the bottom part that is folded up (the part made out of the solid blue fabric in my case), as shown here. As indicated previously, approximately 1/2" of the WPO's ends will be taken out of commission after you do this.

|
| Pin the two ends of the WPO to opposite ends of the bottom part of the large organizer piece... |
Sew the ends of the WPO in place, following the topstitching line on the front side of large organizer piece. NOTE: If you want the outside edges of your pockets to be closed, baste this first to secure the WPO and then sew through all three layers along the topstitching line.

|
| Sew from the front side of the organizer, on top of the existing topstitching... |
While it may appear initially tricky, this should not be too difficult to sew, since you can flip the upper part of the large organizer piece out of your way.
Divide Large Pockets
All that's left is to divide up the large pockets. Flip the upper section of the large organizer piece back in place and repin your pocket placements through both layers. If you need to make actual lines with a marking pen, go ahead and do so; I can generally manage by pinning.

|
| Mark the sewing lines for your large pockets... |
When you sew this part, of course, ensure that the WPO side is flipped out of your way.
The way I did these pocket dividing lines was to start at the bottom and sew up to the top edge, pivot and then sew back down along the same line. This gives the seam some added strength while the backtacking and securing is more or less out of sight along the bottom.

|
| Finished organizer with large pocket edges open... |
Oh, and you might also use matching thread; I went with white so that you can see more clearly in the photos.

|
| My Wave Around Tote Bag Organizer is done! |
Final Assessment
Having had second thoughts about how my Professional Tote was divided up on the inside, let me say that I really appreciate how this tote bag has just one big interior space that is unobstructed. That said, pockets are good at creating order and ensuring ease of access. This tote organizer is perfect for those times when you need pockets.I may be biased, but in my humble opinion, the Wave Around Tote Organizer is an ideal companion for any tote bag.
TERMS OF USE
If you are "sew" inclined, feel free to make and sell as many Wave Around Tote Bag Organizers as you care to; I only ask that you credit me and this blog by attaching the following card to the item.
Like it? Want to keep it? For a copy of this tutorial in PDF format,
download it for free
here!


I need to make one of these Rochelle. Thanks for the pattern!
ReplyDeleteThis is a great idea, Rochelle. No losing things in the bottom of a large bag.
ReplyDeleteI thought about making some organizer as well. Yours is looking good!
ReplyDelete