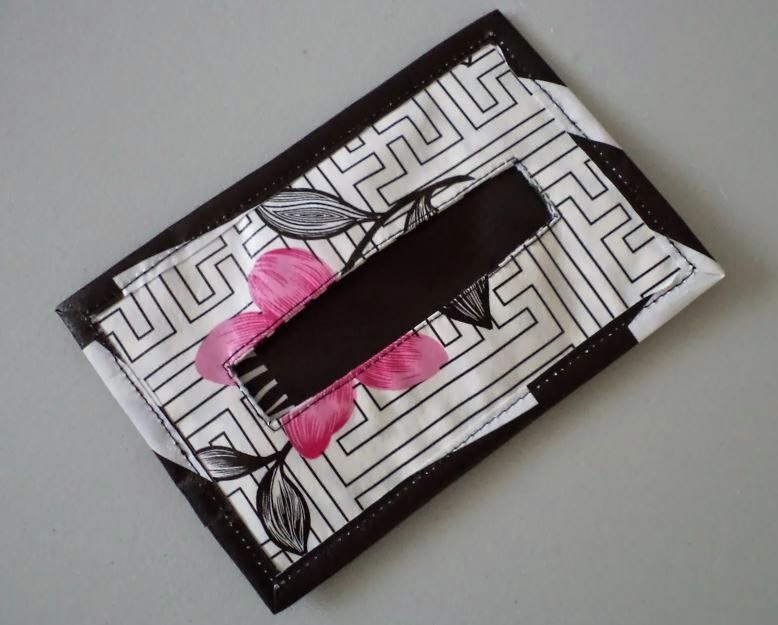
 |
| My Wet Wipe Tissue Wallet in waxcloth... |
First of all, gather your supplies. You will need:
- 5 pieces of laminated cotton or waxcloth, cut to desired dimensions (3 of these pieces will be the inside lining of each pocket; i.e., not really seen)
- 1 piece of quilting cotton cut about a quarter of an inch bigger all the way around (this will be the top lining of the tissue pocket, again, not really seen)
- 1 standard zipper (longer than the longest edge of your wallet)
use promo code COZYCRAFTS for one month free this November
MAKE ZIPPERED POCKET SIDE
Take the two pieces that are going to be used for the exterior and lining of your zippered pocket and cut them both in half lengthwise.Take one each of the pieces that you cut in half and sandwich your zipper between them.
 |
| Sandwich your zipper and clip in place... |
Clip carefully and then sew the three layers together. (You can use pins only if you pin within the seam allowance; otherwise, you'll leave unwanted holes that won't close up.) Go slowly, as you really won't have any opportunity rip out stitches if they're not to your liking! Finger press.
 |
| Finger press the exterior and lining after attaching the zipper... |
Sandwich the other side of the zipper between the two remaining cut pieces. Clip and sew as you did for the other side; finger press again.
 |
| Zipper attached! View of exterior on left; interior on right... |
Grab one of your lining pieces and place it right side up. Center the completed zippered pocket panel on top of it and clip together. (The two pieces may not be the same size; i.e., the outside edges may not line up... this is fine as you can trim off any excess later.)
 |
| Attach the bottom piece to your zippered pocket side... |
Ensure that the zipper pull is positioned somewhere in the middle of the pocket and then sew around the perimeter. If your two pieces are not the same size, sew from the smaller side.
 |
| Sew together and trim off the excess... |
Trim off the excess along the sides and from the two zipper ends. You're officially halfway there!
MAKE TISSUE POCKET SIDE
Now take the tissue pocket exterior piece and the scrap of quilting cotton and clip them right sides together. (It doesn't show this in the picture below, but your quilting cotton piece will be bigger all the way around; center it on top of the waxcloth piece.) |
| Find the middle of your tissue pocket... |
Fold the whole thing in half vertically to locate the middle and draw a line there with a fading marker.
If you're familiar with putting in zippered pockets, you will recognize these next few steps. Draw a rectangle centered around the line that you made. Also draw a couple of angled lines towards the corners at each end.
 |
| Draw the standard "make a zipper opening" box... |
Sew along the outside perimeter of the box. Then use your seam ripper and detailing scissors to cut along the two pairs of angled lines and the middle line between them. Push the quilting cotton fabric through to the other side. Finger press as best as you can.
 |
| Push lining to other side and sew around the opening... |
Stitch along the edge of the opening that you've created. Trim off the excess quilting cotton from all sides to match the waxcloth.
Finish off this pocket the same way as you did for the zippered pocket. When you're done, you should have two completed assemblies, as shown below.
 |
| Put these two completed pieces back to back and trim them as needed to make them the same size... |
Clip the two pieces together, back to back, and ensure that they are the same size. Now take a measuring tape and run it around the edges to get a measurement for the binding. You need to mitre the corners, so allow for extra length to do so.
ATTACH BINDING
Finger press the binding in half along its entire length. Wrap it around the outer edge of your wallet, clipping into place as you go.The pictures below show you how to mitre the corners. (Practice with a short piece first. You should find it almost intuitive in terms of how it's done, once you have your fingers around it.)
 |
| How to create neat, mitred corners with your binding... |
When you get back to your starting point, overlap the ends and cut off the excess binding; sew all the way around to secure.
 |
| Done! Enjoy! |
And that's all there is to it!
Want the complete PDF? If you don't mind making a small contribution to my coffers, the full pattern provides detailed instructions, the pattern template and all measurements (in both metric and imperial) for your convenience, in a 17-page PDF which also includes a different option for the tissue pocket.
 |
| My Wet Wipe Tissue Wallet PDF Pattern & Tutorial... |


Great tutorial Rochelle - nice and clear! And what a perfect use for laminated fabric! :)
ReplyDeleteI would love to make some of these, they would be excellent when travelling. I have never heard of wax cloth or even laminated cotton. I live in Alberta Canada, is it possible to order this on line somewhere?
ReplyDeleteAs it turns out, Nancy, the material that I used was likely just a cheap vinyl that's commonly used for outdoor table cloths. For that, I would simply head out to your nearest dollar store. If you want actual laminated cotton, take a look at what Etsy (https://www.etsy.com/ca/market/laminated_cotton_fabric) might have to offer. (But it'll be a lot more expensive option!)
DeleteHope that helps and thanks for stopping by. :-)