-->
DISCLOSURE: This blog contains Google Adsense ads and affiliate links via which potential commissions are earned when visitors click through.

Search This Blog > > >

Showing posts sorted by relevance for query slippers. Sort by date Show all posts

Saturday, 20 October 2018

Quasi-Tutorial: Make Your Own Slippers

DIY Slippers by eSheep Designs
My new Robert Kaufman slippers...
While my almost four year old kimono slippers still go on the road with me, I was recently inspired to make a pair of regular slippers for use at home.

I have slippers in my bathroom, where — on cold winter mornings — I appreciate having something to warm up my feet right after getting up. My current (store bought) pair is ready for the trash bin, with its plastic sole separating from the top part of the slipper. Upon examining it closely, it occurred to me that it should be relatively easy to make my own.

So I did.

And so can you, regardless of what size you wear.

Supplies needed...
How? Start by going to the nearest dollar store and picking up a pair of insoles. It will serve as the "template" for your personalized slipper pattern.

Be sure to pick an insole with a bit of width to it; i.e., don't choose the skinny ones that typically fit into a women's dress shoe. (In fact, I went for a men's felt boot insole and then trimmed it down to size.)
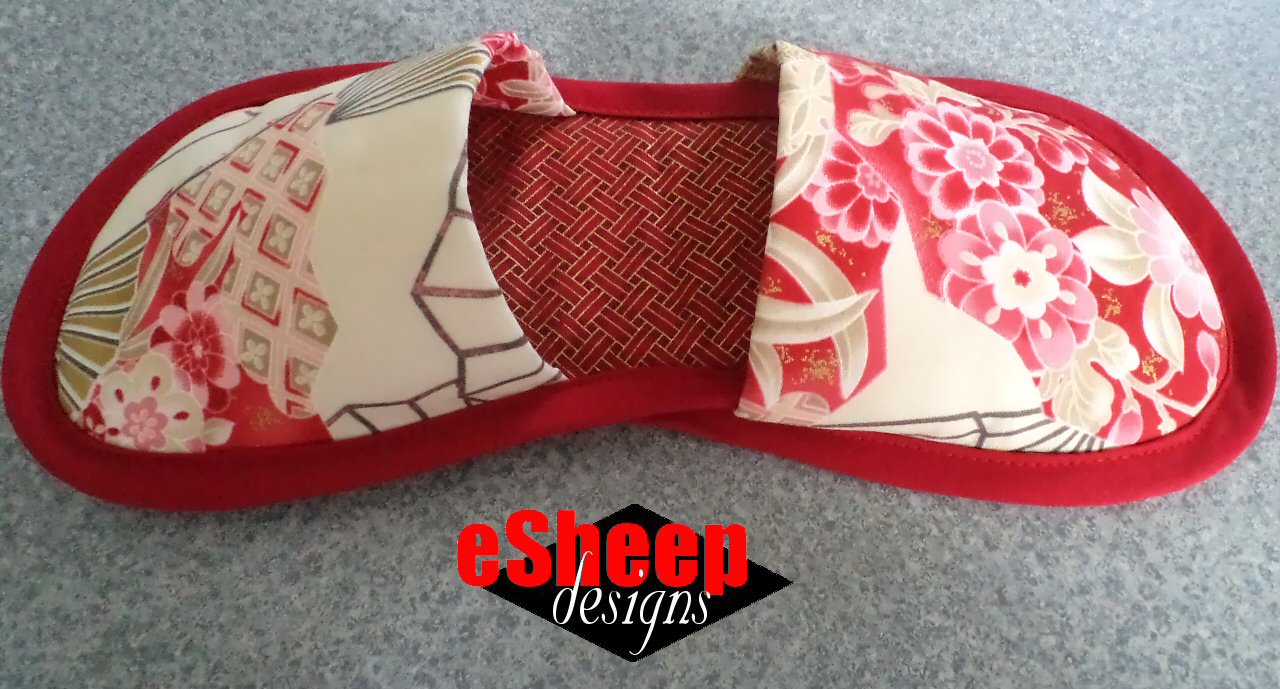
DIY Slippers by eSheep Designs
A pair of slippers made to size!

You'll also need some 1/2" double-folded bias binding, fusible fleece and coordinating fabric for this project.


Check out crafty classes at Creativebug!
[affiliate link]


Make Templates


After ensuring that the insole was sized correctly for my foot, I traced around it on a sheet of paper and then drew a 1/2" outline around it for the seam allowance/bias tape. (I ended up drawing a narrower outline towards the back of the heel.)

DIY Slippers by eSheep Designs
Making a template for the slipper sole...

Next, I made a template for the top part of the slipper.

DIY Slippers by eSheep Designs
Make a template for the slipper's top piece...

This top piece should be about 45% of the length of your slipper's sole (i.e., multiply the length of the sole template by .45 to arrive at the length of this top piece) and should follow the same curve along the top edge.

Both sides should then flare out to become 1.5" wider along the bottom edge as shown in the picture above.

Use clips to attach the two templates together so you can check for proper fit.

DIY Slippers by eSheep Designs
Does it fit?

Once you're satisfied with the templates, mark them appropriately for fold line (only on the top piece) and for left/right top/bottom of the sole.

Cut Fabric & Interface


Use the sole template to cut fabric for the top and bottom of the left sole and (reversed) for the top and bottom of the right sole. You will end up with four pieces in total; interface all four with fusible fleece.

Use the second template to cut fabric on the fold for the top of the left slipper and (reversed) for the top of the right slipper. Interface only the top half of these pieces with fusible fleece. (I would recommend keeping the fleece out of the seam allowance, unlike what's shown here.)

DIY Slippers by eSheep Designs
Interface the top half of these pieces...

Now it's time to sew.


Watch live classes for FREE at CreativeLive! Sign Up at CreativeLive
[affiliate link]


Sew


Pin and then baste the top part of the slipper to the two sole pieces (which should be right sides out).

DIY Slippers by eSheep Designs
Pin and baste top part of slipper to top of sole...

The next step depends on preference. If you want the extra thickness — and can handle the resulting slightly trickier job of sewing the bias binding — slip the insoles themselves in between the two pieces of the sole's fabric. (However, this may affect how washable the slippers are depending on what the insoles are made out of.)

DIY Slippers by eSheep Designs
Optional: add the insole to the inside of the slipper...

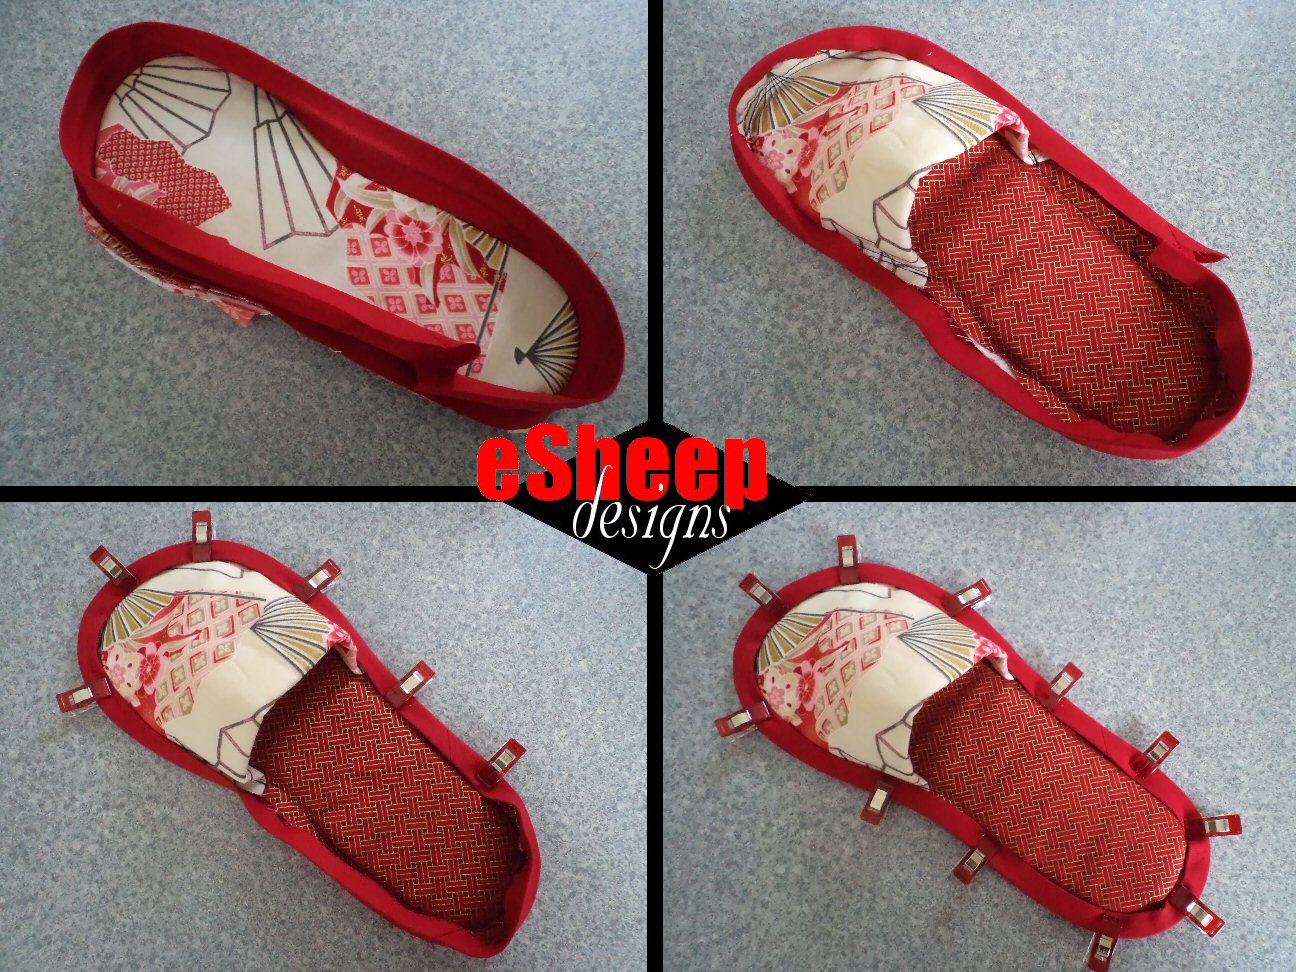
The last step is to attach the bias binding.

I like to start sewing bias binding from the bottom, then flip it around to the top side and finish sewing from the top side. (I used my sewing machine's zipper foot for this part. Depending on the thickness — i.e., if you inserted the actual insoles inside — you may find it useful to use a zipper foot too.)
DIY Slippers by eSheep Designs
Attach bias binding around entire edge of slipper...

You may have your own preferred method of attaching binding, so I won't go into too much more of a discussion here. (If you want details, check out my Quilted Hanging File Organizer tutorial.)

DIY Slippers by eSheep Designs
View of the bottom!

And that's all there is to it! If you want your slippers to be "grippy" on the bottom, I understand applying some puffy paint will do the job.

I've been on a bit of a hunt for sewing projects suitable for guys this year and this is yet another that would qualify, when made with appropriate fabrics.

By the way, in my part of the world, we generally remove our shoes when we enter our homes. Hence, many people wear slippers indoors. Is it customary where you live to remove your shoes or do you wear them inside your house?


Saturday, 20 December 2014

His and Hers Robert Kaufman Inspired Kimono Slippers

Kimono slippers crafted by eSheep Designs
Kimono slippers made with Robert Kaufman Satsuki fabric...
Last week, you saw the muslin version of the kimono slippers that I made using Lauren Mackey's free tutorial/pattern.

This week I present to you a couple of "real" finished pairs. First, this one made from a couple of Robert Kaufman fabrics: the Kimono Floral in Blossom from his Satsuki 2 series and some Kona cotton in rich red.

For this pair, I made a couple of changes (one intentional, one not) to the process outlined in Lauren's tutorial. The intentional change was to add some (fusible fleece) interfacing to the bottom sole piece, just to add some extra substance, since I decided not to make the slipper's lining out of fleece. Then, during the first part of the sewing, I "remembered wrong" and topstitched along the edge of the two facings before they were joined. I decided to live with the consequences.

I will briefly summarize the steps of Lauren's tutorial and provide some extra insight where applicable.

I added some fusible fleece interfacing to the bottom of the slipper...

Instructions 1 through 5 are clear and straight forward. You take the eight facing pieces (2 large external, 2 large lining, 2 small external, 2 small lining) and pin/sew them together appropriately along their curved edges; clip curves, turn and press.

I found #6 to be initially confusing, but after seeing the picture for #7, was able to figure out that it meant to create the vertical join at the heels by sewing together each pair of facings (pairing one large with one small).


Check out crafty classes at Creativebug!
[affiliate link]


Instruction 8 (the part that I jumped the gun on) is to topstitch along the curved edge after the two pairs of facings have been joined together. (Oh, and because I was using quilting cottons, I did my topstitching at just under 1/4" away from the edge, rather than 3/8". If you're using thicker fabric, you may want to go with the original recommendation.)

Kimono slippers crafted by eSheep Designs

Instructions 9 through 12 are pretty clear, as long as you keep an eye on the photos. You are now attaching the lining (and then exterior) sole piece to the facings. Fair warning, this part is not fun... even the pinning part is not easy to do at the extreme curvature around the heel area. (I have to admit that the lining of my pair of slippers has a couple of small puckers in it that I did not bother to fix.)

I did find the 5/8" and 1/2" seam allowances to be a bit much as I ended up clipping away a lot of fabric at the end. (And all that fabric did not make it easier to sew around that afore-mentioned heel area.) As long as I make the pattern piece slightly smaller, I'm going to use a narrower seam allowance, probably 1/4" and 3/8", on my next pair.

Kimono slippers crafted by eSheep Designs

Instruction 13 is to turn the "whole contraption" right side out. (It did not seem like the thing to do, but yes, it actually is.)

Instructions 14 through 17 are to attach the facings to the top part of the sole. (This is actually pretty straight forward when you're holding it in your hands.) The first step is to secure the smaller (inner) facing to the sole's lining piece, using a 5/8" seam allowance. Then, on the opposite side, the larger (top) facing is secured to the sole's exterior piece, using a 1/2" seam allowance.

Kimono slippers crafted by eSheep Designs

It really looks strange after all this, until you turn it inside out again per instruction 18.

BUT... my advice at this point is to stop and take a fitting.

After instruction 17, you should be able to do some fancy flipping to turn the slipper out into its final configuration. This is where you make sure that it fits you before you add any further stitches.

Kimono slippers crafted by eSheep Designs

I had issues with instruction 19. While it's clear what I need to do, the different seam allowances on either side made it tricky to choose what path to sew on. I ended up having to rip out some stitches and resewing. My advice is to sew one side, turn it right side out, check that the stitches are properly hidden and that the corner of the main facing is caught in the side seam. (I had trouble with that particular spot both times.) Then go back and sew up the other side.

Instructions 20 through 22 have to do with trimming the bulk out of the seams and sewing the top edges of the two facings together. Pretty basic stuff, and then you're done!


Overall, I am pleased with how my slippers turned out. They're not perfect, but then I don't need them to be perfect. As is, they will serve me fine as packable slippers that I can stuff inside a ziplock bag and take with me on my travels. (I wear slippers when staying in hotels.) Oh, and of course, for those who are detail oriented, yes, I do realize that the fabric on the bottom of my slippers are nicer than on top... I will bite the bullet and fussy cut the top (larger) facing pieces (piece B) next time.

Now to make a pair for hubby. And here they are...

Kimono slippers crafted by eSheep Designs
Hubby's two-tone kimono slippers...

For this pair (also made with Robert Kaufman fabric), I merely reversed the smaller facing piece (piece C) so that the interior became the exterior. This gave it a two-tone look that I thought was kind of interesting.

Some thoughts about how things went while sewing the second pair... very smoothly. Everything was more intuitive, as might be expected. Also, because I used seam allowances of 3/8" and 1/4" instead of 5/8" and 1/2", the curves were definitely easier to handle. (In fact, I did the whole project rather leisurely over the course of an afternoon, surprising my hubby, to whom I had specifically told earlier in the day, "Don't expect these by this afternoon.")


Shop Roostery for Custom Home Decor


I've come across two patterns for sale for kimono slippers and would assume the advantage of either is that you would not have to DIY your size. One can be ordered from ithinksew; the other is available through Craftsy. From what I can see in the pictures for the latter, the seam shows on the inside. This tutorial — if you can make the adjustments to make it fit you (go back to my post from last week to find out how) — results in a slipper that is arguably more polished looking.

In any case, I thought this was definitely a worthwhile project to take on. If you think so too, you still have time to whip up a few pairs for Christmas morning if you get right on it. ;-)

Thanks, Lauren!


Saturday, 13 December 2014

Making a Pair of (Muslin) Kimono Slippers

Kimono Slippers by Lauren Mackey of Lauren E Fabrications
Lauren Mackey's kimono slippers...
Even before I had gotten a peek at the contents of my Robert Kaufman Far East Mystery Box from Craftsy, I knew I wanted to make a pair of kimono slippers with some of the fabric.

I had seen a similar kimono slipper pattern for sale at Craftsy, but upon doing a Google search, this free tutorial/pattern by Lauren Mackey came up.

Free, yes, but there is a "price" to be paid. Unless you happen to wear a US size 9 to 9-1/2, you'll have to do a little work as this pattern is "one size only". Lauren does offer a table of shoe size values for you to work out your own requirements, however tricky that may be.

Shoe size chart (image courtesy of laurenefabrications.blogspot.com)...

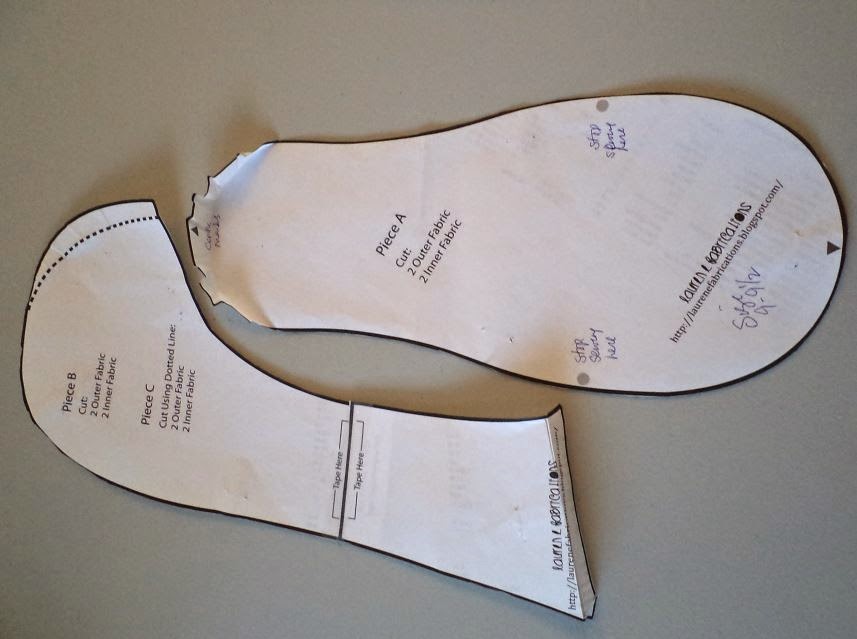
As you can see in the photo below, the pattern piece for the sole that accommodates the size 9 is just over 11.5" long.


According to her table of shoe sizes, a woman's US size 9 is roughly equivalent to a 10" foot length. I wear a size 7, which the table tells me is a half inch shorter than the size 9. By that logic — and given that seam allowances won't vary — I can adjust the pattern piece by a half inch and it should work out, right?

Right.


So I made a muslin pair (using just old poly cottons) with just that one simple adjustment and they turned out quite well...

My muslin kimono slippers fit me fine...

Here's what I did with the two pattern pieces.

I folded off a little over half an inch from the heel of the pattern on both pieces. The straight edge of the top facing pattern piece (B and C) was easy enough to fold off; for the sole pattern piece (A), I made sure that the largest part of the fold (i.e., where the half inch is measured) was situated right where the little triangle was, and then I folded along a curve on both sides, tapering off progressively. (The reason I folded off more than a half inch was that I was going to use straight cottons; a smaller fit would likely be better. And as it turned out, I would say that the sizing is generous.)


I then followed Lauren's step by step tutorial. It's a decent tutorial (especially considering it's free) and in general, it wasn't too bad to follow. There were parts that could have used a bit more clarification, but it still turned out fine. (I'm sure that after doing one pair, the next experience will be less confusing.) Oddly enough, it seemed to come together intuitively at the end. And timewise, the muslin only took me a couple of hours.

The seam allowances are very generous (perhaps too generous), so I think you can go into this project confident that you'll be able to make a pair to fit you.

I actually paid a lot more attention to this muslin than I usually do...

Anyway, after the successful muslin, I think it's safe to proceed with an actual pair. As I said up top, I'm going to use some of my recently acquired Robert Kaufman Satsuki fabric. This is the Kimono Floral in Blossom from his Satsuki 2 series.

Robert Kaufman Satsuki fabric...

I'll follow up with a post next week to show you my "real" pair of kimono slippers.

But before I sign off, I would like to draw your attention to this chance at a most excellent Christmas present for you... as long as you live in Canada or the U.S. AllFreeSewing.com is running this 12 Days of Christmas giveaway until December 19. Enter daily for your chance to win all of this marvellous "stuff"!

The 12 gifts that you can win from AllFreeSewing.com...
I could use a new iron...


Saturday, 14 August 2021

Things to Sew for Travel [Pt 2]: Drawstring Bags

Things to sew for travel
Things to sew for travel...
In today's second post about what to sew for travel (first post here) — now that travel is tentatively becoming a thing again — the focus is on drawstring bags.

When it comes to the world of drawstring bags, I'm very much a latecomer.

While most sewers tackle a drawstring bag as one of their rites of passage projects, I didn't get around to making my first one until 2016, when I came up with the idea of the Bundled Up Bindle Bag.

It's based on the circular drawstring bag, which when made in different sizes can be functional as a jewelry pouch or a child's play mat.

My take on the idea was to incorporate multiple layers to form a variety of pockets. With the use of mesh and laminate, the pockets could also be made to be waterproof or see through.

Bundled Up Bindle Bag by eSheep Designs
My Bundled Up Bindle Bag...

I will admit that I had never used mine until this year. First, I found an unexpected use for it while pursuing one of my pandemic activities.


Turns out it's handy for organizing puzzle pieces.

The three mesh pockets allowed me to do some colour sorting while I worked with the pieces in the main top compartment. (I often took my puzzles outside to work on and this bag was just the thing to keep everything organized.)

Bundled Up Bindle Bag by eSheep Designs
Sort, organize and carry your puzzle pieces...

For travel, however, it's perfect for day trips to the beach or for a float on the river as it can keep your sunscreen, sunglasses, insect repellent, wipes, bathing suit, etc., all in one grabbable bag. It's also easily packable as it can be laid out flat or rolled up when not in use.

My bindle bag pattern sells for only $2, but if you're looking for a freebie to hack your own version, I'd suggest searching for "circular drawstring play mat" or "circular drawstring bag". You'll find no end of similar items, although it may be harder to find one that features pockets. (But hey, if you're somewhat skilled, you can add pockets, right?)

Here is a laminated version from Bernina's WeAllSew blog, presented by Melissa Mortenson.

WeAllSew Laminated Drawstring Bag by Melissa Mortenson
image courtesy of WeAllSew...

It's an example of a mid-size version that's useful for carting around makeup. However you go about it, it's a fun project, infinitely useful for travel, and easy to do.


Watch live classes for FREE at CreativeLive! Sign Up at CreativeLive
[affiliate link]


The other kind of drawstring bag, of course, is the simple rectangular version that people commonly use as eco-friendly gift bags. Even before my sewing days (re)started, I would carry shoes in one of those whenever I travelled anywhere.

Four years ago, I discovered this terrific method for easily making drawstring bags of any size.

Easiest Ever Reversible Drawstring Bag by eSheep Designs
Simple drawstring bag is an indispensable travel shoe bag...

It's reversible, too. I found the method featured on a video tutorial by Laura Coia. (Refer back to my original post for the link.)

Some time later, I made a much smaller version — finished size about 4.5" wide by 5.5" high — out of some Robert Kaufman fabric scraps.

Easiest Ever Reversible Drawstring Bag by eSheep Designs
Mini version...

I use it to carry my kimono slippers. (What do you know, still a shoe bag!)

Easiest Ever Reversible Drawstring Bag by eSheep Designs
A carrying case for my hotel slippers...

Speaking of slippers, that's something else you can sew for travel. (After all we've been through in the past year and some, our aversion to germs may make more of us want to wear slippers in hotels.)


Check out crafty classes at Creativebug!
[affiliate link]


While I swear by this method of making drawstring bags, there are situations where you might not need a lined or reversible bag. The fabric gift bag that I used as a shoe bag for years was just a single layer.

Easy Drawstring Bag by Erica Arndt
image courtesy of Erica Arndt...

If you'd just as soon make a simple drawstring bag that doesn't require two pieces of fabric, I highly recommend you check out Erica's Super Easy Drawstring Bag sewing tutorial on YouTube. True to its name, it's super easy and straight forward.

Do you use drawstring bags when you travel? If so, what for?

'Til next...

Saturday, 29 May 2021

Five Fabulous Freebies from Bernina's "Other" Blog

Bernina's Other Blog
image courtesy of Bernina.com...
In February 2020, I posted about Bernina's Through The Needle magazine archive and briefly mentioned that they publish a decent blog called WeAllSew.

While searching online for something a few months ago, I happened upon another Bernina blog that I didn't know existed. It dates back to May 2014 and is accessible in German, Dutch and English versions according to a language menu. (As an aside, if the English version doesn't seem to be up to date — the blog should post fairly regularly — check out the other two and have your browser translate the content for you.)

Interestingly enough, on that same menu is a selection for "US" (which is not a language, but whatever) that links up with WeAllSew, which has different content altogether.

Wonder why that is?

Make it in May at eSheep Designs

Anyway, today I'm going to share five fabulous freebies from this "other" blog. (Yep, we're going to finish off the last week of Make it in May with a bang: five tutes!) Links are available at the end of this post; those of you who live in the US can let me know if you're able to access them. 


First up is a tutorial for a stuffed animal of a species close to my heart: Bernina's version of a plush sheep. Sample shown here is trimmed with denim.

Bernina plush sheep
image courtesy of Bernina.com...

A downloadable pattern for two different sizes is yours for the taking. (Small is about 10" high x 14" long; large version is about 14" high x 19.5" long; since this content is meant for non-US folks, the project measurements are given in metric.)

It's worth mentioning that the tutorial even gives you an idea of how much fill you'll need. It looks fairly simple and if you have some old plushy blankets that you no longer need, it would be a great recycling or repurposing project.

Next up are some slippers; I love slippers. Have made a few myself, like here and here. Living in a cold climate, it's always more comfortable about six months out of the year to have my feet covered in some way.

Bernina Soft Slippers
image courtesy of Bernina.com...

These ones look super cozy, with the sherpa fleece lining. Again, if you have an old blanket that's fallen out of favour, consider harvesting the material for the inside of this slipper or the outside of the plush sheep.

The pattern provided is for a European size 39, which translates roughly into a North American 8.5. But it's usually not too hard to adjust these types of patterns slightly up or down to fit.


Watch live classes for FREE at CreativeLive! Sign Up at CreativeLive
[affiliate link]


This next project is definitely different. The title of the post refers to recycling party tent fabric into bags! Not sure exactly what European party tents are made out of, but I assume any sort of rip stop nylon would meet the criteria here.

image courtesy of Bernina.com...

In any case, you will find three different patterns here to make simple bags for all occasions: the purse shown above, a backpack style bag with a flap, and what they call a "man bag" (LOL), which is a sling bag of sorts. All in all, quite fun and if you want templates to play with to make your own version of these using more conventional fabric, it's a great starting place to be creative.

The next project also meets my strict criteria for being different: it's a fabric votive holder.

Bernina star shaped candle holder
image courtesy of Bernina.com...

Particularly with the advent of LED votives, these would make great mood lighting for any special occasion without fear of burning down the house.

Again, templates are provided, but this one looks to be a bit more challenging in that there is a fabric ring to sew in place around a small round opening. What I like about it is that it inspires me to think of other shapes — like a starfish or a flower — that I can convert into this idea.


Check out crafty classes at Creativebug!
[affiliate link]


The last project that I have to share today is one that falls into my definition of fabric origami: it's a folded gift box.

Bernina folded gift box
image courtesy of Bernina.com...

I've always loved these boxes. Everyone I know has shared the same lament about our Chinese takeout: they're never in these kind of boxes like we see on TV! (Although admittedly, some noodle places are using them now.)

This tutorial gives you templates for two different sized boxes, one with a 3" square base and the other with a 3.5" base. The project uses a paper product called SnapPap which is probably similar to Kraft Tex. (I may have to give that stuff a try someday.) Alternatively, I would try fabric piecing with Peltex like I did with my match box.

Here are the links to the Bernina projects that I've discussed above:

If you're finding it more and more difficult to seek out blog content that isn't "same old, same old", this is a worthwhile blog to check in on regularly. For those of you into making your own clothing, they also offer a free pattern every month (which is only available for free downloading during that month).  Enjoy!

'Til next...