 |
| My jumbo ironing mat! |
Not sure if that's unusual, but all I've ever had is the mini table-top version. And since the one I have was not constructed with a steel base, it's gotten warped over the years.
The advantage of one of these things is that it can be placed virtually anywhere and doesn't take up a whole lot of space. Ever since my sewing journey began, my little board has had a home in my sewing room, on top of a shelf in front of the window.
 |
| My sad little ironing board... |
If I had a full-size ironing board, you can be assured I wouldn't have it sitting out and open all the time.
When I recently made the decision to improve my ironing station (after purchasing a new iron), I pondered whether to make a large pad that I could put on any surface, or turn the top of this shelving unit into a larger ironing "board".
After mulling it over — and ordering a yard of Insul-Bright — I thought, why not do both?
 |
| Gathering my materials to make an ironing mat... |
 |
| Easy to use... |
Therefore, this qualifies as an recycling project. A quick visit to your nearest thrift store should yield inexpensive bed sheets, duvet covers and blankets if you don't happen to have any at home that you can repurpose.
The result is a fairly large mat that can do double duty as a topper for my shelf as well as for a large counter or table top. (On the shelf, the excess part just hangs off the back against the wall.)
 |
| My expanded ironing "board"... |
For this project, I didn't even bother measuring any of the materials. I just used the Insul-Bright as a template and cut around it. (The fabric was cut about half an inch larger all the way around.)
 |
| Stacking the four layers... |
The four resulting pieces were then stacked in this fashion: the blanket, the Insul-Bright, the top fabric piece (right side up), the bottom fabric piece (right side down).

Then it was just a matter of pinning and sewing all the way around, leaving a turning gap. After turning, I closed up the opening and topstitched all the way around the perimeter.
 |
| Closing the gap... |
And of course, it sounds easy, but when dealing with something of this size, the layers are bound to shift. I probably could have gotten better results by basting everything first, but in the end, it's just an ironing mat and I wasn't seeking perfection.
My first instinct was to use binder clips to secure the mat to the top of the shelf, like this...
 |
| Trying out some binder clips... |
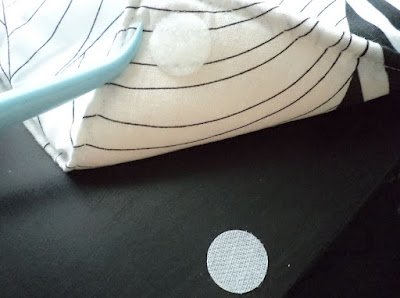
They seemed too strong, however, so I attached four sets of adhesive hook and loop "dots" instead.
 |
| ...but adhesive velcro dots come to the rescue... |
Despite being "just" adhesive, these things hold quite well to fabric. They'll do the job in this situation and I don't have to be concerned about something being permanently fixed onto the shelf. (By the way, I do keep an old towel underneath to absorb any excess moisture that comes through during steaming.)
 |
| My new ironing station ready to go! |
Quite happy with how this turned out. Not only do I have a larger surface on which to iron — three feet by almost four feet when laid out in full — it's actually flat and not concave! (I've seen smaller projects made with strips of magnets for securing to the tops of washing machines, which is another handy idea.)
Oh, and given the recycling factor, my only real cost associated with the project was $11 CDN for the Insul-Bright.
Do you do your sewing related ironing on a traditional ironing board... or do you have something a bit different?

I covered a large squarish piece of plywood with Foam stabilizer and silver ironing material on top of that, then I stapled each to the back side of the plywood. I placed a piece of that rubbery shelf stuff on top of my table and the ironing board on top of that. This table also has bed risers so it's at the perfect height for ironing too.
ReplyDeleteI have a full sized ironing board but find I don't use it much for ironing. I have a table top board that I bought years ago on clearance because it didn't have any legs. I've recovered it once and use it when applying interfacing and pressing as I sew. I also have an ironing mat on my sewing table under my cutting mat that I use for ironing larger jobs such as preparing fabric for cutting out pattern pieces. It's simply a piece of fleece from a mattress pad that wasn't being used covered with a piece of thick muslin. I do use my large ironing board when my son needs his uniform shirt starched and when I need the arm sleeve board that is attached.
ReplyDeleteYou bring up the only reason why my warped mini board is still in my household... sometimes I need that curved end for ironing clothes. Thanks for sharing your ironing solutions; good to know that we're all finding non-traditional ways of getting the job done.
DeleteBTW, in case you weren't aware, your Blogger account is set up without an email (i.e., the default is set to "noreply-comment") so I am unable to respond personally to you.