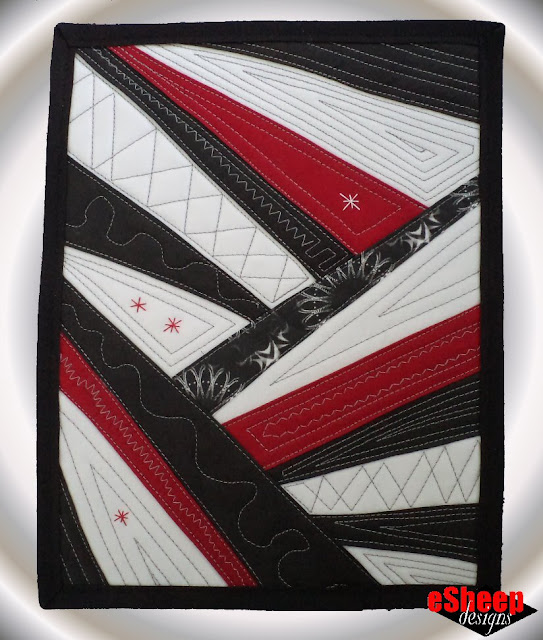
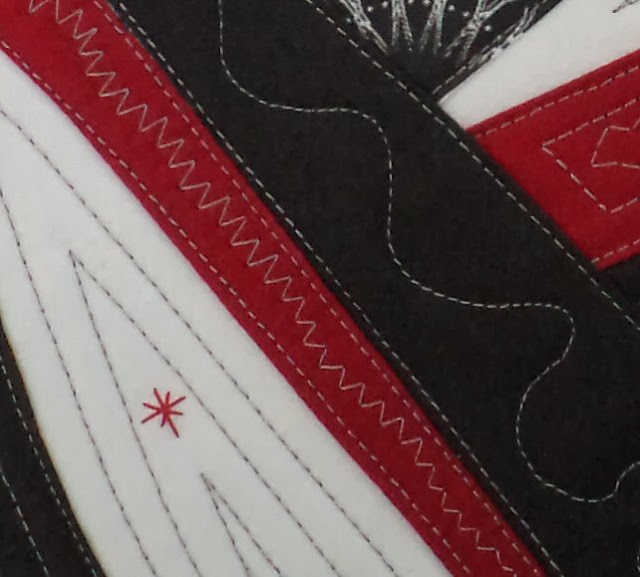
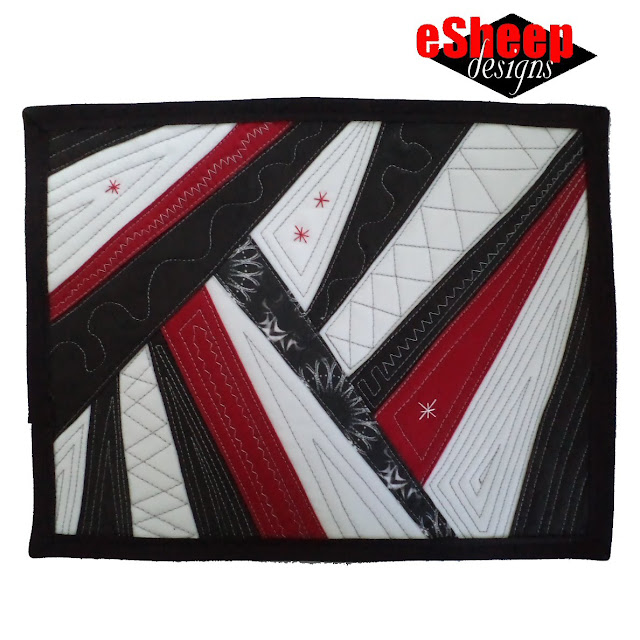
| A closeup look at my first (mini) quilt... |
First of all, it was surprising that I gave my time to a quilting class. Nothing against quilting; it's just something that I've never had much interest in pursuing.
Second of all, I was surprised that I was so jazzed by the end of the class that I wanted to make one of those fun "mojo minis" for myself.
Third of all, no more than ten days later, I did make myself a mini quilt... even one of my own design.
| "Unity" |
It's funny, but from a couple of the reviews that I read for this class, I take it that some quilters are extreme rule followers and don't appreciate this type of "freestyle" quilting. For me, it was exactly the "no rules" approach that drew me to this project.
And now without further ado, may I present my mini masterpiece... LOL!
 |
| My Criss Cross mini quilt... |
This is the size of a sheet of paper, 8.5" x 11" (the ones in the Mojo Minis class were 11" x 14"). It took me four to five hours to make from start to finish, with the quilting taking up the last hour and a half. (With about twenty minutes to go, I was pretty much wanting it to be over, so I know that I still don't have much interest in — i.e., patience for — taking up quilting!)
 |
| This element turned out looking like a tribute to one of my other interests... know what I'm referring to? |
Not knowing if I'd end up framing it, in anticipation of hanging it up "as is", I zigzag stitched all around the outer edge and then sewed a narrow binding on top of it. (The mini quilts in the class were matted and framed and therefore it didn't matter that the edges were left au naturel.)
Days later, I found a spare frame in the house and put my work under glass.
| Must admit, the frame is a nice touch... |
Picking the colours/selecting the fabrics that I wanted for my quilt was easy enough. The black and white with red highlights combo is sort of my "theme".
| Choosing fabrics for my mini quilt... |
The tiny bit of red Robert Kaufman Kona Cotton fabric is a scrap from my original Craftsy order some years back. The black accents were recycled from the cover of one of the couch cushions that I took apart last year to make my P & P throw pillows. (Yay for recycling!)
 |
| This strip of fabric is one of my Spoonflower creations... |
Finally, I wanted to feature a single strip of printed fabric among the solids. The strip comes from my Psychedelia collection on Spoonflower, called Spirographing.

If you too want to jumpstart your creative energy by making a mini quilt, here's the general process.
Draw a Pattern
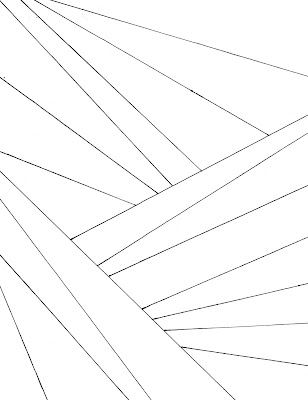
Take a sheet of paper and draw a pattern, extending the lines all the way to the edge. Here's mine (feel free to use it if you wish).
I then numbered the various "strips" so that they could be easily identified later.
 |
My original mini quilt pattern... |
It was then scanned and loaded up into PSP so that I could explore options for colour and fabric placement.
Determine Fabric Placement
Here are some examples of what happened while playing around with the pattern in Paint Shop Pro.
| Creating some sample placements for my fabric... |
| The final plan! |
... it turned out to be what I wanted as my fabric layout.
The white is the background. I used a piece of cotton twill from my stash that I interfaced with fusible fleece (since I don't own any quilt batting).
Create Templates
At this time, I went back to my original drawing and wrote down the colours on each of the strips. I indicated with arrows where seam allowances would be needed.
| Transferring the plan back onto the paper... |
I then made a copy of this to cut up.
| Cut template strips... |
Of course, I only kept the black and red strips after cutting up the second copy of the pattern (the white being my background).
While laying down the pieces on top of the original copy, I identified other areas where a seam allowance was needed, namely for the strips that would be overlapped by a top layer strip. In the drawing above, the first (bottom-most) layer is made up of strips 12-18, the second layer is made up of strips 5-11 and the top layer is made up of strips 1-4.
Therefore, I had to add a seam allowance to strips 6, 8, 9 and 11 at the edge where they go under strip 4.
Cut Fabric
I placed the individual paper templates onto fabric and cut around them with a rotary cutter, roughly including a 1/4" (6mm) seam allowance where I had my arrow pointers. The idea is that this is meant to be an imperfect creative exercise, with no need to be exact; hence, no actual measuring.
| Quilting strips all cut out... |
And this is what my collection of strips looked like when I placed them down on my pattern sheet.
I then spent some time with the iron, pressing the seam allowances.
Attach Components to Background
The next step was to lay down the strips onto the background piece. Once I had a grasp of where things had to go in terms of first, second and top layers, I started stitching the strips onto the background.
| Pinned and ready for sewing... |
For the most part, I had to start with the bottom most layer and work my way up, but there are always pieces that aren't affected by any layers that can be stitched down quickly, like the two black corner pieces.
| Sewing two side by side strips... |
Wherever I had two strips side by side, I put one on top of the other as shown above (in this case, I would then stitch on top of the red strip to secure both it and the black strip to the background).
In the Mojo Minis class, the strips were glue basted, but I found that I didn't need to do so here.
By the way, I used gray thread for my sewing/quilting. (The hand-sewn stars were, of course, done in red and white thread.) I use gray quite a bit for many applications where it might be customary to use white or black; I like that it's darker than white and lighter than black.
Quilt Away
All that's left after the strips are sewn down is to quilt to your heart's content. As you can see, apart from the machine quilting, I also added some hand-sewn embellishments (the stars). I have no experience or training in quilting, so what I liked most about this was the freedom to do as I saw fit.
If you're in the same boat, just do what you feel like doing. In the Mojo Minis class, it was almost the goal to be random and irregular. Fortunately or unfortunately, I tend to be "ordered" by nature, so most of what I did ended up with some symmetry.
But you know what? This really is the kind of project where you can just pass the time mindlessly, forgetting any troubles and rejuvenating yourself creatively. I know I said that near the end, I was ready for the quilting part to be over, but throughout the whole making process, I was quite enjoying the experience.
Who knows, I may do this again sometime.
For those of you who are quilters, what do you like most about quilting?


I do a lot of my own designs, but I have no computer program. I might sketch out a basic idea with paper and pencil, but if it's pieced, I just grab scraps and start sewing. I prefer to create as I go, because even with the best plans, you still might need to make changes. For free form style, I do the sew and flip style with my scraps and see where it takes me. I might trim off an angle or two as the piece grows. I am more of an asymmetric person myself.
ReplyDeleteI am glad you had fun making and designing your piece Rochelle. It is a great way to use up scraps! The size of a sheet of paper is the doll quilt size quilts I made for charity.
I've only entered the quilting world in recent years, so don't know all the rules. Not knowing what I should be doing, has given me a certain amount of freedom to experiment, which I really do enjoy. Mind you, I'm also enjoying learning the traditional ways to quilt.
ReplyDeleteCan't beat a black/white/red combo. I really like the quilting you have done - totally suits the design. Well done on your first mini.