-->
DISCLOSURE: This blog contains Google Adsense ads and affiliate links to Creativebug via which potential commissions are earned when visitors click through.

Search This Blog > > >

Saturday, 25 June 2022

Quasi-Tutorial: Tote Bags to Seat Cushions

Tote bag gifts from various charities...
Gifted tote bags from charities...
Do you receive "gifts" from charities that you support? Apart from the never-ending flood of greeting cards and mailing labels, I have routinely discovered socks, gloves and these large tote bags in my mailbox.

The socks and the gloves get used, but in the past, I've tossed these tote bags in with my clothing donations to Goodwill.

Recently, I pulled one of them out and thought, hmm... this is waterproof material. And sort of nice looking. What if I were to take these apart and make something else out of them?

My first inkling was to make a different style of bag, but then an idea that I had previously seen on Sew4Home occurred to me: I would turn these into outdoor seat cushions.


The ones from Sew4Home were round. I like round but I hate the waste that's required to get there. Therefore, I decided not to cut away any of the material by keeping its essential shape. These finished out to a 17" x 17" (about 43cm) square.

Outdoor Seat Cushion by eSheep Designs
... transformed into an outdoor seat cushion...

The original bags feature a zippered front pocket with a center compartment that closes with a piece of hook and loop tape.
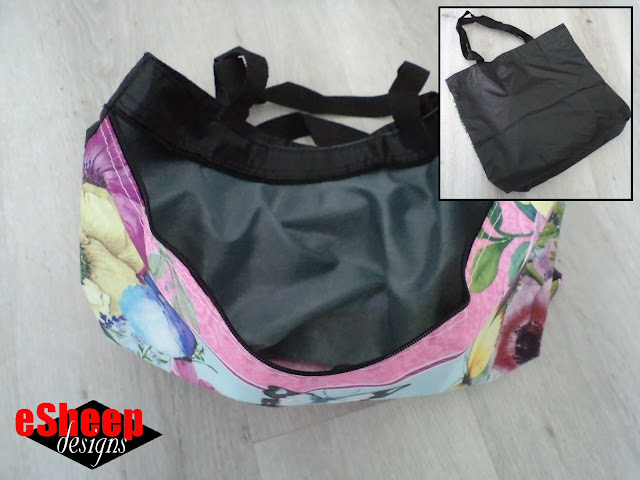
Tote bag gifts from various charities...
Original format of tote bag with a zippered front pocket (inset shows back view)...

After taking a seam ripper to the whole thing, I ended up with a zipper, a couple of webbing straps, a floral print panel and a (larger) black panel.

The top facings and lining of the pocket weren't part of the repurposing.

Tote bag gifts from various charities...
Stripped down...

Because of the availability of a full width zipper, I decided to make the finished item a cover only; i.e., you can put whatever you like inside to provide the cushioning and it can be removed for cleaning.

Outdoor Seat Cushion by eSheep Designs
Make a tube out of the two pieces of material...

Construction is fairly simple. First, sew the printed panel to the black panel to create a tube. (I used a 3/8" seam allowance for the whole project.)

Outdoor Seat Cushion by eSheep Designs
Fold the two ends evenly...

Fold the tube so that the black material appears evenly along both sides.
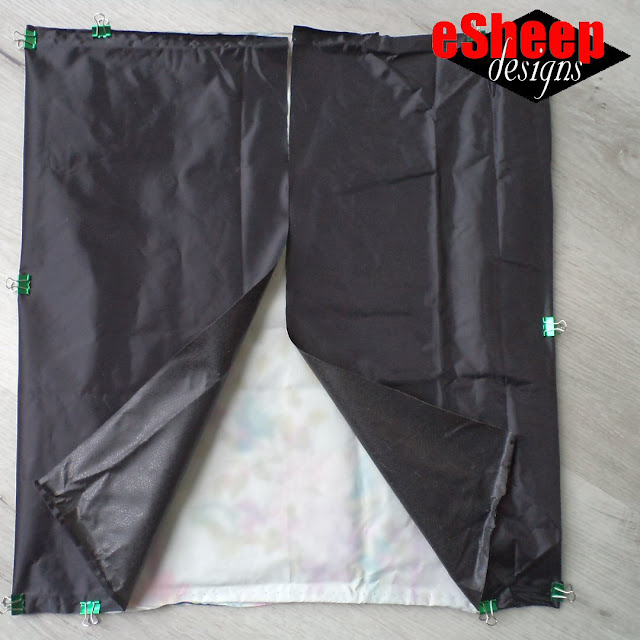
Outdoor Seat Cushion by eSheep Designs
Cut open the middle of the back panel...

Flip the whole thing over and cut the back panel in half right down the middle. This will accommodate the zipper. But first...


Watch live classes for FREE at CreativeLive! Sign Up at CreativeLive
[affiliate link]


With the tube now open, it's easy to run a line of topstitching along the two seams. Secure the entire seam allowance against the black panel.

Outdoor Seat Cushion by eSheep Designs
Top stitch the two existing seams...

Now it's time to attach the zipper. Remember that the right side of the zipper tape always faces the right side of the fabric.

Outdoor Seat Cushion by eSheep Designs
Attach the zipper...

With wrong side of the fabric facing out, ensure that the black material along the sides is evenly distributed once again. Clip in place and use something to mark and round off the corners.

Outdoor Seat Cushion by eSheep Designs
Round off the corners...

Take the webbing from one original bag strap and cut it in half. Slip it inside under the zipper and clip it in place as shown below. Use a couple more clips on the end of the zipper to ensure that the seams lie open and flat.
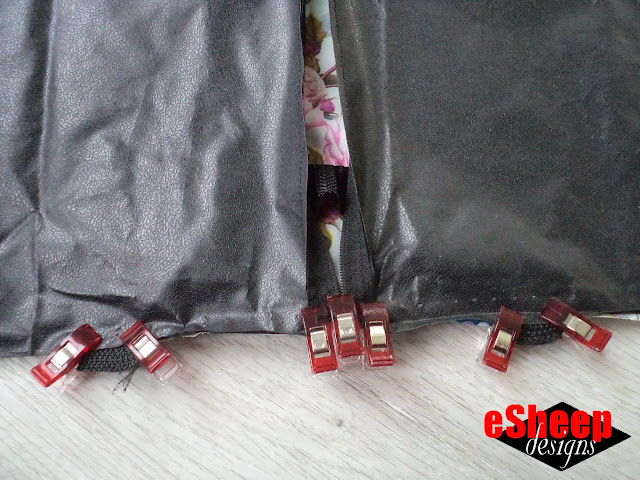
Outdoor Seat Cushion by eSheep Designs
Add a handle using the webbing...

Before you start sewing up the sides, make sure that the zipper is at least partly open.

Stitch it up, turn it right side out and it's ready to use!
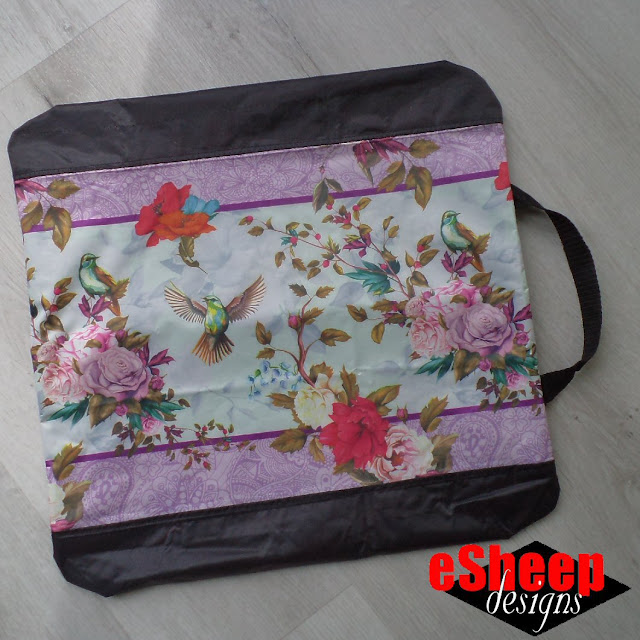
Outdoor Seat Cushion by eSheep Designs
Turned right side out and done...

This cushion cover can now be filled however you want. It's a great opportunity for repurposing if you have textiles that you can save from the landfill.


Check out crafty classes at Creativebug!
[affiliate link]


For example, I think we all have towels that have outlived their prime. Those that are no longer suitable for in home use are relegated to drying off vehicles. But even those eventually become less than optimal; that's what I decided to pack into this cushion cover.
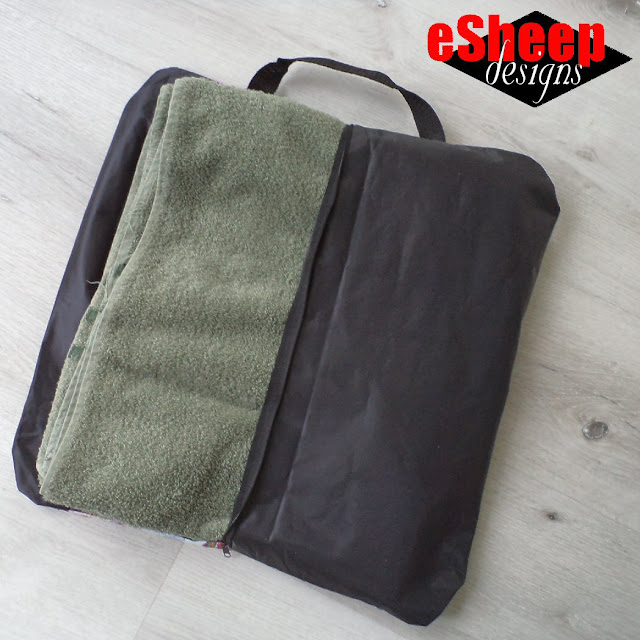
Outdoor Seat Cushion by eSheep Designs
One way to use old towels...

One might also see this as an opportunity to recycle old pillows. Depending on original size, you may be able to fill two cushion covers with one pillow (since you don't necessarily want these as puffy as a regular pillow).

Outdoor Seat Cushion by eSheep Designs
View of back...

Before I decided to make use of the zipper and have this project be just a cover, I thought about sewing old pieces of clothing together and using them to fill the cushion. But the adjunct to that original idea — to quilt the whole thing so that everything would stay in place — was ultimately tossed because all that stitching would punch too many holes in the material. That said, it's still an option to stuff this with old clothing.

Outdoor Seat Cushion by eSheep Designs
View of the front...

For the final photo shoot below, one of these was filled with my Mexican blanket. That brings up an idea that works well for travel: use these to carry beach towels and picnic blankets on your road trip. You'll be able to use them as cushions during pit stops, but when you get to your destination, you can break out the towels and blankets.

Outdoor Seat Cushions by eSheep Designs
Completed transformation...

More likely, you'll find these handy for enjoying outdoor fun when traditional seating isn't available and you'd like to keep your pants dry and free from grass stains. ٩(^‿^)۶

'Til next...

Saturday, 18 June 2022

Compiling a Bucket List [Pt 2]

Winding Down
Planning for my end game...
Post #451 has me thinking about the end of this blogging journey once again. Last year around this time, I marked my 400th blog post with permission to deviate from my "every Saturday" schedule. Happy to have managed to continue on once a week, but the permission still stands. ◕‿↼

However, as I continue to ponder how much longer this journey might last, I'm back with part two of my bucket list compilation... things I might want to accomplish before I call it quits.

One of the few upsides of the pandemic was the increased level of creativity that resulted from too many days spent confined at home.

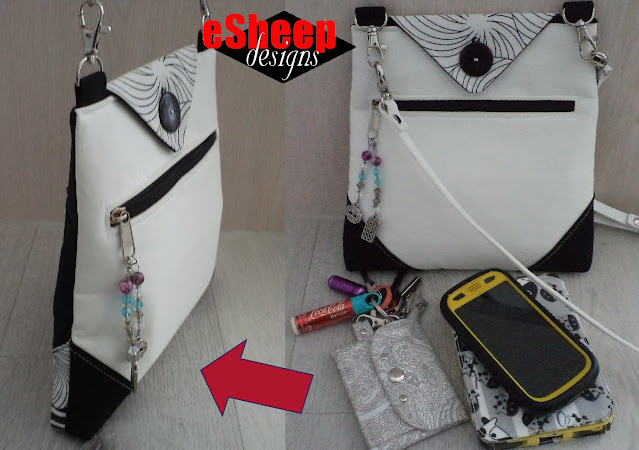
In my case, the need for a more efficient purse led to my reimagining the design of a souvenir sling bag. It then turned into something that's been my constant shopping companion for the past twenty-two months.

The pattern for the crossbody sling bag can be had for free here from my blog (there's a link for it further down on the sidebar), but I also sell it in my Makerist shop, where I've been surprised by its performance. Despite the fact that it's not a tutorial — i.e., I provide no real instructions — people have been drawn to it.

That said, I've yet to see anyone's actual finished bag.


Over the past year, I've had two people strike up an extended conversation with me about my pandemic sling bag. I directed one of them to my blog to get the pattern, as she was a sewer. The other gave me her email address so that I could send her a quote on making one for her. While she did respond to me, it never went anywhere and to be honest, I'm glad. I decided long ago that I am not in the bag making business.

Pandemic Sling Bag by eSheep Designs
My pandemic sling bag after twenty-two months of use...

This leads to the topic of this particular post: the continued compilation of my bucket list. Before I retire this blog, I want to check off two more items, one of which is to make another of my sling bags. Actually, it was always my intention to have two of these to switch back and forth. I specifically purchased (some of my own) fabric for the second one some time ago and have had all of the required materials inside my project bag for a while now.

Project Bag by eSheep Designs
Materials all gathered for a second pandemic sling bag...

My original bag is showing distinct signs of wear after almost two years of faithful service. The binding around the bottom of the flap is worn through in one corner and the whole exterior fabric is a lot less vibrant than it was at the beginning.

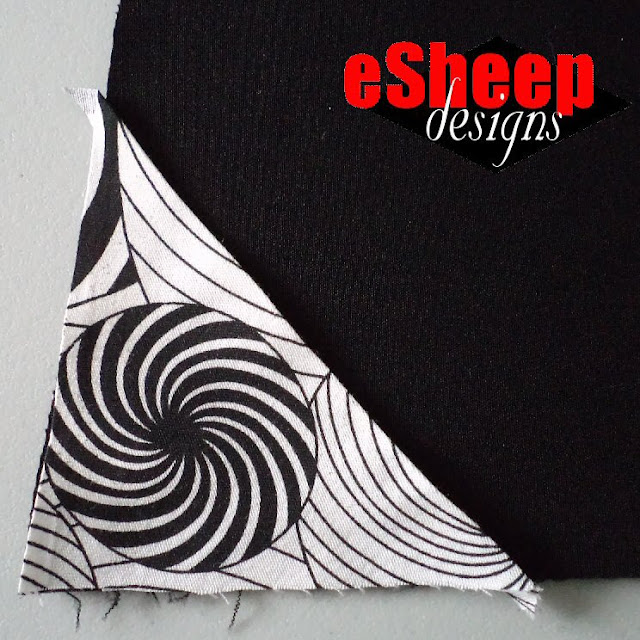
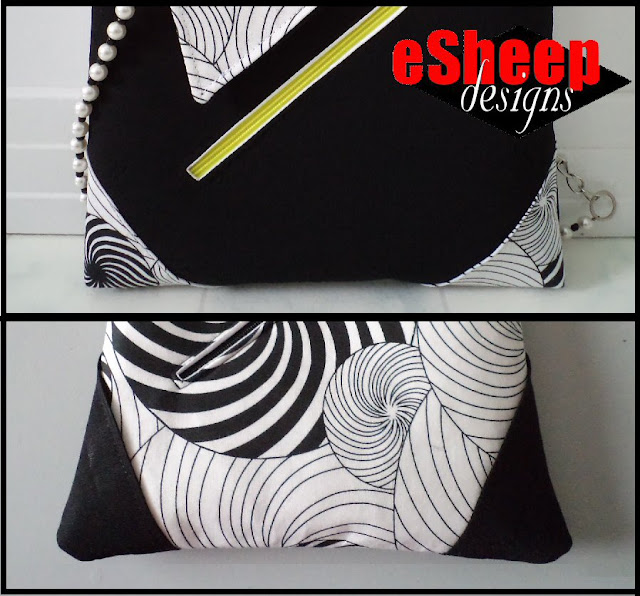
This new one is going to be darker than the first, with fabrics primarily in black and gray (it's my zen doodle fabric) with a bit of white.

Going back to carrying a regular purse isn't such a big deal anymore, but I've really gotten used to the convenience of this bag. (My mom is similarly enamored with her version of a pandemic bag and hasn't wanted to go back to carrying her regular purse either.) Pandemic or not, this bag will likely remain in my rotation for regular use.


Watch live classes for FREE at CreativeLive! Sign Up at CreativeLive
[affiliate link]


The other — more significant — bucket list item that I'm including here in this discussion is also referred to as a sling bag, but in a mini backpack style for hubby. It's a more complex bag (it's officially a Swiss Gear Wenger mini sling) than mine, but I do have the remains of one of his discarded versions as well as his current bag to use as reference.

Swiss Gear Wenger Mini Sling Bag
Mini Sling by SwissGear...

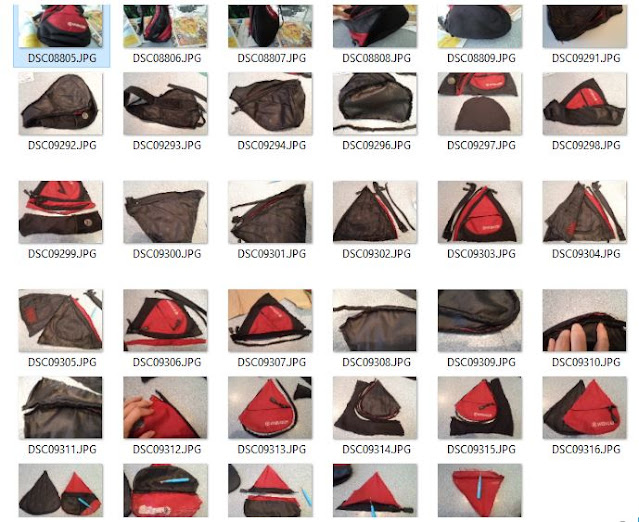
When I took apart his first bag, I documented the process with my camera, snapping a pic with every piece that I removed. (Some of those pieces will in fact be reusable.)

Taking apart a SwissGear mini sling bag
Being thorough always helps...

I'm hoping that perhaps my improved sewing prowess will make this project easier than it would have been six years ago (the above shots were taken in 2016). I'm sure it was put aside and not picked up again for a reason.

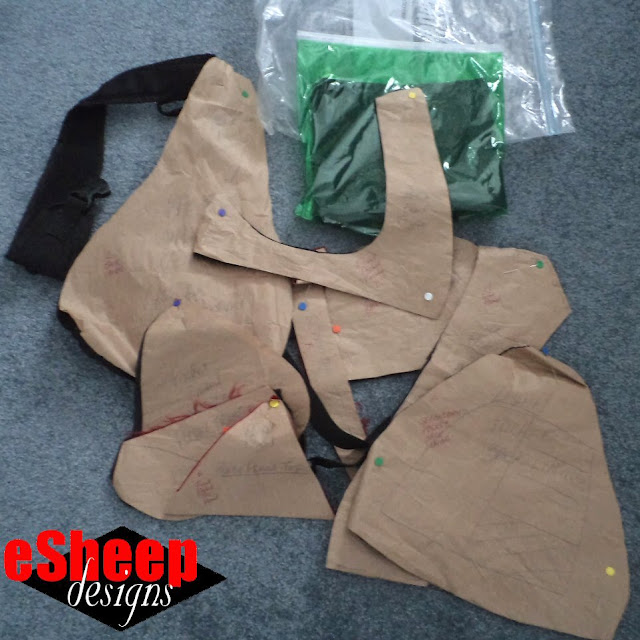
Although... this is how it was put aside.

Remaking a SwissGear mini sling bag
Pattern pieces already made from six years ago...

When I went looking for these "remains", I was surprised to find them nicely organized in a zip lock bag, pinned to paper templates and all.

I'm not sure why I abandoned it at the time, but maybe this won't be such a big puzzler after all. I just need to get into the right frame of mind to start again. (And for the record, the one that he's currently carrying is starting to show wear in certain spots, so it is time.)


Check out crafty classes at Creativebug!
[affiliate link]


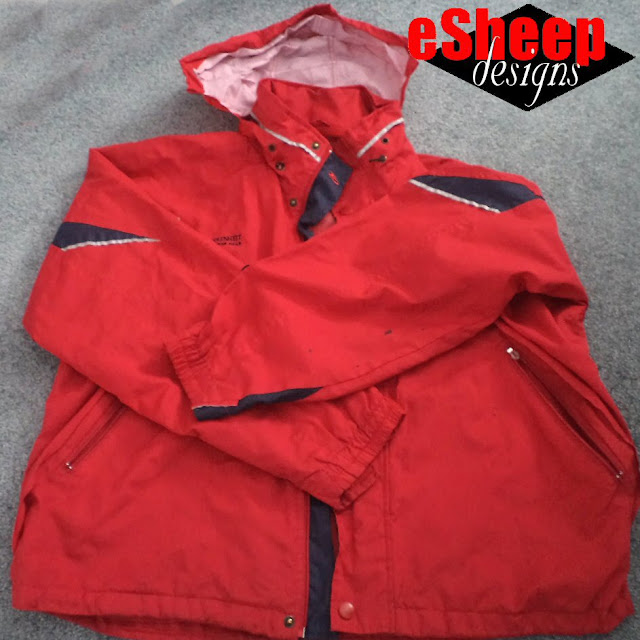
For material, I may harvest most of it from a red jacket that the other half gave me for recycling a couple of years ago. (Why not have a second "jackets to something" challenge, right?) And I might just dismantle that YJCFS sling bag that wasn't to his liking for other components.

Old jacket ready for recycling
A slightly damaged jacket ready for recycling...

In the past, I've been leery about setting goals like this. However, a bucket list is usually interpreted as a wish list of sorts. While I may wind up being a bit disappointed if I don't actually do what I set out to do, having markers to aim for down the road does make for a more defined "journey".

I don't believe, however, that I will be as quick to knock off these items as I was with my first bucket list item, which turned out to be the creation of a duffle bag out of a couple of jackets

'Til next...

Saturday, 11 June 2022

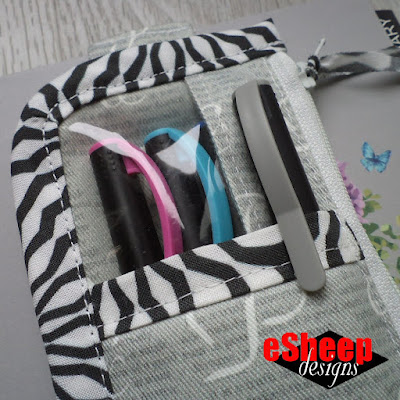
Peekaboo Pencil Pouch

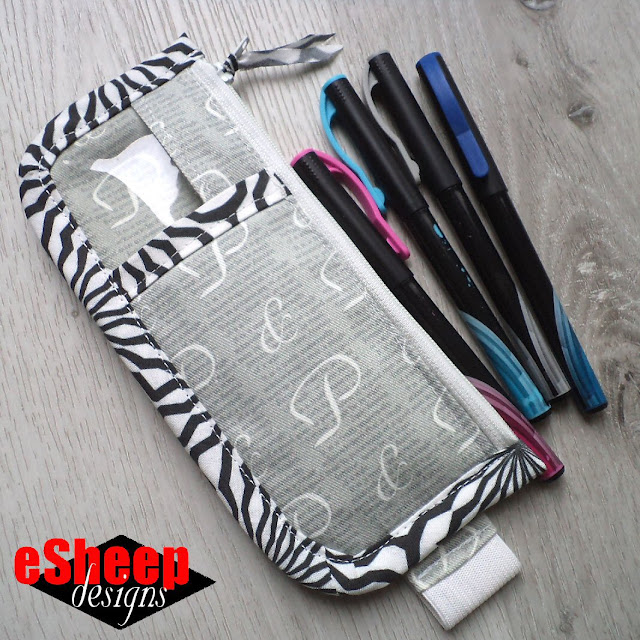
Peekaboo Pencil Pouch by eSheep Designs
My "crafting on the fly" version of a pencil pouch...
Even though I love all sorts of pens and still use paper and writing instruments on a regular basis, I have never been tempted to make myself a pencil case... until now.

How significant is that, given that I've now been back at the sewing game for almost ten years?

So what exactly inspired me to make this? Well, it was a very nifty looking pencil case that attaches to a notebook cover (with elastic) made by Debbie from The Folk Art Factory. I first came across it via AllFreeSewing in March.

image courtesy of thefolkartfactory.com...
I don't know about you, but sometimes a freebie comes across my screen that looks like it should cost something. As in, it looks professionally made and staged. Not to criticize the vast majority of freebies out there, but not too many of them manage to elevate themselves in that way to be noticed and to exclaim, "Make me!"

So before I show you my pencil case/pouch, let me say a quick thanks to Debbie for her inspiration all the way from Germany. It was not something that I needed to make, but her creativity sparked something in me and sometimes that alone deserves recognition.


My first consideration was that if I was to make a pencil case that's meant to be wrapped around a book cover that I don't really need, it would have to be sized down.

Debbie's versions are designed for European A4 and A5 books. Mine would be for my day planner, which is 8" x 5" — similar to an A5's measurement but still a bit smaller. So for starters, I needed to bring the height of the case down to 7.5". The 3" measurement that she used for the depth of the case seemed fine to me.

Peekaboo Pencil Pouch by eSheep Designs
At this size, the pouch will hold about six pens...

Recently, a vinyl storage bag that we use to cart around our life jackets busted open around the zipper, rendering it recycling material. The cut pieces of vinyl were on my sewing table when I was rooting around for fabric. A lightbulb popped and I thought, why not make the front panel out of vinyl so that I could see the contents of the pouch at the top?

Peekaboo Pencil Pouch by eSheep Designs
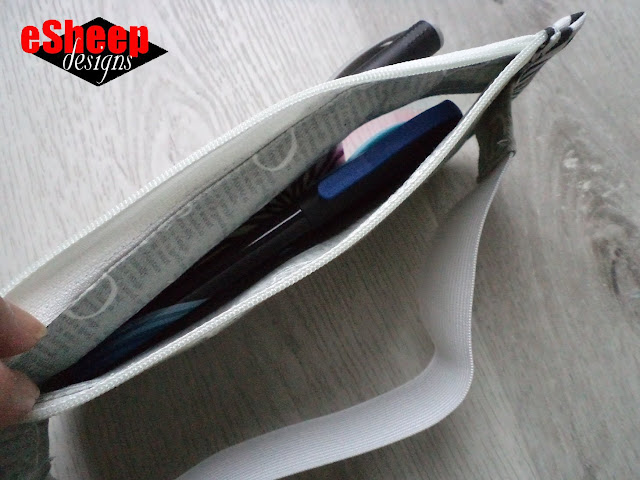
Zipper tape is enclosed by fabric on the inside...

I still wanted the zipper to be installed on fabric, however, so that led to several hours of pondering how that could be done. Again — as is my tendency — a "middle of the night" solution occurred to me to use a couple of strips of fabric to encase the edge of the vinyl panel along one side while the other side could be attached to the zipper like a traditional exterior and lining piece.

Virtually all of Debbie's projects use fusible foam; I've mentioned many times here that I don't have any of that stuff and don't intend to get any, so I was going to make do with fusible fleece. (My scraps of P&P fabric are already a lightweight cotton twill, so they don't need too much stabilizing.)

Peekaboo Pencil Pouch by eSheep Designs
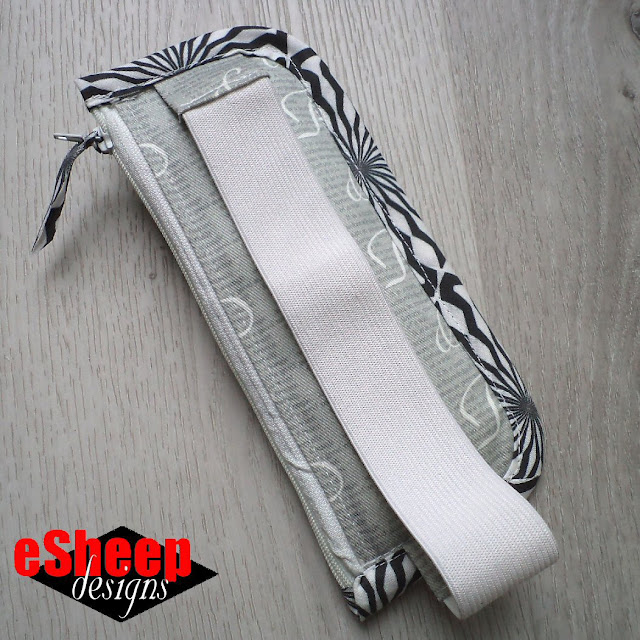
My solution to use less elastic...

The elastic that holds the pencil case to the book cover was threaded through a casing on the back of Debbie's version of the project. It has definite advantages being made that way, not the least of which being that it can easily be replaced when it loses its elasticity. Being the frugal sewer that I am, I didn't want to use that much elastic and therefore rejigged that whole area. (The setup is akin to what I did with my shinto stool cushions. Are you able to see a solution for using even less elastic by replacing a section of it with fabric?)

The elastic can still be cut/replaced/adjusted if it gets stretched out, but you'd have to unpick the stitches on at least one of the fabric tabs.


Watch live classes for FREE at CreativeLive! Sign Up at CreativeLive
[affiliate link]


Due to the smaller size that I went with, I only rounded off the corners slightly, since cutting away more space there might reduce the number of pens that the pouch can hold. (The original curvature of the corners is a nice look, however.)

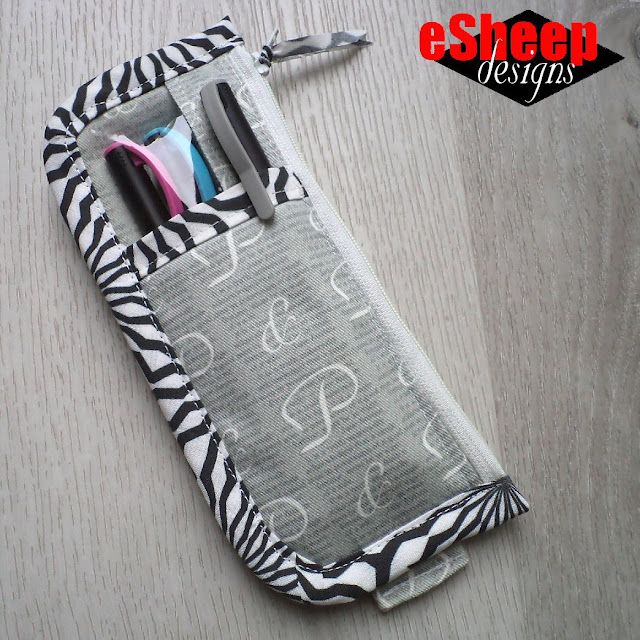
Peekaboo Pencil Pouch by eSheep Designs
A cool pencil case for my day planner...

And while I also really liked the slanted front slip pocket of the original design, with the pouch being downsized, I figured the pocket would be more functional cut straight across. I therefore extended the the lining of the pocket to the front side so it would be visible as trim, omitting the use of binding entirely. (I first used this technique when I made my desktop tote organizer.)

Peekaboo Pencil Pouch by eSheep Designs
View of the inside cover with pencil pouch attached to the front...

Not liking to install zippers onto thick bulky fabric, I refrained from applying the fusible fleece to the exterior fabric until after the zipper was sewn in. And because I used vinyl in place of fabric for the front of the pouch, I interfaced the slip pocket exterior with fusible fleece (while also being careful to cut it just shy of the edge next to the zipper).

Peekaboo Pencil Pouch by eSheep Designs
Bias trim fabric are remnants from my Warren bear mobile...

After working out the requirements in my head, I more or less made this on the fly, without further detailed planning like I would normally do. One reason for not being overly cautious is that a bound item can be trimmed down before the binding is installed, so it's not essential to be absolutely perfect up to that point.


Check out crafty classes at Creativebug!
[affiliate link]


However, as a result of my on the fly-ness, I forgot that I wanted to quilt the exterior pieces. Not a big deal, since this was sort of a proof of concept trial run. I may yet make one for Mom.

If I were to do this again, I would change up the width of the fabric strip that's attached to the vinyl and zipper so that the "window" is bigger... or maybe add a half inch to the depth of the pouch itself. Or maybe use narrower binding, since the bound edge cuts into the amount of storage space.

Peekaboo Pencil Pouch by eSheep Designs
Staging my own photo... ha, ha!

Ultimately, small projects like this provide the opportunity to learn without having to invest a lot of time and materials. They deliver a quick win and get you thinking about what you can do differently next time.

With Father's Day around the corner, a discount store notebook set off by a pouch like this containing some pens and markers would be a useful gift for any dad. (Tip: recycle a pair of twill pants or the old standby, denim jeans, for the material.)

To see Debbie's original project, the link to her blog post is here.

'Til next...

Saturday, 4 June 2022

Another Look at the HHC Crossbody Fooler Bag

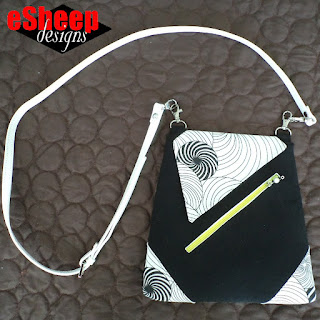
Hot Hues Convertible Crossbody FOOLER Bag by eSheep Designs
Wanna make your own HHCCF bag?
I love this time of year. The weather is pleasant, the bugs aren't quite out yet, the daylight hours are plentiful and flowering trees are in full bloom. Not so much thinking about sewing.

Therefore, in an effort to keep blogging in the absence of new stuff to write about, I'm going to dig into the archives every now and then to pull out projects to revisit and reminisce. And perhaps to give away... more on that later.

Hot Hues Convertible Crossbody FOOLER Bag by eSheep Designs
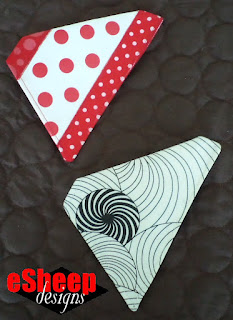
Interchangeable flaps...
The Hot Hues Convertible Crossbody FOOLER Bag was the first purse pattern that I developed for sale. The idea for it germinated as a storage solution for my mother to take on her walks around the neighbourhood. I wanted a way for her to have pockets on hot days when she wouldn't be wearing a jacket.

Once I determined how to accomplish that, it occurred to me that a style feature could be added: the ability to swap out a flap and have the bag take on a different look, depending on the fabric used to make the flaps.

However, the flap was never meant to cover any opening into the bag. When I named it with the word "FOOLER", I thought I was being clear that something might not be as you would expect. Did that ever cause a problem for a few individuals!


It was a difficulty I did not anticipate, as none of the pattern testers asked why the bag didn't have an actual interior. (Well, one person said it gave her pause, but she then realized the significance of the word "fooler".)

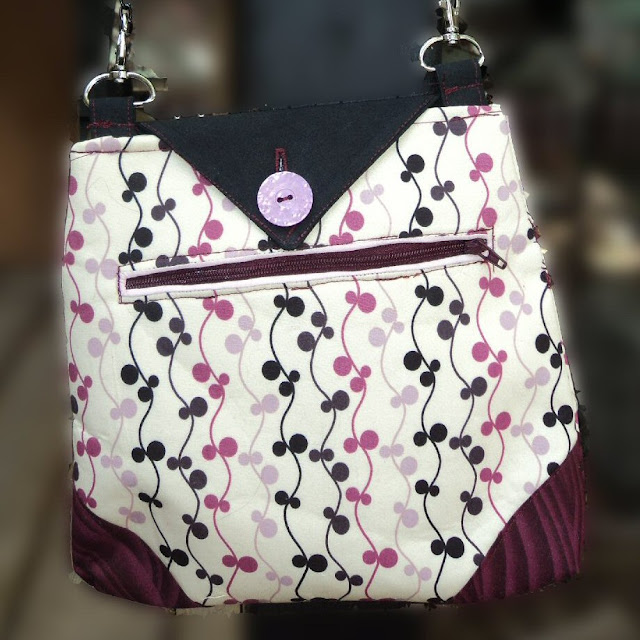
One tester made her bag with two flaps...yay for Sammi! Here is a photo of the back of her bag with a black flap (she also made one to match the burgundy fabric used on the corners).

Sammi's tester Hot Hues Convertible Crossbody Fooler Bag by eSheep Designs
One of the two flaps Sammi made for her test HHCCF bag...

As you can see, the swap out functionality is accomplished by a button sewn onto the back of the bag. (Which means that an additional look for the bag is without a flap.)

Perhaps it was due to the way I allocated the fabric on my own test bags, but the "swap-ability" aspect never really gained any traction, judging by what I've seen over the years. (I obviously can't comment on those who purchased the pattern but did not share their results with me.)

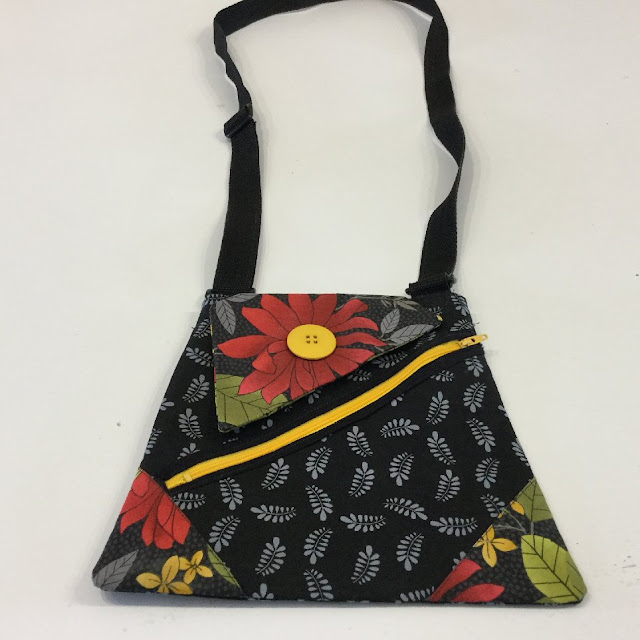
Sylvie made the one shown below. She indicated that the flap was sewn in place at the back.

Sylvie P.'s Hot Hues Convertible Crossbody FOOLER Bag by eSheep Designs
Sylvie's colourful HHCCF bag...

She made the bag for a trip to Cuba and said that it was a pleasure to sew, which to me was a nice change of pace from having someone express disappointment that the pattern did not include instructions on lining the bag. ◔̯◔


Watch live classes for FREE at CreativeLive! Sign Up at CreativeLive
[affiliate link]


In looking back at this pattern from a distance of eight years — yowza! — I'm impressed by the amount of leeway that I managed to incorporate into the design. I really wanted a beginner sewer to be able to make the project successfully and figured that easing up on absolutes would afford more flexibility. ("No rules!" is actually found somewhere in the text of the PDF.)

For example, the corner trim is optional. And because they are merely triangular pieces sewn onto a main body piece, they can easily be omitted. Or you could decide to put them on the front panel but not the back... or vice versa.

Hot Hues Convertible Crossbody FOOLER Bag by eSheep Designs
Corner accents are totally optional on both front and back...

Strap solutions range from sewn fabric straps to chains to webbing to ready made purchased straps. My bag — shown at the top of this post — now has a skinny leatherette adjustable strap on it. (It may or may not have been a cheap eBay purchase, I don't remember exactly.) It originally had a chain strap as shown below.

Hot Hues Convertible Crossbody FOOLER Bag by eSheep Designs
Two options for finishing off the bottom of the HHCCG bag...

Finally, the bag can be made with boxed or knife edged corners. The finished size and shape will, of course, be slightly different as you can see from the comparison photos above.


Check out crafty classes at Creativebug!
[affiliate link]


I recently did a "volume test" on this and was pleasantly surprised by its roominess. The finished size is about 9" high x 7" wide at the top (or 23cm x 18cm). The bottom will vary from 9" to 10" (23cm to 25cm) depending on style of finish.

In the first photo below, it's holding a cell phone, my eReader, a small wallet and some keys.

Hot Hues Convertible Crossbody FOOLER Bag by eSheep Designs
I was able to carry all of this in the two pockets of my HHCCF bag...

Not that I would carry my eReader with me in this bag, but I wanted to see how much I could put into it and still have it look decent. Again, it's that caveat about adding an "interior" to this... having another compartment would distort the appearance of the bag.

Hope I've made that clear!

'Til next...