|
|
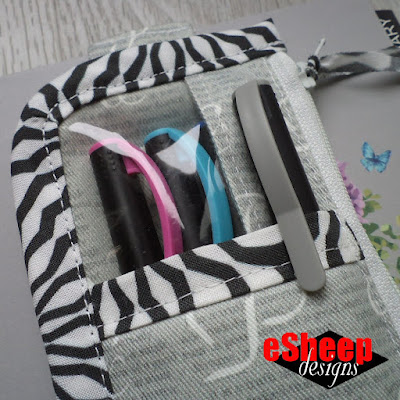
My "crafting on the fly" version of a pencil pouch... |
How significant is that, given that I've now been back at the sewing game for
almost ten years?
So what exactly inspired me to make this? Well, it was a very nifty looking
pencil case that attaches to a notebook cover (with elastic) made by
Debbie from The Folk Art Factory. I first came across it via AllFreeSewing in March.
I don't know about you, but sometimes a freebie comes across my screen that
looks like it should cost something. As in, it looks professionally made and
staged. Not to criticize the vast majority of freebies out there, but not too
many of them manage to elevate themselves in that way to be noticed and to
exclaim, "Make me!"
So before I show you my pencil case/pouch, let me say a quick thanks to Debbie
for her inspiration all the way from Germany. It was not something that I
needed to make, but her creativity sparked something in me and sometimes that
alone deserves recognition.

My first consideration was that if I was to make a pencil case that's meant to be wrapped around a book cover that I don't really need, it would have to be sized down.
Debbie's versions are designed for European A4 and A5 books. Mine would be for
my day planner, which is 8" x 5" — similar to an A5's measurement but still a
bit smaller. So for starters, I needed to bring the height of the case down to
7.5". The 3" measurement that she used for the depth of the case seemed fine
to me.
|
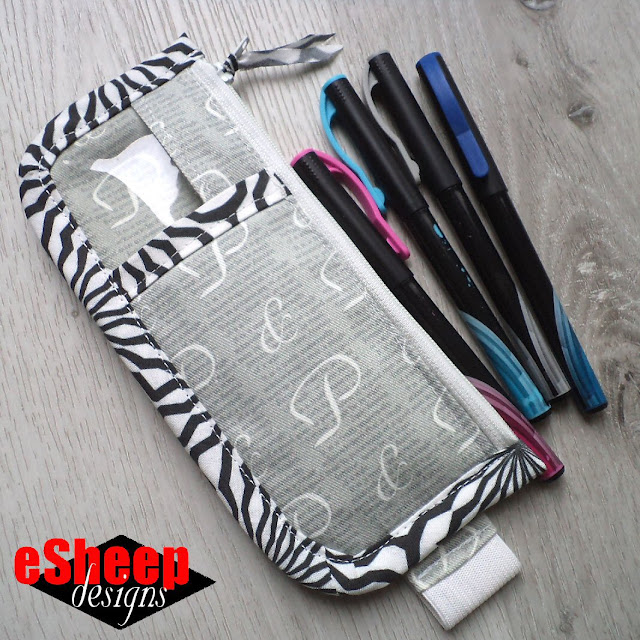
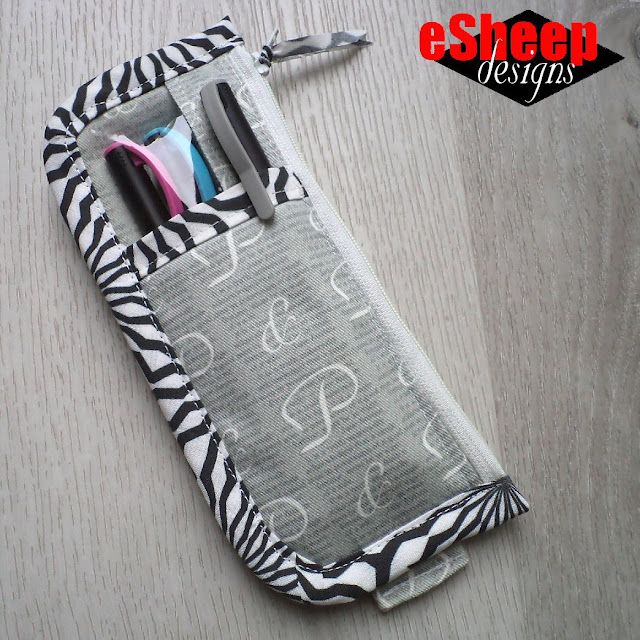
| At this size, the pouch will hold about six pens... |
Recently, a vinyl storage bag that we use to cart around our life jackets
busted open around the zipper, rendering it recycling material. The cut pieces
of vinyl were on my sewing table when I was rooting around for fabric. A
lightbulb popped and I thought, why not make the front panel out of vinyl so
that I could see the contents of the pouch at the top?
|
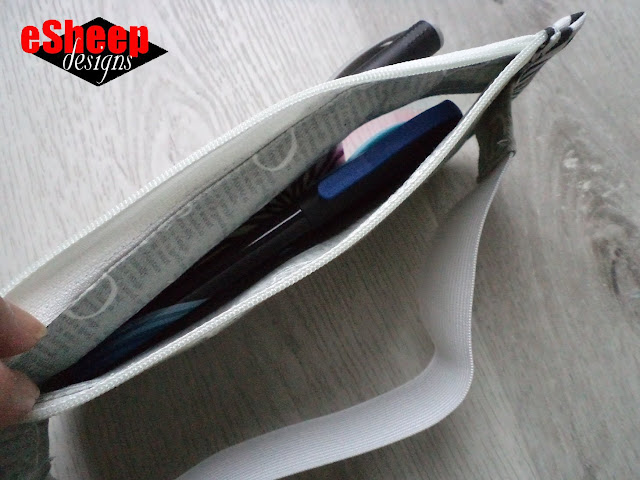
| Zipper tape is enclosed by fabric on the inside... |
I still wanted the zipper to be installed on fabric, however, so that led to
several hours of pondering how that could be done. Again — as is my tendency —
a "middle of the night" solution occurred to me to use a couple of strips of
fabric to encase the edge of the vinyl panel along one side while the other
side could be attached to the zipper like a traditional exterior and lining
piece.
Virtually all of Debbie's projects use fusible foam; I've mentioned many times
here that I don't have any of that stuff and don't intend to get any, so I was
going to make do with fusible fleece. (My scraps of
P&P fabric
are already a lightweight cotton twill, so they don't need too much
stabilizing.)
|
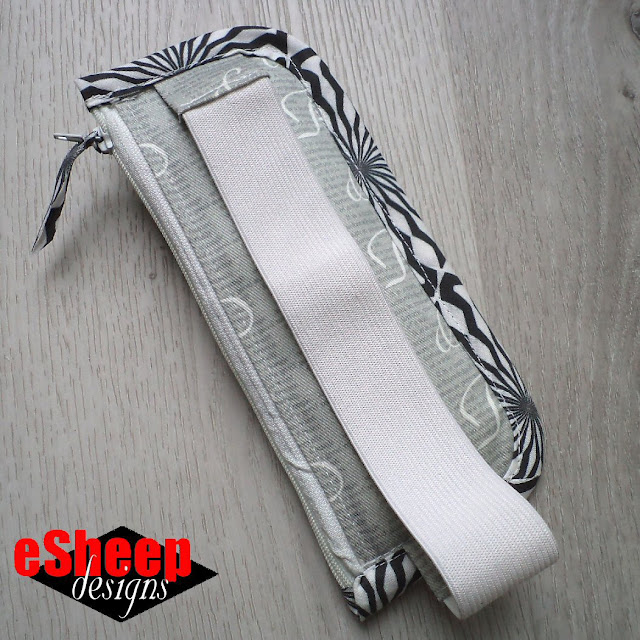
| My solution to use less elastic... |
The elastic that holds the pencil case to the book cover was threaded through
a casing on the back of Debbie's version of the project. It has definite
advantages being made that way, not the least of which being that it can
easily be replaced when it loses its elasticity. Being the frugal sewer that I
am, I didn't want to use that much elastic and therefore rejigged that whole
area. (The setup is akin to what I did with my
shinto stool cushions.
Are you able to see a solution for using even less elastic by replacing a
section of it with fabric?)
The elastic can still be cut/replaced/adjusted if it gets stretched out, but
you'd have to unpick the stitches on at least one of the fabric tabs.

Due to the smaller size that I went with, I only rounded off the corners slightly, since cutting away more space there might reduce the number of pens that the pouch can hold. (The original curvature of the corners is a nice look, however.)

|
| A cool pencil case for my day planner... |
And while I also really liked the slanted front slip pocket of the original
design, with the pouch being downsized, I figured the pocket would be more
functional cut straight across. I therefore extended the the lining of the
pocket to the front side so it would be visible as trim, omitting the use of
binding entirely. (I first used this technique when I made my
desktop tote organizer.)

|
| View of the inside cover with pencil pouch attached to the front... |
Not liking to install zippers onto thick bulky fabric, I refrained from
applying the fusible fleece to the exterior fabric until after the
zipper was sewn in. And because I used vinyl in place of fabric for the
front of the pouch, I interfaced the slip pocket exterior with fusible
fleece (while also being careful to cut it just shy of the edge next to the
zipper).
|
| Bias trim fabric are remnants from my Warren bear mobile... |
After working out the requirements in my head, I more or less made this on the fly, without further detailed planning like I would normally do. One reason for not being overly cautious is that a bound item can be trimmed down before the binding is installed, so it's not essential to be absolutely perfect up to that point.

However, as a result of my on the fly-ness, I forgot that I wanted to quilt the exterior pieces. Not a big deal, since this was sort of a proof of concept trial run. I may yet make one for Mom.
If I were to do this again, I would change up the width of the fabric strip
that's attached to the vinyl and zipper so that the "window" is bigger... or
maybe add a half inch to the depth of the pouch itself. Or maybe use
narrower binding, since the bound edge cuts into the amount of storage
space.

|
| Staging my own photo... ha, ha! |
Ultimately, small projects like this provide the opportunity to learn
without having to invest a lot of time and materials. They deliver a quick
win and get you thinking about what you can do differently next time.
With Father's Day around the corner, a discount store notebook set off by a
pouch like this containing some pens and markers would be a useful gift for
any dad. (Tip: recycle a pair of twill pants or the old standby, denim
jeans, for the material.)
To see Debbie's original project, the link to her blog post is
here.


No comments:
Post a Comment
You have the power to brighten my day. Leave me a comment; I'd love to hear your thoughts... you can even remain ANONYMOUS! And rest assured that I acknowledge all comments, either here or via email. (That is, if you don't see a response from me here, I would have responded privately to the person.) Spam or generic comments with unrelated links, however, are promptly removed... and I may take appropriate action or report you to Google. Thanks for reading! (✿◠‿◠)