|
| A snowflake project almost finished... |
My
fabric kite
had been in that place of honour since March. To mark our typical long
winters, I decided to make a snowflake to replace the
mitten
that I made last year.
A couple of weeks ago, I introduced this project by cutting a large snowflake out of Decor Bond interfacing. It was then fused onto a fabric hexagon backed with fusible fleece. (For those of you not interested in a window hanging, this idea can also be used as a table topper.)
A couple of weeks ago, I introduced this project by cutting a large snowflake out of Decor Bond interfacing. It was then fused onto a fabric hexagon backed with fusible fleece. (For those of you not interested in a window hanging, this idea can also be used as a table topper.)
At the close of my last post, I was about to consider how to quilt the
piece.

After some thought, I decided to quilt lines on the diagonal, about 1.5" apart. I didn't want to draw attention to the lines on the snowflake itself, so I went with white thread.

After some thought, I decided to quilt lines on the diagonal, about 1.5" apart. I didn't want to draw attention to the lines on the snowflake itself, so I went with white thread.

|
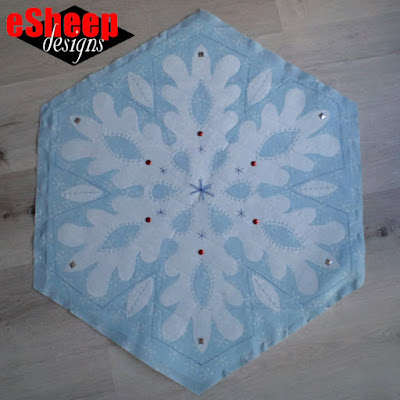
| Machine and hand quilted... |
I hand quilted various areas with blue thread next, before sewing around the
general outline of the snowflake using dark blue thread.
[Ended up pricking my index finger at one point during the hand quilting —
severely enough that I had to stop to ensure that blood wouldn't get on my
snowflake! Severely enough that a couple of days later, I could still feel
the spot on my finger.]

|
| Further embellished... |
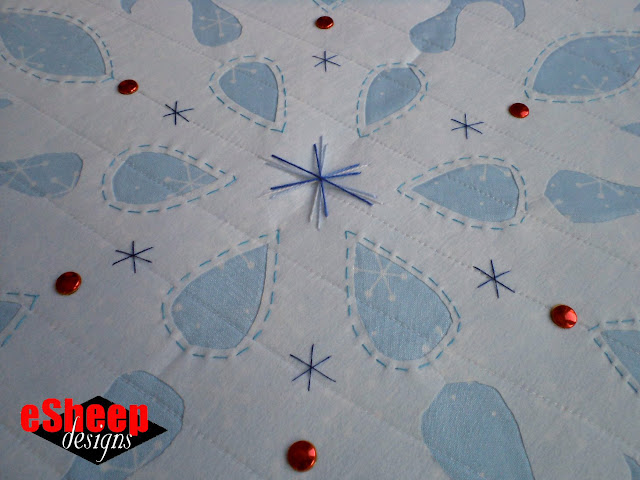
The dark blue thread was also used to add some six-pointed stars in the
centre, around a large one done with variegated embroidery floss. Leftover
adhesive "jewels" add just the right bit of shine and colour to this (exterior
facing) side.
If you've ever cut a snowflake shape out of a folded piece of paper, you
already know that a lot of the paper — over half of it in some cases — is
discarded. Since I cut this snowflake out of expensive interfacing, I had
plans for as many of the remnants to be used on the reverse side of this
thing.

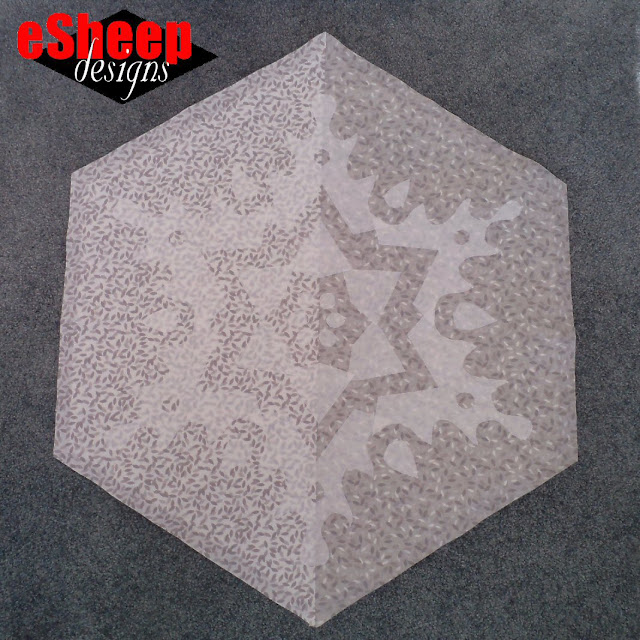
I started with the big pieces of interfacing to build a different looking
snowflake and eventually added some of the smaller remnants to fill in the
empty spaces.

|
| Fused... |
Having once again confirmed that I don't really enjoy the whole painstaking
process of quilting lines on something, I decided to keep it simple for this
side. I did some hand quilting with black thread and then used the sewing
machine to stitch around the outline of the main pattern using gray thread.

|
| Arguably simpler quilting choices on this side... |
Simple yes, but going around the outline wasn't easy, given repetitive
curvy, pointy sections to navigate. Going slowly and guiding the material by
holding it with both hands — almost in a free motion quilting style — ended
up working well for me.

|
| Closer view... |
No further embellishments on this side, but one idea that I considered was to
use buttons to add some interest; I may still do that. (Rivets would have been
another idea, before the two sides were joined together, of course.)
Check out 2 MONTHS of FREE crafty classes at Creativebug!

[affiliate link]
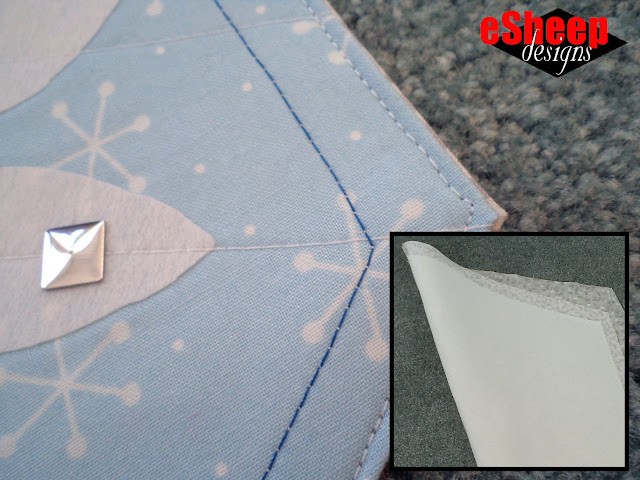
When I cut the fusible fleece for these two pieces of fabric, it was in a size that left a generous border of fabric around it... about 3/4". This was to facilitate finishing off the edges; I didn't want to bind them, nor did I want to do the sew together and turn right side out thing. (Decor Bond doesn't react well to being turned at the best of times and with it being the focal point of this project, I didn't want to chance it getting wrinkled beyond repair.)

When I cut the fusible fleece for these two pieces of fabric, it was in a size that left a generous border of fabric around it... about 3/4". This was to facilitate finishing off the edges; I didn't want to bind them, nor did I want to do the sew together and turn right side out thing. (Decor Bond doesn't react well to being turned at the best of times and with it being the focal point of this project, I didn't want to chance it getting wrinkled beyond repair.)

|
| Finishing the edges... |
With a decent amount of fabric to work with, I was able to fold and press a
matching hem on both sides, which were then sewn together.
I had some gimp in my collection — from the tags of a clothing brand
that hubby likes — that was perfect to use for hanging this; the ends were
sewn between the two layers.

|
| Finished main side... |
For someone who doesn't have a large fabric stash, this particular selection
from
Lily and Loom
was the perfect choice for the project. It features what could be interpreted
as little white snowflakes on a blue background, evoking the best feelings
about winter: white snow, blue sky and (implied) sunshine.

|
| Finished "back" side... |
It's arguably cheerier than the reverse side shown above. The gray half
reminds me of February, when winter usually wears out its welcome — if it's
ever truly welcome — and we're all ready for it to be gone.
Maybe come February, I'll hang it this side out.


Pretty!! You sure put a lot of work into this. Great use of all the snowflake parts on the reverse side too. I also like the mitten you made. I must have missed it last year.
ReplyDeleteKathleen - kakingsbury at verizon dot net