|
|
A quick and scrappy project... |
For that reason, my Monday afternoons have not involved any specific sewing
activities for a couple of years.
But if I were still doing it, this particular project would qualify as
something that can easily be done in an afternoon. It's also small and scrap
friendly, so you can dip into those leftover pieces of fabric and interfacing
and make something pretty and useful.
I got the inspiration from YouTube on Candy Tomato's channel, from a video uploaded September 25, 2020 (called "Quilt No.100 key & card ring, quilt key ring"). It was originally offered as a free pattern, but Candy Tomato/Tomato Candy is one of those unfortunate crafters whose work is constantly being ripped off by unscrupulous entities.
I got the inspiration from YouTube on Candy Tomato's channel, from a video uploaded September 25, 2020 (called "Quilt No.100 key & card ring, quilt key ring"). It was originally offered as a free pattern, but Candy Tomato/Tomato Candy is one of those unfortunate crafters whose work is constantly being ripped off by unscrupulous entities.
She and I managed to exchange some brief correspondence back when I was
having my
difficulties with Dyanneo. She told me that these sites "repeatedly steal from me, run factories,
and steal my photos, videos and patterns." In response, she's pulled some of
her previously free patterns and put them into her Etsy shop, where
she charges a mostly modest price for them. (However — and I've said this to
fellow designers — if someone is determined to steal from you, it won't make
a difference if you charge for the pattern and stamp it with the purchaser's
name. These unscrupulous sorts will quite easily reproduce it and sell it as
their own anyway.)
But enough of that. When you have a moment, check out
her YouTube channel and see some of her amazing
creativity for yourself. I can't get over what she manages to accomplish
just by hand sewing.

Tomato Candy's project is quite a bit more elaborate than mine. Hers
actually opens up like a clamshell (secured with a zipper) to store the
other keys on that large key ring. The pockets have a curvy edge to them and
the flaps (on both sides) are angled.
I simplified everything to the point of only having a couple of pockets
and a single flap. That said, I will give you access to my pattern templates. (NOTE TO SCAMMERS: This doesn't mean that you can turn around and sell
them along with my instructions for some insane, stupid price.)

|
| Simplified version of the "inspiration" project... |
Anyway, as the name suggests, this is something that can be easily sewn
using some of your fabric and interfacing scraps.
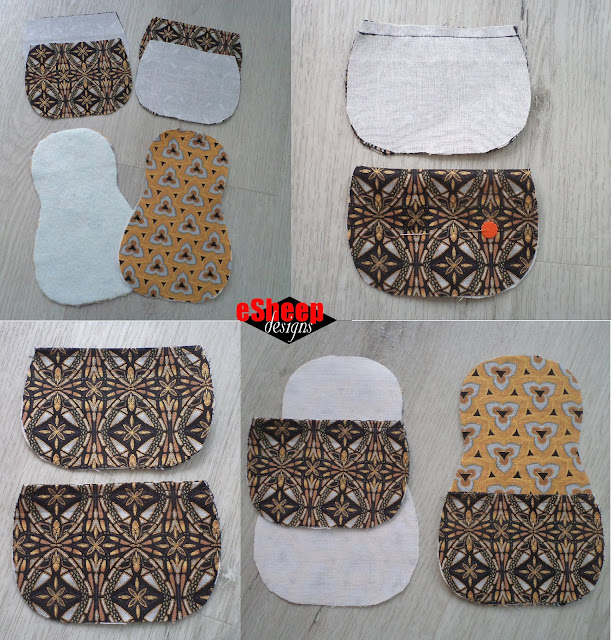
The SF101 adds a little body to the pieces without adding
bulk, but it's not absolutely necessary; or, you could use some other type
of interfacing. (The fusible fleece is applied to the exterior body piece.
The SF101 — if you're using it — is applied to the lining
body piece and the two exterior pocket pieces.)

|
| Templates for the Scrappy Keychain Card Wallet... |
You'll also need about 18" (45cm) of bias binding, which you can make yourself with a "spare square" of fabric. (In fact, if you decide to make
your own, make it 1.5" wide — just under 4cm — instead of 2"; this is a
small item and doesn't need such wide binding.)
In terms of hardware, you'll need a snap fastener set, a 1/4" (6mm) eyelet
set, and a split key ring with optional lobster clasp.

|
| Fuse, sew and baste... |
I used the same fabric for the exterior and lining of the body and another
selection for the pocket exteriors and linings. (They were all remnants of
a Craftsy purchase from years ago.)
Once the pieces are cut and interfaced, the two pocket linings are matched
to the two pocket exteriors and sewn with a 1/4" (6mm) seam allowance. The
finished pocket assemblies are then turned right side out, pressed and
topstitched.

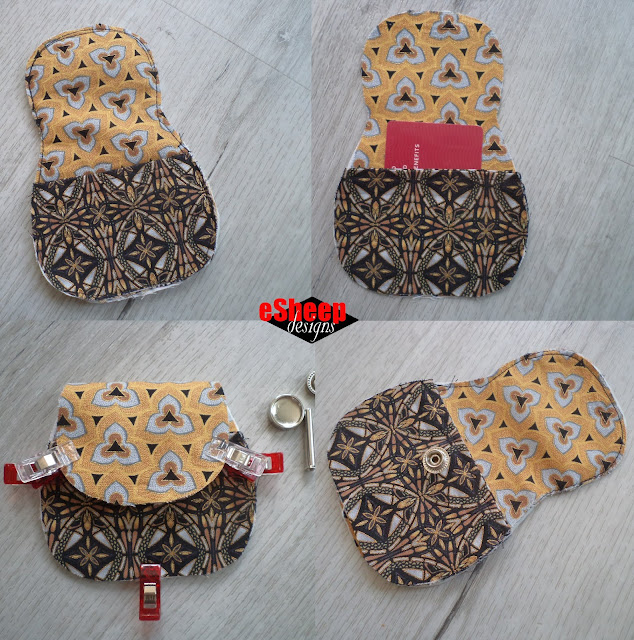
Baste the pocket meant for the back of the wallet to the exterior body piece.
Next, position the front pocket on the lining body piece and use some
clips to hold it together with the exterior body piece (the one that was
just basted with the back pocket). Because these edges will be finished with
bias binding, everything should be right side out when you do this.
Put a card in the front pocket and fold the flap down on top of it to
gauge the best placement for the snap fastener. (The one I made had a very
tight fit, so I added a bit of length to the template afterwards.)

|
| Determine placement of snap fastener... |
When you do this, be aware that installing the bias binding later will do
two things: 1) reduce the depth of the pocket and 2) take up space along
the edge of the flap.
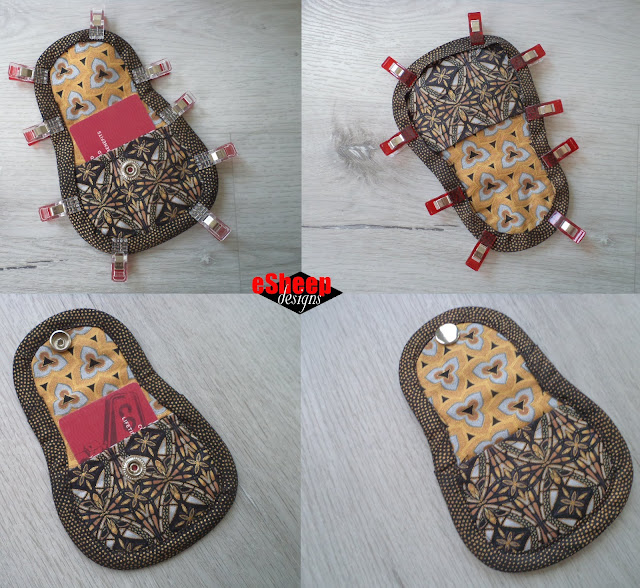
Once you're satisfied with where the snap should go, install the bottom half
of it on the pocket piece. Then baste around the entire assembly to secure
everything before binding.

|
| Bind the edge... |
I'm not going to discuss how to sew bias binding here. If you've never done it before or need to have a refresher, check out this post for some ideas. (Like I said above, however, if you're going to make binding specifically for this project, go with a narrower width than the usual 2" option.)
After the whole thing is bound, install the top half of the snap fastener
set, after reconfirming that the location will allow it to close properly
with a card in the pocket. (Tip for marking: push a pin up through the
bottom half of fastener and let it go through the flap at the desired
location.)

I had a heck of a time getting a hole punched through the layers of fabric, interfacing and binding to install the eyelet. To make this job easier, I recommend punching a hole into the body piece before sewing on the binding.

|
| Finished front view, opened... |
You can then feel around for the opening afterwards and cut through the
binding at that same spot to complete the hole.
I'm not going to say anything further about how to install snap
fasteners or eyelet/grommets since they come with instructions when you
buy them. Maybe one tip is to hammer on something truly solid for best
results. (You may have to go outdoors for that.)

|
| Finished back view... |
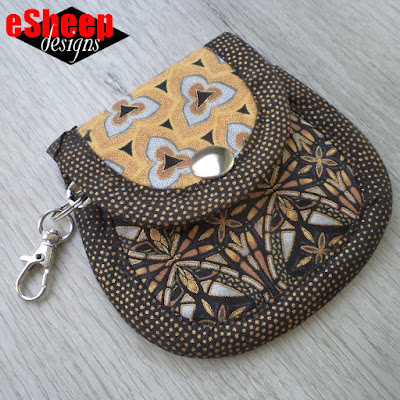
I made this little wallet for a friend visiting from Vancouver Island last month. Always good to test out one's creativity and be able to give the result away.


Very nice gift! I love Candy tomato's projects....made the sewing basket for my sister as a bread bun holder for camping, and those umbrella holders and the 4 bags that can hang flat against the wall (forgot the name?)...those are on my to-do list...some day soon🥴This one has just jumped onto the same list😁
ReplyDeleteWow, so you've already been inspired by the talented Ms. Candy Tomato. I usually admire her creations and then tell myself, I don't have the need for this or the right fabric to make it. (Luckily I've managed to give away both of the last two items as gifts.)
DeleteI am too old to have much use of anything, but gifting gives me an excuse to make it😁😁
ReplyDeleteYou're right — not about the "too old" part, because I cannot and must not comment on that (!) — if I can gift it, it's easier to justify making something.
Delete😁👌🌷💖
Delete