|
|
Guess what this is? |
At the same time, I want to smack myself upside the head for not having
pursued this sooner.
I don't think I've ever shown the little extension table that came with my
Kenmore sewing machine, but it's just a small piece of plastic that doesn't
seem to match the functionality of the machine itself. In its defense — and
I've probably said this before — it's likely because it was
meant to be sunk into a sewing table.
For me, however, I've always used it on top of a regular table while the
machine sits in the bottom half of its carrying case. Which means that I have
often been hampered by not having a level surface when sewing larger items,
resulting in that dreaded "fabric drag" that seems to require three hands to
control.
I've hopefully curtailed any future difficulties with my latest DIY, which I
am sharing with you today. It turned out to be almost entirely a recycling
project for me, but as you can assume from the title of this post, it's a
cheap project even if you have to buy supplies. Certainly cheaper than buying
a ready-made extension table. (Not to mention that that's often only an option for those with
popular, late model sewing machines or machines with a free arm; i.e., the tables are U-shaped.)
Here's what you'll need: foam core board (or two, depending on your preference
for thickness), something out of your household recycling bin for the legs
(pill bottles, cardboard tubes, cardboard box corners, styrofoam packing
pieces, empty thread spools, or whatever you can think of that's the right
height or can be made into the right height), hot glue gun, adhesive hook and
loop "dots" (optional), and a roll of adhesive shelf liner paper or decorative tape.

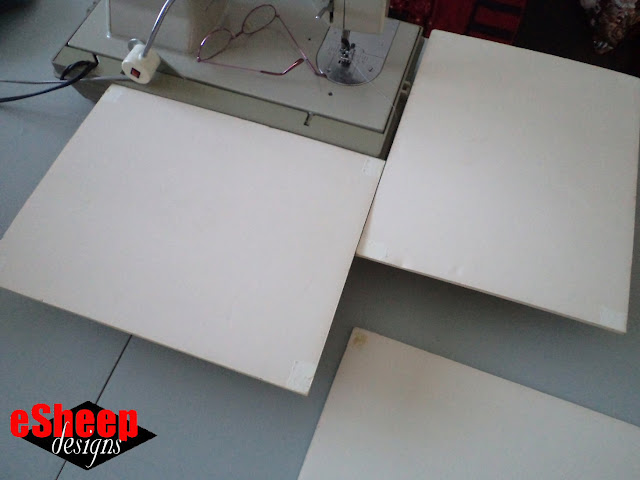
Last spring, I came across some old foam core mounted photos from hubby's and my first business venture together. It occurred to me then that they could be used to create a lightweight extension table for my Kenmore, as long as I could find some "legs" for them. It turned out that a couple of pill bottles that I found in our blue box were more or less the right height.
|
| Three old photo panels being recycled... |
I asked hubby if he had any more of the same bottles and that got us started
on a conversation of what I was planning to do. At the time, we had just
finished off a roll of tin foil and he volunteered to cut the rather stiff
cardboard tube into additional legs for my table.
|
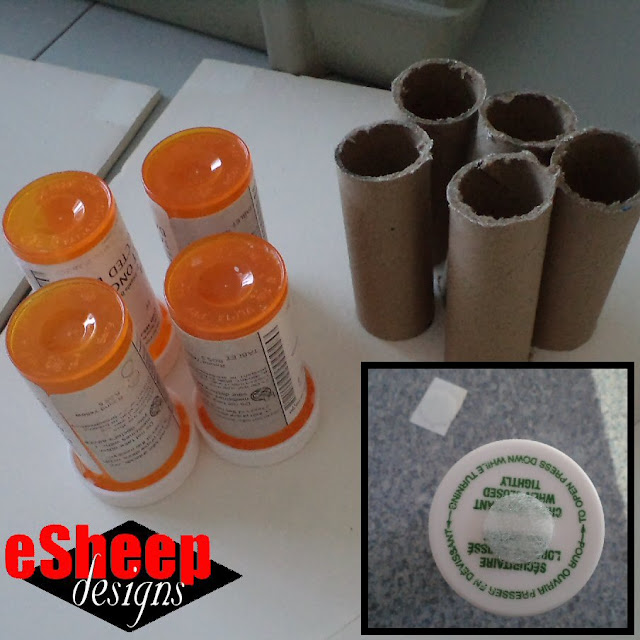
| You may need these for your table: pill bottles, cardboard tubes, adhesive velcro dots... |
Then at Christmas — after gifts had been opened — he presented me with an "extra" gift: a moving dolly
with casters that he thought could be converted into what I need. I loved that
he remembered my extension table project, but what he thought might work wasn't going to be practical at all. (The dolly was returned.)
A week later, he handed me the five cardboard tube pieces shown above. I headed
upstairs to measure the required cuts and joins on my 11" x 14" photo panels. The
project was officially underway!
|
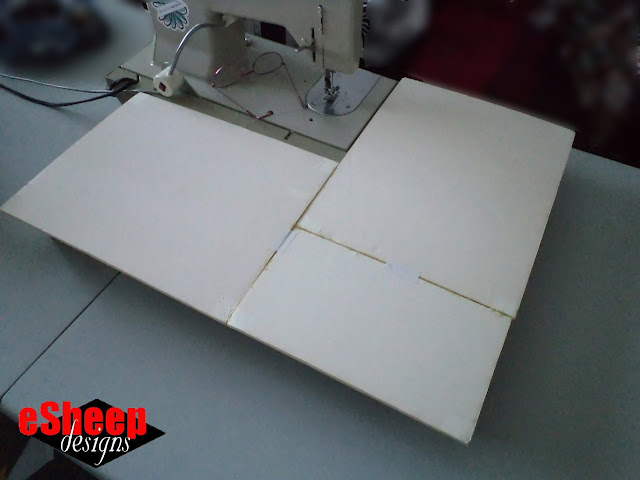
| Pieces cut and joined with hot glue... |
Several minutes later, I had two panels and one smaller piece hot glued
together. Of course, you would just start off with a (typical) 20" x
30" piece of foam core board and won't need to make any joins at all, just a
couple of cuts.

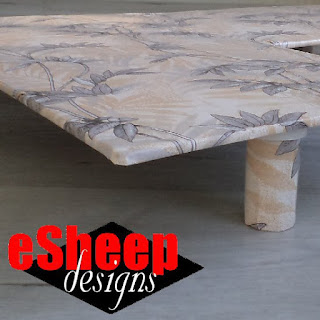
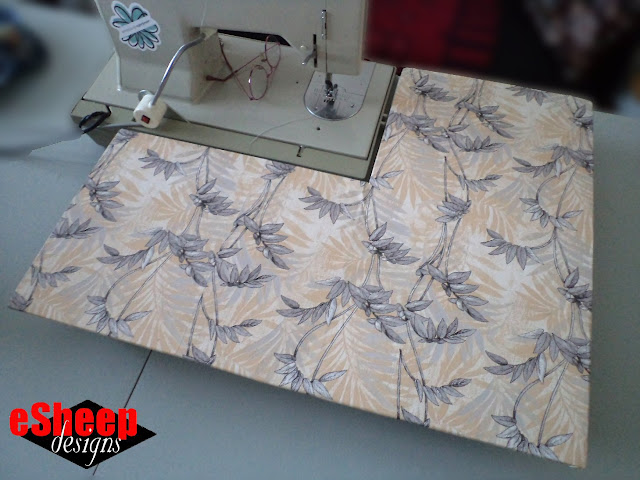
Once the foam board is cut into the desired shape, you'll want to beautify it. For me — since the thing didn't look good "as is" — I went to my nearest dollar store and picked up a roll of adhesive shelf paper with a gray, beige and white leafy print. (For my Canadian readers, opt for a Dollar Tree over a Dollarama if you can, as everything there will be cheaper.)
If you want to keep your extension table the same colour as your foam board, just wrap
the edges with some decorative tape.

|
| At the corners, fold the tip in first, then wrap the two sides in on top... |
If you do use shelf paper,
remember that it's paper and can rip. (Unless you use a more expensive vinyl version.) Also, the foam
board is not a shelf so you'll have minimal luck repositioning the paper without
causing damage to the board. Be careful and go slowly, but don't worry too much about inevitable
small creases if you go this route.
I managed to pattern match the seams, but because I didn't want to be too wasteful in my fussy cutting, I ended up using a total of four pieces to
cover the board. (One of them was a 2" x 1" piece that didn't match,
but I would challenge anyone to find where it is!)
I decided that I was going to work with the pill bottles rather than the
cardboard tube pieces, given another idea that popped into my head. Because I
won't always want this table sitting out there in the open, the less space
that it takes to store, the better.
So my thought was to put some adhesive velcro dots on the top of the pill
bottles so that the legs can be removed. The top of the table is then just
something flat that can slide out of sight behind virtually anything.

|
| Positioning of the legs... |
I put each of the legs about 2" in from the sides. If you opt not to make
use of hook and loop adhesive dots, hot glue will secure your extension
table legs permanently.

Before you do that, however, wrap the legs in some of the shelf liner paper or decorative tape. It makes for a polished look, don't you think?
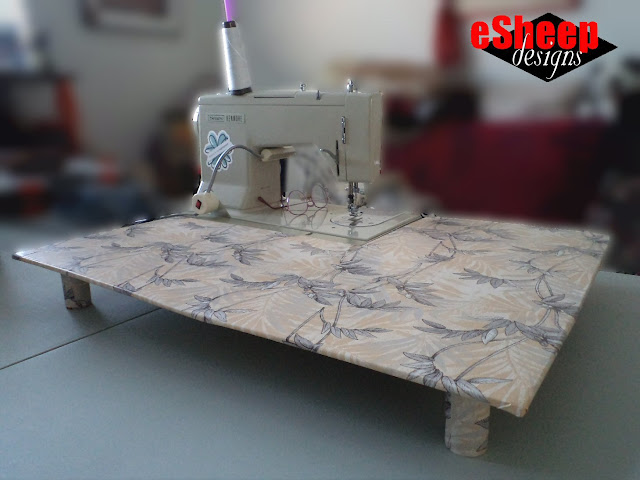
Finished size of my extension table is 27.75" wide and 20" deep. It ended up
with five legs. (The table that my sewing machine sits on slopes towards the
middle — it's a portable folding table — so the surface is not level. Putting
more legs on the extension table won't help in this situation.)
I find it sturdy enough for sewing purposes, but you can definitely make this
with two pieces of foam board for additional strength if desired.

|
| An extension table for a non-free arm sewing machine... |
The title of this post states that you can make this for five dollars, but the
cost will depend on what stores you have access to and what you can harvest
from your own household. (You might already have adhesive hook and loop tape
and/or shelf liner paper, for instance.) In my case, it was less than five
dollars.
Ideally, you can find a piece of foam core board for $1.50 or less, spend $1.50 or
less for a package of adhesive velcro (if you want removeable legs), and no more
than $3.50 for a roll of shelf liner paper (vinyl will likely cost more). All in all, it's an incredibly inexpensive
project. Since writing up this post, I've thought of other
potential items that could be recycled for the legs:
individual yogurt cups, spray can tops, tomato paste tin cans... all things
that will cost you nothing.
Like I said, with it being so easy to do, I truly wonder why it has taken me so
long to get around to solving this problem. (And if it weren't for my hubby, it
probably still wouldn't be done, so hurray for him.)




Ingenious! I might copy this!🏆
ReplyDeletePlease do! And thank you!
DeleteThis is the most important amazing idea of my 46 yrs. Of sewing THANK YOU!!!!!!!!
DeleteWow - that's some amazing compliment! You're welcome and thank you right back!
DeleteI love this idea I’m actually recovering my desk chair right now and not enough level space has been challenging. I’m going to stop and make this I’ve been seeing for over 60 years and never ever thought about how to do this. Thank Tou for your idea!!
DeleteYou are extremely welcome! To have been sewing (?) for over sixty years, you deserve to have a solution!
DeleteWhat a fantastic idea! Thank you for sharing how you made it.
ReplyDeleteThis is so smart! I'm sharing your link in my next newsletter Rochelle!
ReplyDeleteWell, that's a heartwarming comment from someone I think is "so smart" with her craftiness! Thanks, Staci. :-)
Deletei found an old plastic cutting board at thrift store and used that .It has a good weight and is very sturdy
ReplyDeleteFor the size (and shape) that I was looking for, a cutting board wouldn't have worked for me, but terrific for you if that meets your needs.
DeleteI'm actually in the process of making one of these and I'm using the same procedure. I'm using foam core and for my legs: I'm recycling the rectangle shaped butter bowls that I've washed and saved for years. They come in handy for all sorts of things, so I can't bear to throw them away. This will be my best use of them yet. Thanks for the very precise details on your table.
ReplyDeleteYou're so welcome, Brenda, and thank you for letting me know how you've worked out your table. I don't know what these "butter bowls" look like, but I'll take your word that it's the best recycling use for them yet!
DeleteBrilliant idea, so simple and, when you think about it, obvious, I've been looking at extension table for my machine, they want about £65!!! Thank you.
ReplyDeleteYes, I totally agree that in the end, it was an obvious solution. ;-) Oh, and sixty-five quid for an extension table is a bit crazy, but I didn't even have that as an option, given my machine.
DeleteWow wow and more wows!!! This is wonderful, and perfect timing as I am in the process of rearranging my sewing room.
ReplyDeleteAnd using pill bottles, just warms my heart. I am always trying to find ways to recycle them.
Thanks sew much
Wonderful idea. I will definitely try this.
ReplyDeleteHope it works out well for you, and thanks for leaving some feedback.
DeleteHow do you keep the table from moving away from your machine?
ReplyDeleteYes, the not so obvious flaw of a lightweight table... I usually put some hand weights (I have a couple of small 2lb dumbbells that work well) in front of the legs to keep it from shifting forward. If pill bottles are used as legs, you could also put some sand or coins in them to add weight.
DeleteI came looking for a solution to make what you already managed to accomplish.
ReplyDeleteLove how you used your cheap and cheerful solution to such great effect.
I have a sewing machine table I've taken apart. I think I'll use your template for sizing and maybe cut myself some wood to make myself a similar table. I won't use the foam as I know how rough I can be on stuff, and I'd likely break it trying to store it.
Thanks for the visual help. It'll really give me what I need in terms of dimension.
Awesome job!
Well, you are so very welcome and thanks for the kind words! And yes, my version will not stand up to harsh use, so it's good that you've already identified a way to change it up for yourself.
DeleteCouldn't have found this at the right time if I tried! I want to start making jelly roll rugs and was looking for an inexpensive extension table. But the ones that are the size I need are so expensive! And I have a bag full of old prescription bottles I've been looking to use along with the foam core I found hiding in a corner. Although I'm going to get one more board and sandwich them together for a little more stability.
ReplyDeleteThank you for the inspiration!
Yes! You are so very welcome! And the extra stability measures are a good idea. It'll still be inexpensive, but much more sturdy with additional layers. Good luck with your DIY. :-)
Delete