|
|
Feeling quite accomplished by this! |
I no longer have to pine any more.
For now I've made my own,
Using sewing skills as shown,
And it's really made my spirits soar.
Plus, it allowed me to knock off one of my bucket list items unexpectedly early. Very early, in fact.

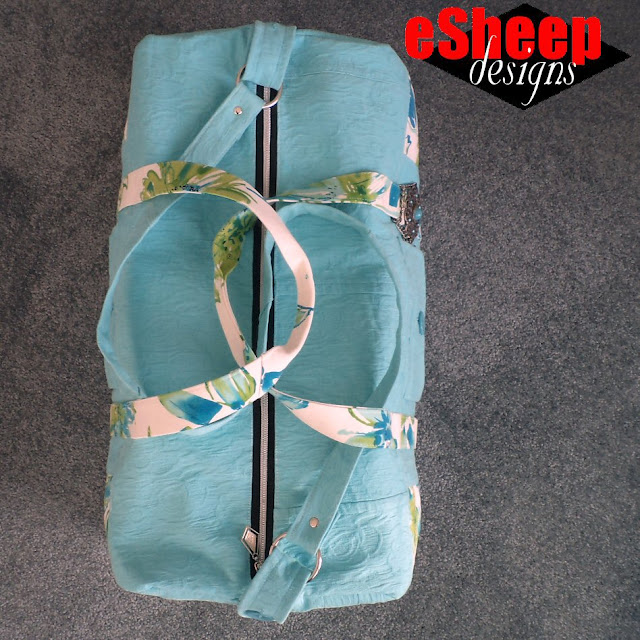
Since last week's post covered the often excruciating "behind the scenes" details, this week will focus more on the photos of the completed project than any excessive verbiage. We'll start with this view from the top. (By the way, the colour is slightly off in several of the pictures; it's alternately too blue or too green.)
Didn't know that I was a poet, did you?
I can't say that the above is one of my better poetic efforts, but it sums
up my feelings quite well. While my old reliable store bought nylon duffle
is still better designed overall, this was a challenge well met and has me
feeling very accomplished for it.
[Important aside: we all need to feel accomplished every now and
then. Find what does it for you and do it regularly.]
Plus, it allowed me to knock off one of my bucket list items unexpectedly early. Very early, in fact.

Since last week's post covered the often excruciating "behind the scenes" details, this week will focus more on the photos of the completed project than any excessive verbiage. We'll start with this view from the top. (By the way, the colour is slightly off in several of the pictures; it's alternately too blue or too green.)

|
| Top view... |
The main zipper is off a roll of zipper tape. The diamond shaped zipper
pull is part of my collection of
zippiest zipper pulls. The two chrome rings on the shoulder strap may have come off an old
chain belt of mine; I don't exactly recall anymore. The strap ends were
secured to the rings with a single rivet.
The two end pocket metal zippers came from my mom's sewing box. I do wish they had been a little bit longer, but given that I didn't want to make a full width zipper pocket, I'm fine with it.

|
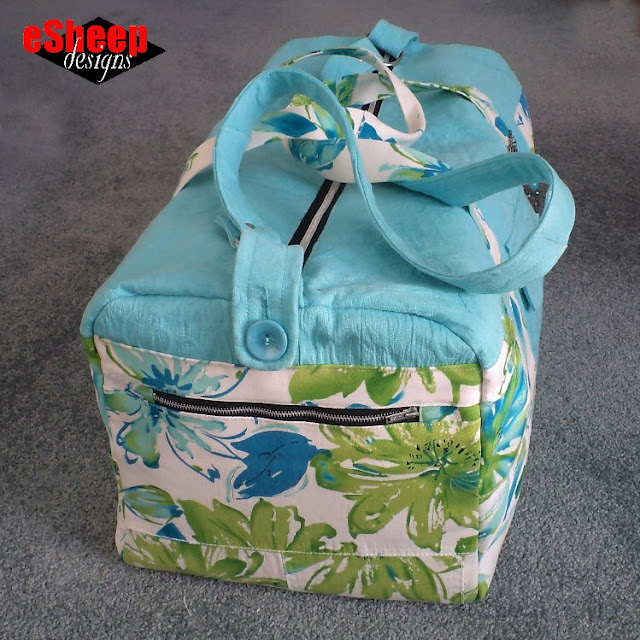
| View of the end... |
The two end pocket metal zippers came from my mom's sewing box. I do wish they had been a little bit longer, but given that I didn't want to make a full width zipper pocket, I'm fine with it.

|
| Three quarter view... |
I mentioned last week that I couldn't avoid some small puckers when
I sewed up the end panels. You can see one of them in the photo
above.
Because of the thick seam that resulted when the top piece of the side panel was added to the bottom part, when it came time to secure the handle straps, I had to "jump over" this seam and leave a gap between the initial stitching and the reinforcing "X".
Watch live classes for FREE at CreativeLive!

[affiliate link]
The resulting gap ended up being a handy place to thread some bag bling.

|
| View of the front... |
Because of the thick seam that resulted when the top piece of the side panel was added to the bottom part, when it came time to secure the handle straps, I had to "jump over" this seam and leave a gap between the initial stitching and the reinforcing "X".

The resulting gap ended up being a handy place to thread some bag bling.

|
| What's a bag without some bling? |
This piece is actually a link that I removed from a chain belt.
(The belt is still a belt; the link was removed for sizing.)
The bottom base panel was created out of the back of the long jacket. To increase its strength, this piece was interfaced with both fusible fleece and Decor Bond.
These are nothing like the large gusseted end pockets of my store bought black and purple duffle, but at least I still have some secure storage at both ends.
For those of you thinking that the shoulder strap is too long,
yes, that was my observation too. (Forgot to account for how
much the strap anchors would add in terms of length.) I ended
up doing some fancy stitching with it a few days after the
photo shoot to shorten it up in the middle, which subsequently
yields a padded section with three layers. The photo at right
shows it in its final form.

|
| View of the base... |
The bottom base panel was created out of the back of the long jacket. To increase its strength, this piece was interfaced with both fusible fleece and Decor Bond.
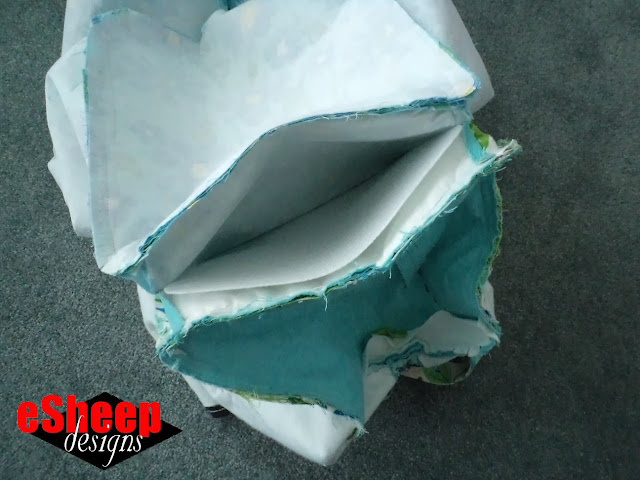
And then just before closing the seams between the lining and
the exterior, I slipped in a piece of Peltex to create
an even sturdier bottom.
As you can see, the lining was also interfaced with
Decor Bond. I figured that since I wasn't shelling out
for the fabric on this project, it was no big deal to do a
deep dive into my stash of interfacing to ensure a durable
duffle. (You can see why, however, I've always been reluctant
to make something of this size. If one were to use new fabric,
the cost of doing so can get prohibitive.)
Speaking of the lining, with amount of (bedsheet) fabric not
being an issue, I added a couple of end pockets to the
interior.

|
| Interior end pocket... |
Admittedly, the pockets do not function all that well when the
bag is not filled to capacity (contents spill out), but I
figure when it is filled and I need some things to be
kept separate, they'll come in handy.

|
| View of one of the end pockets... |
These are nothing like the large gusseted end pockets of my store bought black and purple duffle, but at least I still have some secure storage at both ends.

|
| Despite the little pucker, the fabric matching worked out well... |
By the way, for the fact that I do not recall planning for
this, I was stoked by how well the two fabrics ended up lining
up evenly around the ends of the bag.
Check out crafty classes at Creativebug!

[affiliate link]
So I set out to make a duffle that could meet my needs at least as well as my old standby. Is the proof in the pudding? Well, here is a scale view of the duffle: it certainly ended up meeting my expectations for size. In these photos, there are six bath towels inside the bag.

So I set out to make a duffle that could meet my needs at least as well as my old standby. Is the proof in the pudding? Well, here is a scale view of the duffle: it certainly ended up meeting my expectations for size. In these photos, there are six bath towels inside the bag.

|
| Padded shoulder strap... |
I also know that in the long run, having just the buttons
holding the strap in place will be an issue. I am planning
on adding snap fasteners to relieve some of the stress. In
the meantime, the shoulder strap is just a convenience; I
rarely carry a duffle that way... unless I'm really in a
hurry and trying to haul more than I should. In that vein,
even though they had to be made shorter than I would have
liked (due to fabric constraints), the handles can
actually fit over my shoulder.

|
| Here you can see the button feet on the bottom... |
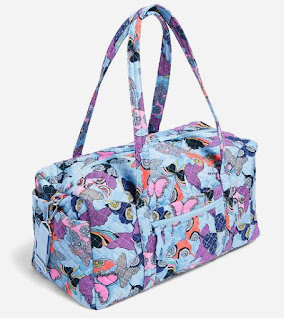
The photo below is a size comparison of the two duffles.
They are essentially the same size once you take into
consideration that the black bag is empty. (That one is,
however, expandable.)
Incidentally, this stands up quite well by itself when
empty. (I didn't want it to be floppy even though it's made
out of fabric and can be squished down if needed.) The
combination of exterior fusible fleece and interior
Decor Bond gives it excellent body. In the photo at
the very top of this post, there is nothing inside of it.

|
| image courtesy of verabradley.ca... |
As you might guess from my opening ode to this
duffle, I'm over the moon pleased with how it turned out.
(Hubby says that I can sell it for big bucks.) The item is
unique in the purest sense. While some folks may lust after
a Vera Bradley branded duffle (e.g., at left),
none of them are like mine. Transformed into something
functional, every time I use it, I'm going to recall the
source garments with much greater fondness than if I had
donated them, or if they were still hanging (unworn) in my
closet.
In fact, I'm now motivated to examine other things hanging
unworn in my closet.
If nothing else, this project is proof that when you decide
to take on a challenge like this — and treat it as a
one of a kind experience that you're never going to have
again
— you'll find the means to have it turn out well.
May you be inspired to try something similar yourself.


Hi Rochelle, Nice job! It’s a gorgeous bag! The contrasting fabrics look awesome together! And my fav part is those button feet on the bottom!
ReplyDeleteMarie
Many thanks, Marie! I'm usually not that good at combining random fabrics but something about these two jackets certainly "spoke" to me to do so. ;-)
DeleteThat is quite a large bag and it looks great! I like the button feet. You will have to report on how well those hold up. I am sure they will be fine, but if you ever hauled around something heavy like bricks and set it down on those buttons, that's what I wonder about, will the buttons break with too much weight? I am sure you won't be hauling bricks or anything that heavy though. It is great you are upcycling fabrics too. I am doing more of that myself. As I continue to sew purses for Sew Powerful, I am using hubby's denim jeans, and I will eventually use stuff in my closet, but since I need to work through fabric first, I will let them remain in the closet. Nicely made duffle and oh no one would have seen those little puckers if you hadn't pointed them out.
ReplyDeleteI love your bag. Well done!
ReplyDeleteThank you for the praise!
DeleteGreat job on all counts, Rochelle. I LOVE your duffle bag!!! The two fabrics are a perfect match - even better that they're pre-loved. Hmmm... I'm feeling inspired. Ha, ha, not to make a duffle bag, but to sew something a little simpler.
ReplyDelete