
|
|
Guess what this is? |
As proof once again that we ultimately can surprise ourselves with our crafting choices, one of the projects that I'm featuring today was not something that I thought I'd make. (It's the one that's shown above in extreme closeup.)
My hubby's motorhome project was ultimately the inspiration for my choices.
There were two spaces between a couple of upper cabinet doors that had been
decorated according to the previous owners' rather eclectic tastes. When those
items were removed, visible outlines remained. Hubby said,
why don't you make something out of burlap to hide that?
I had already planned to make him the bulletin board with the monogram, but
these spaces that we were trying to cover were relatively small; under one
square foot each. So while I stayed with the idea of a pin board, I did not
add any embellishments.

|
| Burlap memo board... |
For the underpinnings, I used some corrugated cardboard and plastic foam
that were rescued out of the packaging of recent purchases that hubby made
for the motorhome.
The first step of this super simple project was to cut both cardboard and
foam to size and glue them together.

|
| Crafting by recycling is the best! |
Then it was a matter of cutting a piece of burlap big enough to overlap on
all sides of the board.

|
| Be generous with the amount of material... |
Using a hot glue gun, secure the burlap, starting at a corner. Fold in and
glue all the tips first, then go back and secure the sides on top of the
corners.
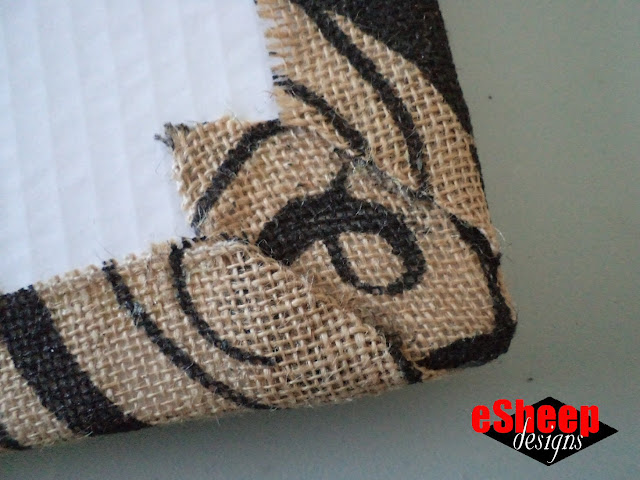
|
| Fold a mitred corner... |
Burlap tends to be stiff and bulky, so I wasn't expecting perfection on
these corners. But they turned out well, at least for my purposes.

|
| Back view of finished memo board... |
The advantage of this type of construction is that the resulting board is
very light weight. Exactly what's needed inside a motorhome. We will secure
it using some double-sided gel tape when the time comes.
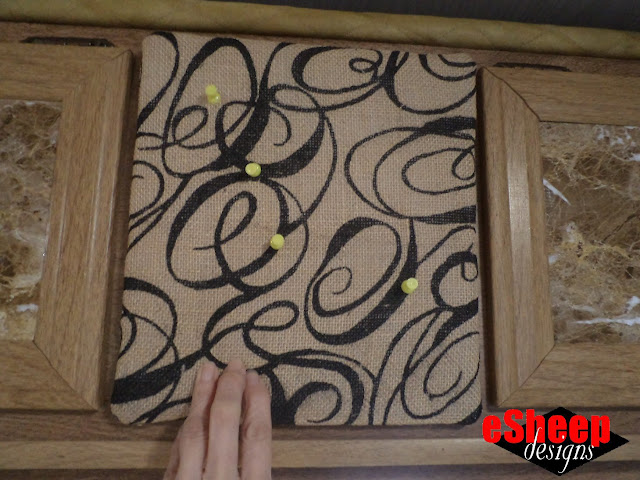
|
| No more rhinestone toucan stickers (that's what was here before)... |
So that's super simple project number one.
Watch live classes for FREE at CreativeLive!

[affiliate link]
For super simple project number two, I started with the same materials: the plastic foam and corrugated cardboard. (Note that in lieu of this plastic foam stuff, you could just use a couple more layers of cardboard.) The actual inspiration for this came out of a running joke between hubby and me about the motorhome. I created a piece of art that would reflect this joke, and wanted to contain it within a burlap frame.

For super simple project number two, I started with the same materials: the plastic foam and corrugated cardboard. (Note that in lieu of this plastic foam stuff, you could just use a couple more layers of cardboard.) The actual inspiration for this came out of a running joke between hubby and me about the motorhome. I created a piece of art that would reflect this joke, and wanted to contain it within a burlap frame.

|
| Draw a frame... |
This time, only the plastic foam would be wrapped in burlap. I cut away the
center, leaving a 1.5" border that would be the frame itself. Then, as with
the previous project, I needed some burlap large enough to overlap the
entire piece.
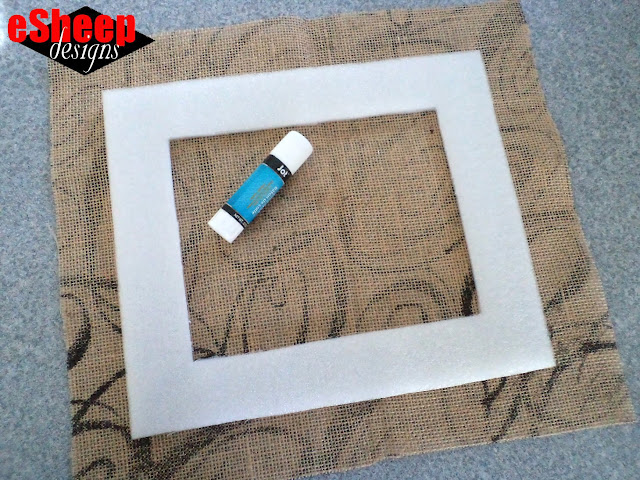
|
| Get the glue stick ready... |
Next, I cut out the center of the burlap, again leaving enough material to
overlap onto the inside edges of the frame; this was accomplished by
snipping diagonally into each corner. My adhesive of choice here was a glue
stick, and it worked fine, as most glues should. (Just be aware that a glue
gun at high heat will melt plastic foam.)

|
| Glue down the inside edges to the frame... |
The insides of the corners are obviously raw edged. I would suggest that
some dabs of Fray Check or some other liquid glue be applied if they
are bothersome.
The outside edge of the frame is finished off by wrapping the burlap around
in the same way as with the first project. Since there were parts here that
are burlap on burlap, I did end up using hot glue to secure those areas.
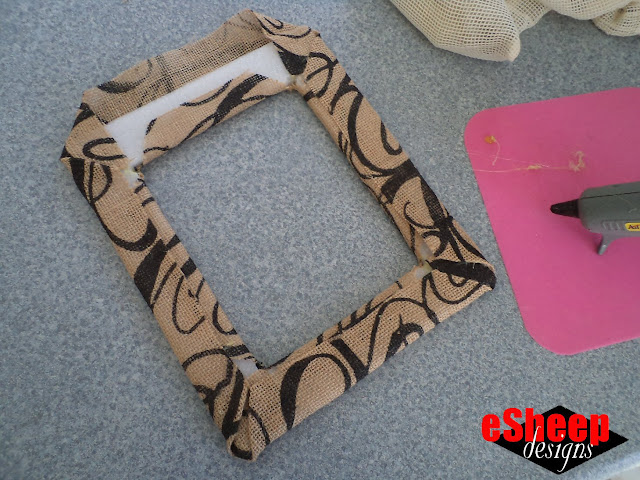
|
| If using a glue gun, don't wait for it to heat up to highest setting... |
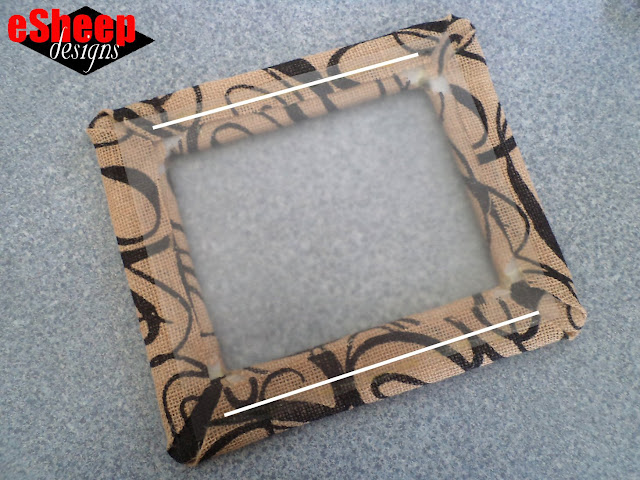
Every frame needs a protective surface for the item being framed, even if
it's just a thin piece of plastic. (As this will be hanging in a moving
vehicle, I'd prefer it to be plastic.) This used to be the cover of a
presentation folder.
|
| Add some plastic to the frame... |
Cut to size and glue to the back of the frame. (Just along the top and
bottom as indicated by the white bars in the photo; of course, if you want
the frame to be oriented portrait style, secure the two shorter sides.) The
last step is to attach the piece of cardboard on top; glue was applied to
the sides and the bottom for that.

|
| Leave the top edge open to receive whatever picture you want framed... |
I then printed up my work of art to the size of the frame's opening and can
now do the "big reveal" to show you what it is.

Throughout this whole motorhome renovation experience, I've made the same comment virtually every time he's showed me one of his improvements: it's just lipstick on a pig. (Which is not to disparage his efforts. It's just that quite often, when new elements are introduced on top of an old foundation, the disparity between them is obvious.)
Anyway, that's the story behind this LoaP sign. I figure it'll be an amusing conversation
starter.

|
| Lipstick on a pig... |
One of the features of a program like
Paint Shop Pro
is the ability to fill spaces with patterns, textures, or even other
images. Here, the letters "o" and "a" are filled with custom stripes
identical to the motorhome's
new (recycled) curtains while the overall background is filled with
a brown pattern called "rope", which resembles the weave of the burlap.
I'm not sure if I ran across a burlap frame in those one hundred plus
projects that I paged through last Christmas Day. If I had seen
one, I would likely have pegged it as being too pedestrian to consider making. For a small
space, however, this turned out to be the perfect project. Also, while the
idea of a frame may seem rather ordinary, this patterned burlap adds a
definite wow factor to the finished item.
I'm just happy that none of this cost me anything extra beyond what I
already had around the house, and I was able to make useful things
out of potential trash. Hurray for recycling once again!




Very innovative! Love it!👌💕
ReplyDeleteThank you very much, my friend!
Delete