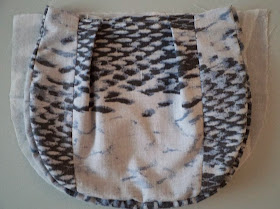
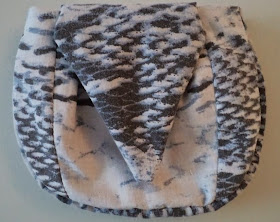
When last I left off, I had completed a muslin prototype that I was satisfied would work well with an actual tie. However, it was just the exterior, so now it's obviously time to turn my attention to the inside of the bag. How do I want to finish this?
Make Some Pockets
With the exterior being as limited as it is — i.e., by the type of fabric (silk or poly that is not easy to sew) and amount of fabric — I don't want to fuss with pockets and zippers and the like. So I'm thinking I may want to put a couple of pockets on the inside, a basic slip pocket to separate out keys or phone and maybe a zippered pocket to keep cash and credit cards safe. And I want to maximize the size of both of these pockets. |
| The largest pocket that can be accommodated by this little bag will be about 4.5" deep... |
As I have shown above with my folded hanky, any pocket will be limited by the exterior size of the bag. Given the outside dimensions, a pocket size of no more than 4.5" high by 5.5" wide should work.
And of course, to make a slip pocket of that size, you would take two pieces of fabric 5" high x 6" wide, sew them right sides together along three edges (with a 1/4" seam allowance), sew along the fourth edge but leave a turning gap in the middle, turn right side out, press and then attach to one of your lining panels.
 |
| ... by about 5.5" wide... |
I highly recommend the Craftsy mini-class, Bag Making Basics: Reversible Tote and Zippered Pouch for a potentially new technique to achieve this.
[Note that I am not going to go into the "how to" of making a zippered pocket. I assume you've all done one of those in the past and most likely have instructions for how to do so from several different patterns.]
Make The Lining
Okay, so what about the lining panels that these pockets will be sewed onto? It's normal practice to structure a bag's lining the same way as the exterior, but for this size of a bag, I think it will be all right to cheat a little. So instead of a lining with a gusset like I've created for the exterior, the lining will just be made from the two panels, using the same original pattern piece as for the exterior. (By the way, this goes without saying, but I'll say it anyway to remind you: the lining — and the pockets, for that matter — for this bag is made from some other coordinating fabric of your choice; it's no longer from the tie.)In the picture below, you can see one of the lining panels placed underneath my muslin prototype.
 |
| If you sew with a larger seam allowance at the top sides, the original pattern piece for the exterior should also work for the lining... |
While the exterior has gained width from the addition of the gusset, it has also been pleated, which takes away more than what the gusset has added. A quick measurement shows that I have about a 7" wide opening at the top of my prototype, after securing the pleats. I don't want pleats in the lining so I will either need to trim some of the top width off the original panels, or sew a larger (say 3/4") seam allowance at the top and then taper off as I go down the sides. I think I will choose the latter, because that doesn't involve the "can't go back" finality of cutting the fabric.
 |
| Taper the side seams of your lining and you should be able to make do with the same pattern piece... |
So here is my lining, after doing just that. Note that I've left a turning gap along the bottom. (Note also that I have not actually attached any pockets to this; if you are using this as a tutorial to make an actual bag, ensure that you attach your pockets before you sew your lining panels together!)
To follow the usual bag making process, leave the lining wrong side out and drop the completed exterior into it, so that both pieces have right sides together. Pin around the top edge, easing to fit.
 |
| Right sides are together as the exterior is pinned to the lining... |
If the lining is too loose, re-stitch one or both of the sides.
Add the Flap and Cord
I like the idea of using a decorative cord for a strap. It fits the size of the bag and needless to say, it would be totally easy to do.So before you stitch along the top of the bag (using a seam allowance anywhere from 1/4" to 1/2"), you need to insert the flap — which is the large end of the tie that you would have sliced off (about 5.5" of it) at the beginning — and whatever you are using for the strap, be it a length of cord, a fabric strap of your own creation, or a couple of strap tabs with hardware to accommodate a different type of strap altogether (like a chain).
I did some "fabric origami" to make a faux flap for testing purposes. It needs to be inserted between the lining and the exterior, centered along one side. With an actual bag, you would have to be mindful of what side you do this on if you've made pockets. (For instance, if I had both a slip pocket and a zippered pocket, I would prefer to have the flap attached on the side with the zippered pocket.)
 |
| Insert the flap (end of the tie) between the lining and the exterior... |
Insert the flap with its right side against the right side of the exterior piece and pin in place. Just to be clear, if the above had been cut from a real tie, you would be looking at the underside of it.
Now, cut your desired length of cord (how long? depends on the user and how she wants to wear it) and pin one of the two ends in the middle of the gusset piece on each side, between the lining and the exterior. The raw ends of the cord should be facing up and the rest of the cord needs to be tucked down into the bag and out of the way. You should probably extend the end of the cord about half an inch beyond the top seam.
You can now sew your top seam together and then pull everything out from the gap left in the lining.
 |
| Lining attached and exterior pulled out... |
[Note that I didn't attach a cord on this prototype.] Push the lining into the exterior; here is the side of the bag with the flap attached (showing the underside).
 |
| Back of the bag with flap open... |
And here is the front of the bag.
 |
| Front of the bag with flap down... |
Closures, Interfacing and Other Stuff
The best closure for this bag is an interesting button with an actual buttonhole. A faux button closure with a magnetic snap may seem more convenient in actual usage, but will require a bit of extra effort in pre-planning to position it properly (as the parts have to be installed before the bag's exterior and flap is attached to the lining) and to ensure that the hardware itself doesn't rip out of the fabric.Which, of course, is where the concept of interfacing comes in. On the one hand, this bag has a pouchy look which comes from the fabric being somewhat flexible. A "silk" tie, on the other hand, is extremely flimsy to work with on its own, so it would have to be interfaced with something to give it strength and to have it hold its shape. I'm almost leaning towards using an interlining to add body and structure without stiffness. We'll see.
Coming in the next installment... I cut into an actual tie! Here's a sneak peek:
 |
| Just to be a tease, I'll only show the back view of my test purse... |
P.S. ATTENTION PATTERN TESTERS! Does this project intrigue you? (It doesn't seem to have intrigued anyone so far, but now that you see an actual finished purse... maybe... hmm??) Along with this design, I have two other body shapes that I am planning to make into an actual pattern/tutorial for sale. If you would be interested in testing for me, please send me a message or leave a comment.

Email sent to you just now Rochelle
ReplyDeleteHugs
Naomi
and replied just now. ;-)
Delete