
|
| A unique zippered pouch at last! |
Which is why, when I saw it, I knew I had to make it. Even though I couldn't identify an immediate need or use for it, it was one of those rare "must do" type of projects.
After all, I was simply brimming with curiosity about it. How were those three distinct pouches joined up? My inquiring mind had to know!
As with many things found on the internet, I have no idea who may have designed the "original" original of this item, but I came across this particular tutorial on the ArtsAndCrafts4You YouTube channel (full link at the end of this post).
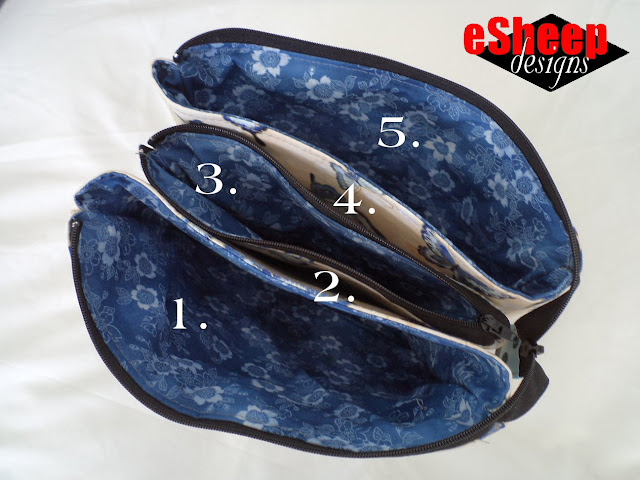
The unique design of this pouch features an integrated unit of three "zippered" pockets (but using only two actual zippers) with two slip pockets between them. You can see the divisions in the following picture.
|
| Here are the five pockets... |
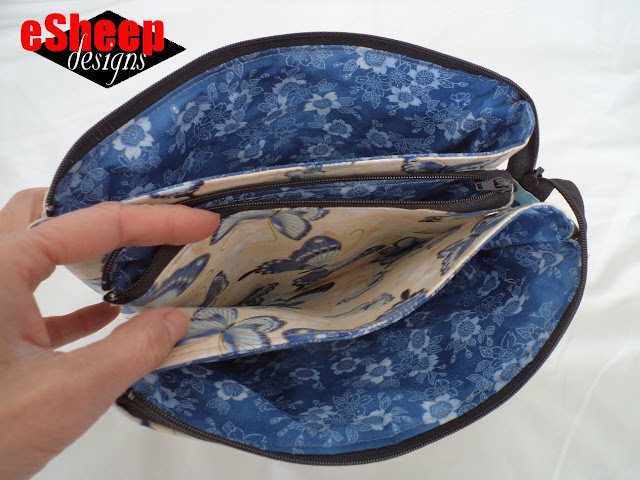
You can do away with the two slip pockets created by joining the two larger pouches to the smaller middle pouch by sewing an additional line of stitching, but why would you? (More pockets are better, yes??)
|
| View of one of the slip pockets... |
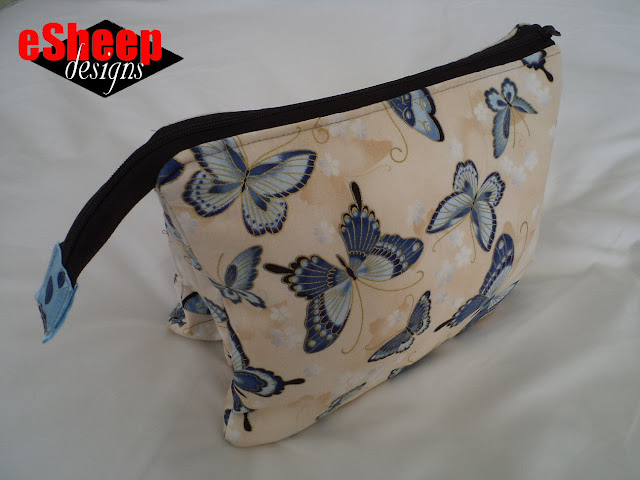
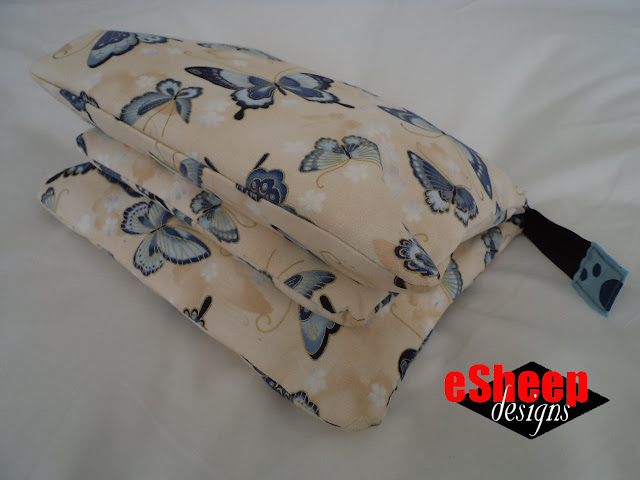
My finished pouch measures 9" wide by 7.5" high, and it can hold a lot. In the picture below, my eReader is in the middle pocket and there is actually a pair of leggings in each of the two outside pockets!
|
| You can fit a LOT into this pouch... |
Despite not having a planned use for this when I decided to make it, I can now imagine all sorts of possibilities for this bag. It would be tremendous for organizing makeup (for those who have large collections of makeup), to protect small tablets or eReaders, to use as an on-the-go sewing project bag, or to keep lingerie or swimwear discreetly in your luggage.
|
| Bottom view of the filled pouch... |
It would also make a great purse organizer for a single compartment purse.
Additionally, I can see how — with a little bit of pre-planning — a couple of strap tabs with D rings can be added to each side to accommodate a strap that could turn this into a crossbody bag.
Despite taking my usual (long) time doing the cutting and prepping, I managed to sew this up in an afternoon. This was, however, only accomplished after I ran through the video a couple of times a few days previous, jotting down a set of instructions the second time around.
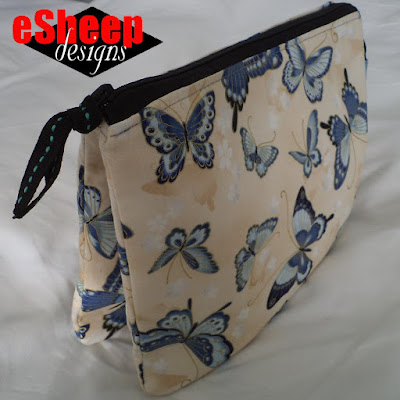
|
| As finishing touches, a remnant of skinny ribbon is attached to the zipper pull... |
This is not a project that you can just take a quick look at and jump right in, unless you've done something remarkably similar. As a couple of people say in the comments section of the video, it really isn't a beginner project.
However, if most every variant of the basic lined zippered pouch has exhausted your interest — as it has mine — then this is the project for you!

I'm not going to go into the process of how to make this, since the video does a fine job. I will, however, clarify some things and make some recommendations based on what I did.
Cutting Fabric
To me, it's always worthwhile to cut some paper templates. You'll need two; the larger one is 10" wide x 8" high (24.5cm x 20cm), and the smaller one is 8.5" wide x 6.5" high (22cm x 16.5cm).
Fold each template in half vertically and use a cup to round off one of the corners. This will result in the shape that you need with curved corners on one long (bottom) edge. Using the large template, I folded my fabric twice, which allowed me to cut all four of the large pieces at once.
Afterwards, I crimped the edge of those same paper templates to make them about 3/8" (1cm) smaller all the way around and used them to cut the required interfacing.
Interfacing
You'll end up with twelve pieces of fabric in total. In my case, using only two different fabrics (one for the lining and one for the exterior), that means 4 large exterior pieces, 4 large lining pieces, 2 small exterior pieces and 2 small lining pieces.
In the video, all of the fabric is interfaced with Pellon SF101. I went with what I had and interfaced the two main outside pieces (i.e., 2 of the large pieces) with fusible fleece and the remainder of the exterior pieces with Decor Bond (2 large and 2 small). The fusible fleece gives the exterior of the bag a bit of padding and an overall nice feel.
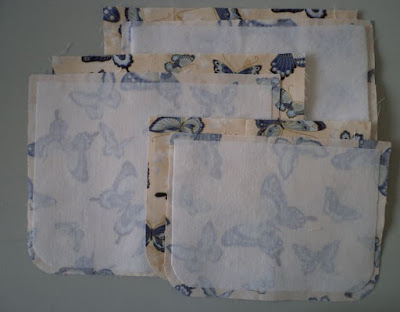
|
| All of the external fabric pieces were interfaced; the lining pieces were left alone.... |
I left all of the lining fabric as is. If you use a quality quilting cotton (like my Robert Kaufman selections; Oriental Traditions #14212 and #14209), the lack of interfacing on the lining will not be an issue.
Zipper Installation
Arguably, the most difficult thing about making any lined zippered pouch is getting the four pieces of fabrics on both sides of the zipper tape lined up evenly. The way it's shown in the video with the zipper being left open during this process did not appeal to me.
I think we all have our favourite methods of installing zippers, so my advice is to use whatever technique you're most comfortable with. The result that you're aiming for is exactly the same as with virtually any other lined, zippered pouch.
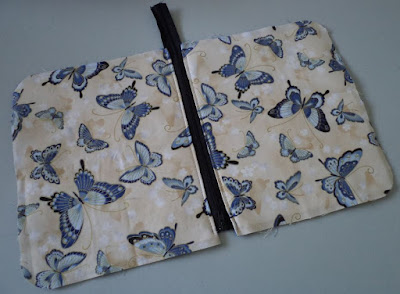
|
| Exterior and lining fabrics attached to both sides of a zipper... no mystery here! |
One very important note: the larger zipper assembly being completed here is the one that is eventually the outside of the entire pouch; i.e., choose the exterior pieces that are interfaced with the fusible fleece if you decide to follow my recommendations regarding interfacing.
Topstitching
If I recall correctly, the tutorial instructs you to topstitch along the zipper edge at the end of the project. I think that would be a bit tricky, so I did my topstitching right after I installed the zippers.
The next instruction is to make "the other side" of the two large outside pockets by sewing together the remaining large exterior pieces to their corresponding lining pieces. There was no mention of seam allowance, but I used 1/4" (6mm). I also topstitched along the edge of these panels.
Attaching Middle Pocket Assembly to Large Pocket Inside Exterior Panels
All I can say is that it makes sense when you see this being done and it becomes crystal clear when you actually have it in your own hands.
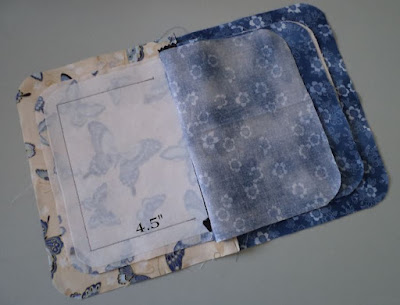
|
| The length of my sewing line up the side was 4.5" or about 11.5cm... |
The video instructions are actually quite clear in terms of what to do here (i.e., the placement at 3/4 of an inch from the edge all the way around and then the drawing of the lines 1" in from the edge of the fabric). The only part that seemed unclear was establishing how long the sewing line should be up the two sides. A 4.5" length worked out well for me in terms of pocket depth.
Sewing & Turning
The rest of the project consists of a series of three executions of a process that is basic to standard zippered pouch construction:
- Put exterior fabric right sides together on one side of the zipper and the lining fabric right sides together on the other side of the zipper.
- ENSURE THAT THE ZIPPER IS OPEN and then sew all the way around, leaving a turning gap along the bottom edge of the lining.
- Turn right side out and close the gap.
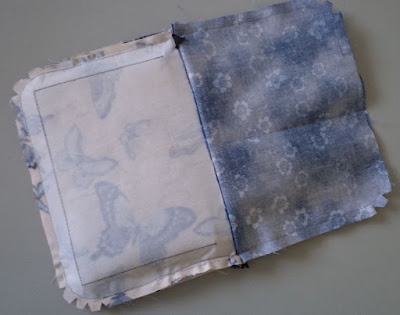
|
| The process is the same... apart from all the "extra stuff" between the layers! |
An important consideration when dealing with the unusual bulk that you'll encounter here... pin judiciously and carefully, ensuring that nothing of the interior gets caught in your sewing, but DO NOT use pins to secure any of that inside stuff. Because at some point, you have to reach in there to pull it all right side out and you don't want to be stabbed by pins!
The instruction in the video during these final steps is to use a 1/4" seam allowance, but due to the thickness in some areas and the "iffiness" of going around the curved corners, I went with 3/8" just to be safe.
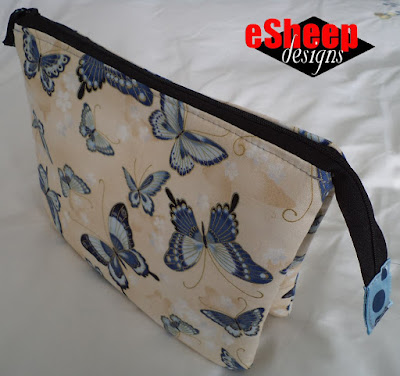
|
| And a short length of 1" wide ribbon makes a quick and easy zipper tab... |
A final tip on the process of learning via video... BE PATIENT AND WATCH THE WHOLE THING! Then watch it again. Like I tell people about using PDF patterns, read it and then read it again. Don't skim and risk asking stupid questions. And yes, I will be politically incorrect and say that yes, there is such a thing as a stupid question.
I couldn't believe the comments from people asking questions about things that were in the video. (One comment was actually a slam disguised as constructive criticism. I've said it before and I'll say it again: some people should just keep their opinions to themselves.)
A lady named Gina — based in Brampton, Ontario — is behind ArtsAndCrafts4You. I would like to thank her for her time in making this particular tutorial; if you'd like to try it out, you can find it here.
UPDATE: I want to add another credit for this design that pre-dates the above video tutorial. I found out that this pouch is part of a recent book (mid 2017) called Stitched Sewing Organizers by Aneela Hoey. The book is on hold for me at the library and I will definitely be back with a review once I get my hands on it!
Finally, if watching a zippered pouch tutorial is not your thing for this weekend, maybe you'll find something over at Craftsy more to your liking. They are offering unlimited access to their entire library this weekend for FREE with no obligation.
We should be in the midst of a minor snowstorm by the time this post goes live. In between shovelling, I might do the Craftsy thing myself.
Enjoy!


What a nifty bag, would be so handy for travel and keeping small items organized! That youtube channel has a lot of good things - thanks for sharing, Rochelle!
ReplyDeleteWhat a fun bag! It's awesome!
ReplyDeleteI'm here from the SewCanShe linkup. What a cool pouch... definitely a “must do”! Thanks for sharing and for all your tips! I plan to make one soon!
ReplyDeleteDon't know how I missed this. An interesting design and so practical with all the pockets. Love it!
ReplyDeleteOooo this looks SO useful. Thanks for all the links and advice. It's on my to do list now!
ReplyDeleteThis is great - am listening to the tutorial now - and so useful. I hate carrying a purse, preferring a backpack. That can be awkward sometimes. I will made this as either a crossbody or hip (waist) bag.
ReplyDeleteI moved recently and haven't set up my sewing area ... getting antsy!!
A crossbody conversion is an idea that I've been considering since I made the original pouch. If I were to do it, I would also want to change the totally rectangular shape of it a bit too... and maybe add an exterior zippered pocket.
DeleteGood luck on setting up your space and happy sewing!
Very interesting. How can I follow you?
ReplyDeleteHi Peg - if you come back to see this reply, all you need to do is go to the sidebar on the left and scroll until you see "SUBSCRIBE TO THIS BLOG". Enter your email there and you will receive a confirmation email about having all future posts delivered to you. Alternatively, you can go to your own Blogger profile and add this blog to your reading list.
DeleteThanks for stopping by!
I am looking forward to sew this pouch but wondering what are the recommended length for zippers?
ReplyDeleteI am fairly certain she mentions the zipper requirements in her video. (I wouldn't want to guess since it's been so long since I made this.)
DeleteI cannot find the video. The bag is really cute.
ReplyDeleteThe link — which I just confirmed still works — is in the fourth/fifth last paragraph from the bottom. (The one that starts off with "A lady named Gina...")
Delete